Craving a decadent dessert? Try these easy homemade swirled chocolate cupcakes with a creamy filling made from rich chocolate and smooth cream, perfect for a family favorite treat, save for later
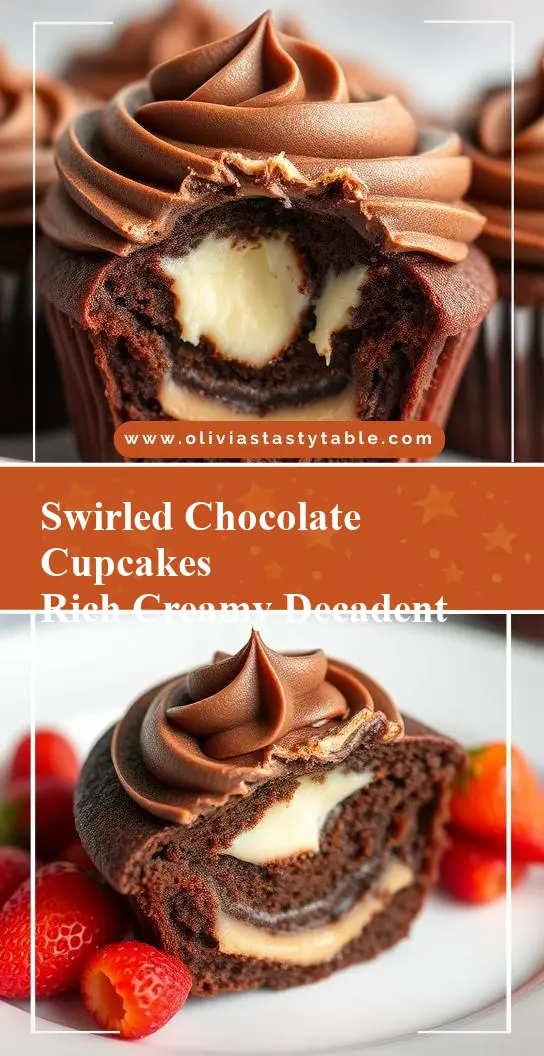
Swirled Chocolate Cupcakes with Creamy Filling — Rich & Decadent Treat
Introduction
Indulge in the rich flavors of swirled chocolate cupcakes, elevated by a creamy filling that will satisfy any sweet tooth. These decadent treats are not only a delight to the taste buds but also surprisingly easy to make, using everyday ingredients that can be found in most kitchens. The best part? They offer a canvas for creativity, allowing you to experiment with different flavors and toppings to make each batch uniquely yours. Whether you’re a seasoned baker or just starting out, these swirled chocolate cupcakes with creamy filling are sure to impress friends and family alike, making them perfect for special occasions or as a simple treat to brighten up any day.
Why This Works
- Flavor balance and ingredient accessibility: The combination of dark and milk chocolate provides a deep, well-rounded flavor that’s balanced by the sweetness of the creamy filling. All the ingredients are easily accessible in most grocery stores, making this recipe highly approachable.
- Ease of preparation: Despite their impressive appearance, these cupcakes are relatively simple to prepare. The batter comes together quickly, and the filling requires just a few ingredients mixed to the right consistency.
- Impressive results with minimal effort: The swirled design on top of the cupcakes adds a professional touch without requiring advanced decorating skills. The creamy filling adds an extra layer of sophistication, making these cupcakes perfect for parties or as gifts.
Key Ingredients
The main ingredients for these swirled chocolate cupcakes include all-purpose flour, granulated sugar, unsweetened cocoa powder, milk, eggs, and butter for the cupcakes, and heavy cream, powdered sugar, and vanilla extract for the creamy filling. For the chocolate swirl, you’ll need both dark and milk chocolate. Practical substitutions can be made for some ingredients, such as using almond milk instead of regular milk for a dairy-free version or substituting some of the granulated sugar with honey for a slightly different flavor profile. However, keep in mind that such substitutions might slightly alter the texture and taste of the final product.
Instructions
- Step 1: Begin by preheating your oven to 350°F (175°C). Line a 12-cup muffin tin with cupcake liners. In a medium bowl, whisk together flour, sugar, cocoa powder, and a pinch of salt. In a large bowl, whisk together milk, eggs, and melted butter. Add the dry ingredients to the wet ingredients and mix until just combined, being careful not to overmix.
- Step 2: Divide the batter evenly among the muffin cups. For the chocolate swirl, melt the dark and milk chocolate in separate bowls in the microwave in 30-second increments, stirring between each interval until smooth. Drop a spoonful of each melted chocolate into each cupcake batter, then use a toothpick or knife to create a swirled design.
- Step 3: Bake the cupcakes for about 18-20 minutes or until a toothpick inserted into the center comes out clean. Allow the cupcakes to cool completely in the pan. For the creamy filling, whip heavy cream until it begins to thicken, then add powdered sugar and vanilla extract, continuing to whip until stiff peaks form.
- Step 4: Once the cupcakes are cool, use a cupcake corer or a small knife to remove the centers. Fill each cupcake with the creamy filling and top with additional chocolate shavings or chopped nuts if desired.
Handy Tips
- Ensure your ingredients, especially the eggs and butter, are at room temperature for a better texture. Don’t overmix the batter, as this can lead to dense cupcakes. If you find your cupcakes are too dense, try adding an extra egg white to the recipe next time.
Heat Control
For baking the cupcakes, precise heat control is crucial. Your oven should be preheated to 350°F (175°C). It’s also important to not overbake; check the cupcakes after 15 minutes and adjust the baking time as needed. They are done when a toothpick inserted into the center of a cupcake comes out clean or with a few moist crumbs attached.
Crunch Factor
The texture of these cupcakes should be moist and tender, with a smooth creamy filling. The swirled chocolate on top can add a slight crunch if it’s allowed to set properly. To achieve the right texture, don’t overbake the cupcakes, and make sure the filling is whipped to the right consistency—not too runny, not too stiff.
Pro Kitchen Tricks
- For a more intense chocolate flavor, use high-quality cocoa powder and chocolate. If you’re having trouble getting the chocolate to swirl nicely, try warming the chocolate slightly by placing the bowls over a pot of simmering water for a few seconds.
Storage Tips
- These cupcakes are best stored in an airtight container in the refrigerator for up to 3 days. Allow them to come to room temperature before serving for the best flavor and texture. If you plan to store them for a longer period, consider freezing them without the creamy filling, which can be added fresh when you’re ready to serve.
Gift Packaging Ideas
These cupcakes make wonderful gifts, especially for chocolate lovers. Consider packaging them in decorative cupcake boxes or bags, topped with a ribbon and a gift tag. For a more personalized touch, you could also add a handwritten note or a small bag of gourmet coffee or tea to complement the chocolate flavor.
Flavor Variations
- 🌟 Different spices: Adding a pinch of cinnamon, nutmeg, or cayenne pepper to the batter can give the cupcakes a unique twist. For a minty flavor, peppermint extract can be added to the creamy filling.
- 🌟 Creative toppings: Experiment with different toppings such as chopped nuts, shaved chocolate, caramel sauce, or even candy pieces to add texture and visual appeal.
- 🌟 Ingredient swaps: Substitute the heavy cream with a non-dairy whipped cream for a vegan version, or use different types of milk and chocolate to change the flavor profile.
Troubleshooting
- Texture problems: If your cupcakes turn out too dense, it might be due to overmixing the batter. Try to mix the ingredients just until they come together. If the filling is too runny, refrigerate it for about 10 minutes to firm it up before using.
- Ingredient replacements: Always consider the flavor and texture you’re trying to achieve when substituting ingredients. For example, replacing granulated sugar with honey will not only change the sweetness level but also add a distinct flavor.
- Over/undercooking signs: Keep an eye on your cupcakes while they’re baking. If they’re undercooked, they will be soggy and possibly sink in the center! If overcooked, they’ll be dry. A toothpick test is your best friend here.
FAQs
- Can I freeze it? Yes, you can freeze the cupcakes without the filling for up to 2 months. Simply thaw at room temperature or refrigerate overnight when you’re ready to serve, then fill and decorate as desired.
- Is it gluten-free? The recipe as described contains gluten due to the all-purpose flour. However, you can substitute the flour with a gluten-free flour mix to make it gluten-free, though you might need to adjust the ratio of flours and add some xanthan gum to help with texture.
- Can I double the recipe? Absolutely! Just keep in mind that you’ll need to adjust the baking time slightly if you’re making a larger batch. Also, ensure you have enough muffin tins, as doubling the recipe will yield 24 cupcakes.
Conclusion
Making swirled chocolate cupcakes with creamy filling is a fun and rewarding baking project that’s sure to delight both kids and adults. With a few simple ingredients and some basic kitchen tools, you can create these stunning and delicious treats. Don’t be afraid to experiment with different flavors and toppings to make the recipe your own, and enjoy the process of sharing your creations with friends and family. Happy baking!