What’s your favorite Halloween treat? Make these easy and quick spooky witch hat cupcakes with homemade chocolate frosting for a family favorite dessert, perfect for weeknight dinner parties, save for later
Spooky Witch Hat Cupcakes for Halloween Fun!
Introduction
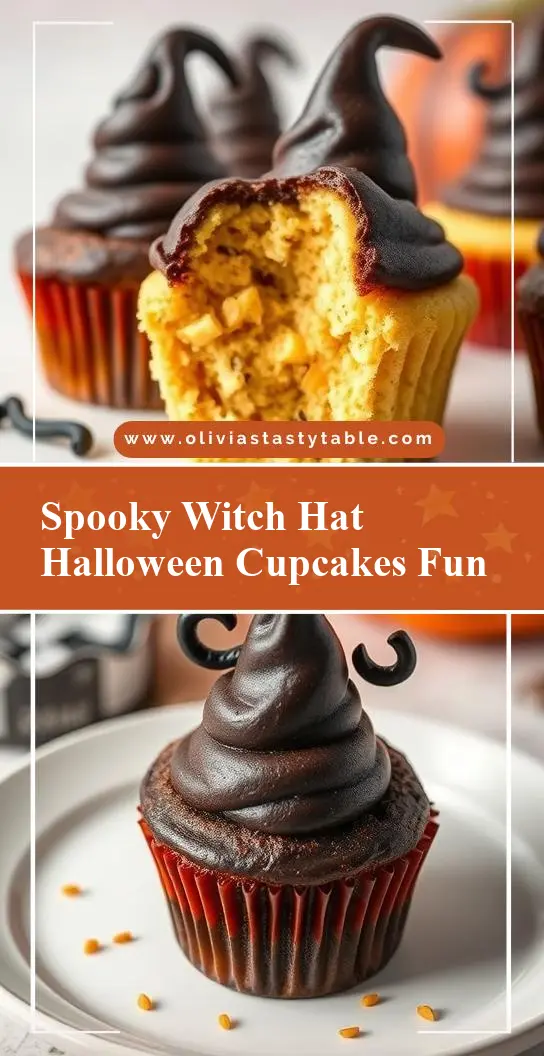
Get ready to cast a spell of delight with these Spooky Witch Hat Cupcakes, perfect for Halloween celebrations. These adorable treats are not only easy to make but also packed with flavor, using everyday ingredients that you might already have in your pantry. The best part? They’re incredibly versatile, allowing you to express your creativity through decorations and toppings. Whether you’re a seasoned baker or a beginner, these cupcakes are sure to impress both kids and adults alike, making them a fantastic addition to your Halloween party or a fun activity to enjoy with the family.
Why This Works
- Flavor balance and ingredient accessibility: The combination of moist chocolate cake, creamy frosting, and the clever use of edible decorations to create the witch hat effect ensures a delightful taste experience. Plus, the ingredients are easily found in most supermarkets, making this recipe accessible to everyone.
- Ease of preparation: The steps to prepare these cupcakes are straightforward, and the decorating process, although it may seem intricate, is surprisingly simple and enjoyable. This makes the recipe perfect for those looking for a fun, hassle-free baking experience.
- Impressive results with minimal effort: Despite the simplicity of the recipe, the end result is incredibly impressive. The witch hat design is a showstopper, and with a few clever tricks, you can achieve professional-looking results without needing extensive baking experience.
Key Ingredients
To make these enchanting Spooky Witch Hat Cupcakes, you’ll need a few key ingredients. For the cupcakes themselves, you’ll require all-purpose flour, granulated sugar, unsweetened cocoa powder, baking powder, salt, milk, eggs, and vegetable oil. For the frosting, you’ll need butter, cream cheese, powdered sugar, and vanilla extract. To create the witch hat effect, you’ll need black frosting or gel icing for the hat and band, and orange or yellow frosting for the buckle. You can also use edible markers or small candies for additional details. Practical substitutions can be made for some ingredients, such as using almond milk instead of regular milk for those with dairy intolerance, or substituting the cream cheese with mascarpone for a lighter frosting.
Instructions
- Step 1: Begin by preheating your oven to 350°F (175°C). Prepare your muffin tin with cupcake liners. In a medium bowl, whisk together flour, sugar, cocoa powder, baking powder, and salt. In a large bowl, whisk together milk, eggs, and vegetable oil. Add the dry ingredients to the wet ingredients and mix until just combined, being careful not to overmix.
- Step 2: Divide the batter evenly among the cupcake liners. Bake for about 18-20 minutes or until a toothpick inserted in the center comes out clean. Allow the cupcakes to cool completely in the pan before frosting.
- Step 3: To make the frosting, beat the butter and cream cheese until smooth. Gradually add the powdered sugar, beating until smooth and creamy. Add the vanilla extract and mix well. If the frosting is too thick, you can add a little milk to thin it out.
- Step 4: Frost the cooled cupcakes. To create the witch hat, use black frosting or gel icing to draw a triangle on top of the cupcake, and then add a band around the base of the triangle. Use orange or yellow frosting to create a buckle. You can also add details with edible markers or small candies.
Handy Tips
- When making the frosting, ensure your butter and cream cheese are at room temperature for the smoothest results. Also, don’t overmix the batter, as this can lead to dense cupcakes. For the witch hat design, it’s helpful to have a picture reference, and don’t worry if it’s not perfect – the charm of homemade goodies is in their uniqueness.
Heat Control
For baking the cupcakes, it’s crucial to maintain the oven at 350°F (175°C) for the best results. The cupcakes are done when a toothpick inserted into the center of a cupcake comes out clean. If you’re unsure, it’s better to err on the side of underbaking than overbaking, as the cupcakes will continue to cook a bit after they’re removed from the oven.
Crunch Factor
The cupcakes should be moist and tender, not crunchy. The crunch factor comes into play if you choose to add any crunchy toppings, like small candies or nuts, to your witch hat design. Achieving the right texture is about not overmixing the batter and not overbaking the cupcakes.
Pro Kitchen Tricks
- To ensure your cupcakes bake evenly, rotate the muffin tin halfway through the baking time. For a professional finish, chill your frosted cupcakes in the refrigerator for about 10 minutes before decorating to set the frosting. This makes the decorating process much easier and prevents the frosting from smudging.
Storage Tips
- Unfrosted cupcakes can be stored in an airtight container at room temperature for up to 3 days or frozen for up to 2 months. Frosted cupcakes are best stored in the refrigerator for up to 3 days. If you plan to freeze them, it’s best to freeze them unfrosted and then frost once thawed. For reheating, simply leave the cupcakes at room temperature for a few hours or warm them gently in the microwave.
Gift Packaging Ideas
These Spooky Witch Hat Cupcakes make fantastic gifts for friends, family, or coworkers, especially around Halloween. Consider packaging them in decorative cupcake boxes or bags with a clear plastic window to show off your creations. You can also add a personal touch with ribbons, gift tags, or small Halloween-themed decorations like plastic spiders or bats.
Flavor Variations
- 🌟 Different spices: Add a pinch of cinnamon or nutmeg to the batter for a unique twist.
- 🌟 Creative toppings: Use different colored frostings or add toppings like sprinkles, chopped nuts, or shredded coconut to give your witch hats a personalized look.
- 🌟 Ingredient swaps: Replace the vegetable oil with coconut oil for a different flavor, or use gluten-free flour to make the cupcakes accessible to those with gluten intolerance.
Troubleshooting
- Texture problems: If your cupcakes turn out too dense, it might be due to overmixing the batter. If they’re too dry, they might have been overbaked.
- Ingredient replacements: Always try to substitute ingredients with something similar in texture and flavor. For example, if you’re out of unsweetened cocoa powder, you can use a bit more melted chocolate as a substitute.
- Over/undercooking signs: Keep an eye on your cupcakes while they’re baking. They’re done when a toothpick comes out clean. If the toothpick is covered in wet batter, they need more time. If it comes out with a few moist crumbs, they’re perfectly baked.
FAQs
- Can I freeze it? Yes, you can freeze both the cupcakes and the frosting. It’s best to freeze them separately and then assemble when you’re ready.
- Is it gluten-free? The original recipe includes gluten due to the all-purpose flour. However, you can easily make it gluten-free by substituting the flour with a gluten-free alternative.
- Can I double the recipe? Absolutely! Just keep in mind that you’ll need to adjust the baking time slightly if you’re making a larger batch of cupcakes.
Conclusion
With these Spooky Witch Hat Cupcakes, you’re not just baking a treat; you’re creating a memorable experience, especially for kids. The process is fun, the results are adorable, and the flavor is divine. Don’t be afraid to experiment with different flavors and decorations to make the recipe your own. Whether you’re a seasoned baker or just starting out, these cupcakes are sure to cast a spell of delight on anyone who tries them. So, go ahead, get baking, and make this Halloween one to remember!