Looking for a show-stopping dessert? Try these easy and quick chocolate cake decoration ideas using rich homemade chocolate and simple techniques, perfect for a family favorite weeknight dinner, Save for later
Chocolate Cake Decoration Ideas: Simple & Elegant Recipes for Everyone
Introduction
Indulge in the rich flavors and velvety textures of chocolate cakes, elevated to new heights with simple yet elegant decoration ideas. This article is designed to guide you through the process of creating stunning chocolate cakes using everyday ingredients, perfect for any occasion. Whether you’re a seasoned baker or a beginner, the ease and creativity of these recipes will inspire you to experiment with new flavors and designs. From classic combinations to innovative twists, we’ll explore the world of chocolate cake decoration, making it accessible and enjoyable for everyone.
Why This Works
- Flavor balance and ingredient accessibility ensure that each cake is not only delicious but also easy to make, using ingredients readily available in most kitchens.
- Ease of preparation is key, with steps and techniques that simplify the baking and decorating process, making it less intimidating for those new to cake decorating.
- Impressive results with minimal effort are achievable through the clever use of simple decorating techniques and quality ingredients, allowing you to create professional-looking cakes at home.
Key Ingredients
The foundation of a great chocolate cake lies in its ingredients. For the cake itself, you’ll need high-quality dark or semi-sweet chocolate, all-purpose flour, granulated sugar, eggs, and butter or oil. For decorations, the possibilities are vast, ranging from chocolate ganache and whipped cream to fresh fruits and nuts. Practical substitutions can enhance or alter the flavor and texture, such as using almond flour for a gluten-free option or coconut sugar for a slightly different taste. The versatility of these ingredients allows for endless creativity in both the cake and its decorations.
Instructions
- Step 1: Begin by preheating your oven to 350°F (175°C). Prepare your cake pans by greasing them and lining the bottoms with parchment paper. Measure out your ingredients, including flour, sugar, cocoa powder, and eggs, to ensure a smooth and efficient baking process.
- Step 2: In a large mixing bowl, combine your dry ingredients (flour, sugar, cocoa powder, and a pinch of salt) and mix well. In a separate bowl, whisk together your wet ingredients (eggs, milk, and melted butter or oil), then gradually add the wet ingredients to the dry ingredients, mixing until just combined. Pour the batter into your prepared pans and bake for approximately 25-30 minutes, or until a toothpick inserted into the center comes out clean.
- Step 3: Once your cakes are baked and cooled, you can start the decoration process. This can involve making a chocolate ganache by heating heavy cream and pouring it over chopped chocolate, then whipping it to a smooth, creamy consistency. Alternatively, you can use whipped cream, buttercream frosting, or other creative toppings to add flavor and texture to your cake.
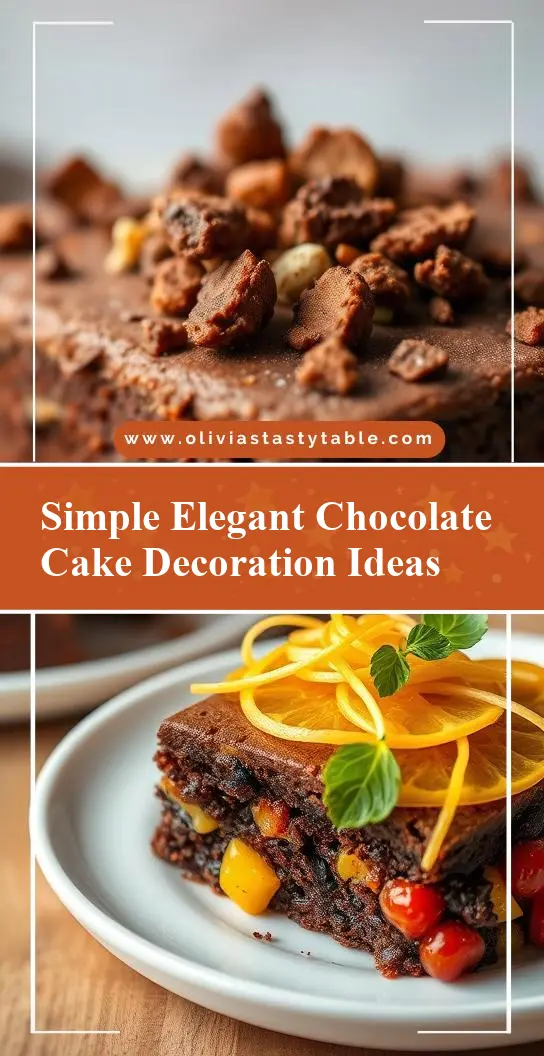
- Step 4: For the final touches, consider adding fresh fruits, nuts, or chocolate shavings to your cake. These elements not only add visual appeal but also introduce new flavors and textures, enhancing the overall experience of your chocolate cake. Plating and serving can be just as creative, with options ranging from simple dustings of powdered sugar to elaborate designs and patterns.
Handy Tips
- Always use room temperature ingredients for better mixing and aeration in your cake batter. This simple step can significantly improve the texture and consistency of your final product.
- Don’t overmix your batter, as this can lead to a dense cake. Instead, mix your ingredients just until they come together in a smooth, cohesive mixture.
- For decorations, practice makes perfect. Don’t be discouraged if your first attempts at decorating don’t turn out as expected. Keep experimenting with different techniques and designs until you find what works best for you.
Heat Control
When baking your cake, maintaining the right temperature is crucial. Ensure your oven is at a consistent 350°F (175°C) throughout the baking process. The baking time will depend on the size of your cakes, but a general rule of thumb is to bake for 25-30 minutes for standard round cakes. Signs of doneness include a toothpick inserted into the center of the cake coming out clean, and the cake feeling springy to the touch.
Crunch Factor
The texture of your cake and its decorations can greatly enhance the overall experience. For a moist and tender cake, avoid overbaking. If you’re adding nuts or cookie crumbs as decorations, these will provide a satisfying crunch. Achieving the right balance of textures—be it the smoothness of ganache, the fluffiness of whipped cream, or the crunch of nuts—can elevate your cake from good to great.
Pro Kitchen Tricks
- Use a turntable to display and decorate your cake, allowing for easy access to all sides and a professional-looking finish.
- Invest in a set of high-quality pastry bags and tips for intricate designs and patterns. Practice using these tools to achieve smooth, consistent lines and shapes.
- For a glossy finish on your chocolate ganache, heat it gently until it reaches a temperature of around 82°F to 90°F (28°C to 32°C), then let it cool and set before using.
Storage Tips
- Store your decorated cake in an airtight container at room temperature for up to 3 days. If you’ve used whipped cream or other perishable toppings, it’s best to refrigerate the cake and let it come to room temperature before serving.
- When reheating, avoid using the microwave, as this can cause the cake to dry out or become unevenly heated. Instead, let the cake come to room temperature naturally, or warm it gently in a low-temperature oven (around 200°F or 90°C) for a few minutes.
Gift Packaging Ideas
If you’re giving your chocolate cake as a gift, consider packaging it in a beautiful cake box or a decorative tin. Wrap the cake in plastic wrap or aluminum foil to protect it, then place it in your chosen container. Add a personal touch with a ribbon or a handmade card, and don’t forget to include a note with storage and serving instructions to ensure your gift is enjoyed at its best.
Flavor Variations
- 🌟 Experiment with different types of chocolate, such as white, milk, or dark, to create unique flavor profiles. Each type of chocolate will impart its own distinct taste and character to your cake.
- 🌟 Add creative toppings like caramel sauce, chopped nuts, or dried fruits to introduce new textures and flavors. These elements can complement the chocolate beautifully, creating a well-rounded and interesting taste experience.
- 🌟 Consider ingredient swaps, such as using coconut oil instead of butter or substituting almond milk for regular milk, to cater to dietary restrictions or preferences. These swaps can also offer interesting flavor twists and nutritional benefits.
Troubleshooting
- Texture problems, such as a dense or dry cake, can often be traced back to overmixing the batter or overbaking the cake. To avoid these issues, mix your ingredients just until they come together, and keep a close eye on your cake while it’s baking.
- Ingredient replacements can sometimes affect the final texture or flavor of your cake. When substituting ingredients, do so thoughtfully, considering how each change might impact the overall outcome.
- Over/undercooking signs include a cake that’s too dark or too light, or one that feels soft or hard to the touch. Adjust your baking time and temperature as needed to achieve the perfect doneness for your cake.
FAQs
- Can I freeze it? Yes, you can freeze your cake layers before decorating. This is a great way to prepare ahead of time or to store cakes for longer periods.
- Is it gluten-free? Depending on the ingredients used, your cake can be gluten-free. Substitute all-purpose flour with a gluten-free flour blend to accommodate dietary restrictions.
- Can I double the recipe? Yes, you can easily double or triple the recipe to make more cakes. Just ensure you have enough pans and adjust the baking time slightly, as larger batches may take a bit longer to cook through.
Conclusion
Embarking on the journey of creating your own chocolate cake decoration masterpieces is a rewarding and delicious adventure. With these simple and elegant recipes, you’re equipped to explore the world of chocolate cakes, from the basics of baking to the art of decoration. Remember, the key to success lies in the balance of flavors, the quality of your ingredients, and the joy you bring to the process. Whether you’re baking for yourself, your family, or as a gift for someone special, the love and effort you put into your cake will shine through in every bite. So, don’t be afraid to experiment, to try new things, and to make these recipes your own. Happy baking, and let the chocolate cake decoration journey begin!