Craving a decadent dessert that’s easy to make and a family favorite? This homemade red velvet cake features buttermilk and cocoa powder for a rich flavor. Save for later and indulge in a quick treat anytime.
Red Velvet Cake
Introduction
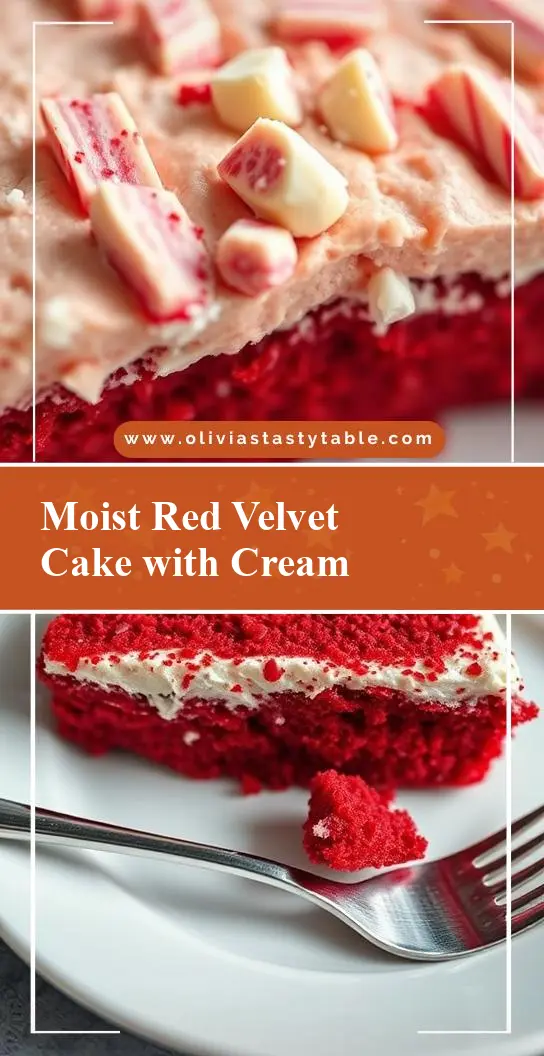
Imagine a cake that is as visually stunning as it is delicious, made with everyday ingredients that come together in perfect harmony. The Red Velvet Cake is a masterpiece of culinary art, with its deep red color, moist texture, and subtle cocoa flavor, all wrapped up in a package that’s both elegant and easy to make. Whether you’re a seasoned baker or a beginner in the kitchen, this recipe is sure to impress your friends and family with its rich, velvety goodness. And the best part? It’s made with ingredients you likely have on hand, making it a creative and accessible treat for any occasion.
Why This Works
- Flavor balance and ingredient accessibility: The combination of cocoa powder, buttermilk, and food coloring creates a unique and delicious flavor profile that’s both familiar and exciting. Plus, the ingredients are easy to find in most supermarkets, making it a convenient choice for bakers of all levels.
- Ease of preparation: Despite its impressive appearance, the Red Velvet Cake is surprisingly easy to make. The batter comes together quickly, and the cake itself requires minimal decoration, making it a great choice for busy bakers or those short on time.
- Impressive results with minimal effort: The Red Velvet Cake is a showstopper, with its deep red color and creamy frosting making it a perfect centerpiece for any special occasion. And yet, it requires surprisingly little effort to achieve such impressive results, making it a great choice for bakers who want to wow their friends and family without spending hours in the kitchen.
Key Ingredients
The Red Velvet Cake relies on a few key ingredients to achieve its distinctive flavor and texture. These include: all-purpose flour, granulated sugar, unsweetened cocoa powder, buttermilk, large eggs, red food coloring, and cream cheese frosting. For those looking for substitutions, you can replace the buttermilk with a mixture of milk and vinegar or lemon juice, and the cream cheese frosting with a whipped cream or buttercream frosting. However, keep in mind that these substitutions may affect the flavor and texture of the final product.
Instructions
- Step 1: Preheat your oven to 350°F (180°C) and prepare two 9-inch (23cm) round cake pans. Grease the pans and line the bottoms with parchment paper to ensure the cakes release easily.
- Step 2: In a medium bowl, whisk together the flour, sugar, cocoa powder, and salt. In a large bowl, whisk together the buttermilk, eggs, and red food coloring. Add the dry ingredients to the wet ingredients and mix until just combined, being careful not to overmix.
- Step 3: Divide the batter evenly between the prepared pans and smooth the tops. Bake for 30-35 minutes, or until a toothpick inserted into the center of each cake comes out clean. Allow the cakes to cool in the pans for 10 minutes before transferring them to a wire rack to cool completely.
- Step 4: Once the cakes are completely cool, you can frost and decorate them as desired. To make the cream cheese frosting, beat the cream cheese and butter until smooth, then add the powdered sugar and vanilla extract. Adjust the frosting to your desired consistency and flavor, then use it to sandwich the two cakes together and frost the outside of the cake.
Handy Tips
- Make sure to use high-quality cocoa powder for the best flavor. Dutch-processed cocoa powder will give you a deeper, richer flavor than natural cocoa powder.
- Don’t overmix the batter, as this can result in a dense, tough cake. Stop mixing as soon as the ingredients are combined, and avoid over-beating the frosting as well.
- If you’re having trouble getting the cakes to release from the pans, try running a knife around the edges of the cakes before inverting them onto a wire rack.
Heat Control
To ensure that your cakes are cooked to perfection, keep an eye on the temperature and timing. The ideal temperature for baking the Red Velvet Cake is 350°F (180°C), and the cakes should be baked for 30-35 minutes, or until a toothpick inserted into the center of each cake comes out clean. If you’re unsure whether the cakes are done, try checking them at 25 minutes and then every 5 minutes thereafter until they’re cooked to your liking.
Crunch Factor
The Red Velvet Cake is known for its moist, velvety texture, but it can also have a delicate crunch on the outside if it’s baked to perfection. To achieve this crunch, make sure to not overmix the batter, and avoid overbaking the cakes. If you want to add an extra crunch to your cake, you can try topping it with chopped nuts or sprinkles before serving.
Pro Kitchen Tricks
- Use a kitchen scale to measure your ingredients for the most accurate results. This is especially important when making a cake, as the ratio of ingredients can affect the final texture and flavor.
- Make sure to level your oven to ensure that your cakes are baked evenly. This can be especially important if you’re baking multiple cakes at once, as an uneven oven can result in some cakes being overcooked while others are undercooked.
- Use a high-quality cream cheese for the best flavor in your frosting. Softened cream cheese will be easier to mix and will result in a smoother, more even frosting.
Storage Tips
- The Red Velvet Cake can be stored at room temperature for up to 3 days, or wrapped tightly and frozen for up to 2 months. If you’re freezing the cake, make sure to thaw it overnight in the refrigerator before serving.
- To keep the cake fresh for as long as possible, make sure to store it in an airtight container. You can also wrap the cake tightly in plastic wrap or aluminum foil to prevent it from drying out.
- If you’re serving the cake at a party or special occasion, consider making it a day or two ahead of time to allow the flavors to meld together. This will result in a more complex, developed flavor that’s sure to impress your guests.
Gift Packaging Ideas
The Red Velvet Cake is a beautiful and delicious gift for any occasion, and it can be packaged in a variety of ways to make it even more special. Consider wrapping the cake in a decorative cake box or tin, or topping it with a sprinkle of powdered sugar and a few fresh flowers. You could also package the cake in a gift basket filled with other sweet treats, such as cupcakes, cookies, or candy.
Flavor Variations
- 🌟 Different spices: Try adding a pinch of cinnamon, nutmeg, or cardamom to the batter for a unique and interesting flavor.
- 🌟 Creative toppings: Top the cake with chopped nuts, sprinkles, or shredded coconut for a fun and playful look. You could also try using different types of frosting, such as whipped cream or buttercream, for a different flavor and texture.
- 🌟 Ingredient swaps: Replace the buttermilk with almond milk or soy milk for a non-dairy version of the cake, or use gluten-free flour to make the cake accessible to those with gluten intolerance.
Troubleshooting
portunistic problems and solutions
- Texture problems: If your cake is too dense or dry, it may be due to overmixing the batter or overbaking the cakes. Try adjusting the ratio of ingredients or the baking time to achieve a better texture.
- Ingredient replacements: If you’re missing an ingredient or want to try a substitution, make sure to adjust the recipe accordingly. For example, if you’re using gluten-free flour, you may need to add xanthan gum to help the cake hold together.
- Over/undercooking signs: Keep an eye on the cakes while they’re baking, and check them frequently to avoid overcooking. If the cakes are undercooked, they may sink in the center or have a soggy texture. If they’re overcooked, they may be dry or crumbly.
FAQs
- Can I freeze it? Yes, the Red Velvet Cake can be frozen for up to 2 months. Simply wrap the cake tightly in plastic wrap or aluminum foil and store it in the freezer. When you’re ready to serve, thaw the cake overnight in the refrigerator and frost as desired.
- Is it gluten-free? No, the traditional Red Velvet Cake recipe includes gluten-containing ingredients like all-purpose flour. However, you can make a gluten-free version of the cake by substituting the flour with a gluten-free alternative and adding xanthan gum to help the cake hold together.
- Can I double the recipe? Yes, you can double the recipe to make a larger cake. Simply multiply all the ingredients by two and adjust the baking time accordingly. Keep in mind that a larger cake may take longer to bake, so make sure to check it frequently to avoid overcooking.
Conclusion
The Red Velvet Cake is a classic recipe that’s sure to impress your friends and family with its rich, velvety texture and deep red color. With its easy-to-follow instructions and accessible ingredients, this cake is perfect for bakers of all levels. Whether you’re a seasoned pro or a beginner in the kitchen, you’ll love the way this cake turns out – and your guests will love it even more. So go ahead, give the Red Velvet Cake a try, and get ready to wow your friends and family with your culinary skills. Happy baking!