Are you ready for a decadent dessert? These dreamy purple velvet cupcakes are a homemade family favorite, made easy with simple ingredients like butter and vanilla, perfect for a quick weeknight treat, save for later
Dreamy Purple Velvet Cupcakes
Introduction
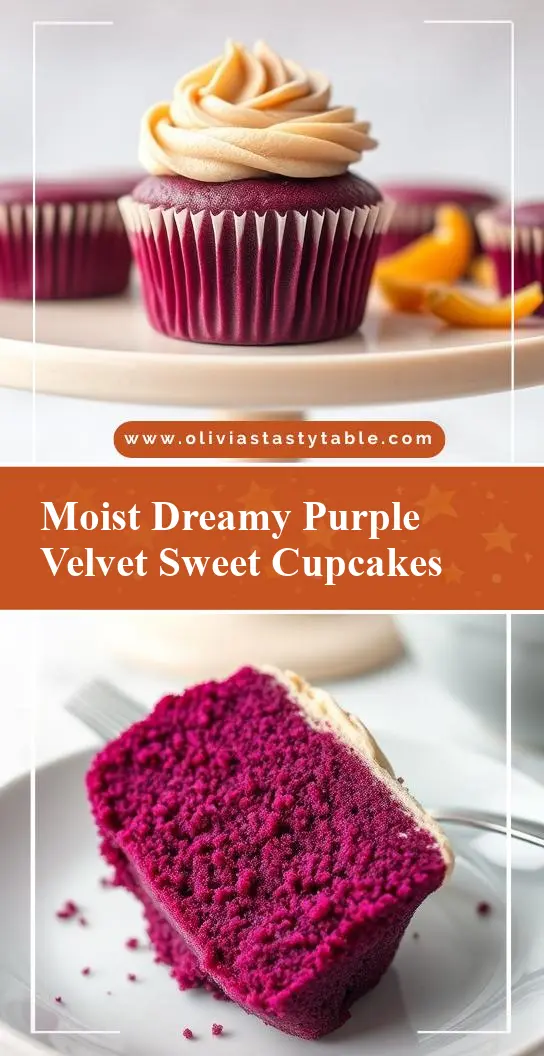
Imagine indulging in a moist, flavorful, and visually stunning dessert that combines the richness of chocolate with the subtle sweetness of vanilla, all wrapped up in a beautiful purple hue. The Dreamy Purple Velvet Cupcakes are not just a treat for the taste buds but also a feast for the eyes, making them perfect for special occasions or everyday indulgence. What’s more, they’re surprisingly easy to make using everyday ingredients, allowing your creativity to shine without breaking the bank or spending hours in the kitchen.
Why This Works
- Flavor balance and ingredient accessibility: The combination of cocoa powder, buttermilk, and a hint of vanilla creates a deep, velvety flavor profile that’s both decadent and approachable. Plus, all the ingredients are easily found in most grocery stores.
- Ease of preparation: Despite their impressive appearance, these cupcakes are relatively simple to prepare. The batter comes together quickly, and the frosting, while creamy and rich, requires minimal effort to whip up.
- Impressive results with minimal effort: The end result is a batch of cupcakes that look like they came from a professional bakery, complete with a vibrant purple color and a swirl of creamy frosting. Perfect for impressing friends and family without spending all day in the kitchen.
Key Ingredients
The magic of these cupcakes lies in their ingredients. You’ll need all-purpose flour, granulated sugar, unsweetened cocoa powder, baking powder, salt, large eggs, buttermilk, vegetable oil, pure vanilla extract, and food coloring (purple). For the frosting, you’ll use cream cheese, unsalted butter, powdered sugar, and a bit more vanilla extract. Practical substitutions include using almond milk or coconut milk if you don’t have buttermilk, and olive oil or coconut oil as alternatives to vegetable oil.
Instructions
- Step 1: Begin by preheating your oven to 350°F (175°C). Line a muffin tin with cupcake liners. In a medium bowl, whisk together flour, sugar, cocoa powder, baking powder, and salt. In a large bowl, whisk together eggs, buttermilk, oil, and vanilla extract. Add the dry ingredients to the wet ingredients and mix until just combined, being careful not to overmix. Add a few drops of purple food coloring to tint the batter.
- Step 2: Divide the batter evenly among the muffin cups. Bake for about 18-20 minutes, or until a toothpick inserted into the center of a cupcake comes out clean. Let the cupcakes cool completely in the pan.
- Step 3: To make the frosting, beat the cream cheese and butter until smooth. Gradually add the powdered sugar, beating until smooth and creamy. Add vanilla extract and mix well. Once the cupcakes are cool, frost each one with a generous amount of frosting.
- Step 4: For the final touches, you can decorate the cupcakes with additional frosting, sprinkles, or edible flowers to match your occasion or personal style. This is where you can let your creativity shine and make the cupcakes truly unique.
Handy Tips
- Make sure to not overmix the batter, as this can lead to dense cupcakes. Stop mixing as soon as the ingredients are combined.
- For an intense purple color, use a high-quality food coloring. Start with a few drops and add more as needed to achieve the desired shade.
- If you find your frosting too thin, refrigerate it for about 10 minutes to firm it up before frosting the cupcakes.
Heat Control
When baking the cupcakes, it’s crucial to maintain the right temperature and baking time. Ensure your oven is at 350°F (175°C) and bake for 18-20 minutes. Check for doneness by inserting a toothpick into the center of a cupcake; it should come out clean. If you’re unsure, it’s always better to err on the side of underbaking slightly, as the cupcakes will continue to cook a bit after being removed from the oven.
Crunch Factor
These cupcakes are designed to be moist and tender, with a smooth frosting. If you’re looking to add a crunch factor, consider topping the frosted cupcakes with chopped nuts, sprinkles, or even crushed cookies for added texture and visual appeal.
Pro Kitchen Tricks
- Use room temperature ingredients for the best results. This ensures that the batter mixes smoothly and evenly, leading to a better texture in the finished cupcakes.
- Don’t overbake. Cupcakes continue to cook a bit after they’re removed from the oven, so taking them out when they’re just done will help keep them moist and tender.
- For a professional finish, pipe the frosting onto the cupcakes using a piping bag and tip. This adds a beautiful, swirly design that elevates the cupcakes to a whole new level.
Storage Tips
- Store the cupcakes in an airtight container at room temperature for up to 3 days. If you won’t be serving them within this timeframe, consider freezing them. Cupcakes can be frozen for up to 2 months. Simply thaw at room temperature when you’re ready to serve.
- For the frosting, you can make it ahead of time and store it in the refrigerator for up to a week. Bring it to room temperature before using.
- When freezing, it’s best to freeze the cupcakes without frosting. Frost them after thawing for the best results.
Gift Packaging Ideas
These cupcakes make wonderful gifts, especially for birthdays, holidays, or just because. Consider packaging them in decorative cupcake boxes or bags, topped with a ribbon and a gift tag. For a more rustic look, use kraft paper bags and twine. You can also add a personal touch by including a handwritten note or card with the gift.
Flavor Variations
- 🌟 Different spices: Add a pinch of cinnamon, nutmeg, or cardamom to the batter for a unique twist on the traditional flavor.
- 🌟 Creative toppings: Experiment with different toppings such as chopped nuts, dried fruits, or even candy pieces to add texture and flavor.
- 🌟 Ingredient swaps: Replace the buttermilk with almond milk or coconut milk for a dairy-free version, or use gluten-free flour for a gluten-free option.
Troubleshooting
- Texture problems: If your cupcakes turn out too dense, it might be due to overmixing the batter. Try mixing the ingredients just until they come together for a lighter texture.
- Ingredient replacements: If you don’t have buttermilk, you can make a substitute by mixing 1 cup of milk with 1 tablespoon of white vinegar or lemon juice. Let it sit for 5-10 minutes before using.
- Over/undercooking signs: Keep an eye on your cupcakes while they’re baking. If they’re done, a toothpick inserted into the center should come out clean. If not, give them a few more minutes and check again.
FAQs
- Can I freeze it? Yes, you can freeze the cupcakes for up to 2 months. It’s best to freeze them without frosting and then frost after thawing.
- Is it gluten-free? The original recipe includes gluten due to the all-purpose flour. However, you can make a gluten-free version by substituting the flour with a gluten-free alternative.
- Can I double the recipe? Absolutely! Simply double all the ingredients and proceed with the instructions. Keep in mind that you might need to adjust the baking time slightly if you’re making a larger batch.
Conclusion
Making the Dreamy Purple Velvet Cupcakes is a fun and rewarding experience that combines creativity with delicious flavors. Whether you’re a seasoned baker or just starting out, these cupcakes are sure to impress. Feel free to experiment with different flavors and decorations to make them your own, and don’t hesitate to reach out if you have any questions or need further guidance. Happy baking, and enjoy every delightful bite of your Dreamy Purple Velvet Cupcakes!