Can you resist a homemade treat like peanut butter and jelly pop tarts? Made with simple ingredients and easy to bake, this quick family favorite is perfect for a weeknight dinner dessert – Save for later
Irresistible Peanut Butter and Jelly Pop Tarts
Introduction
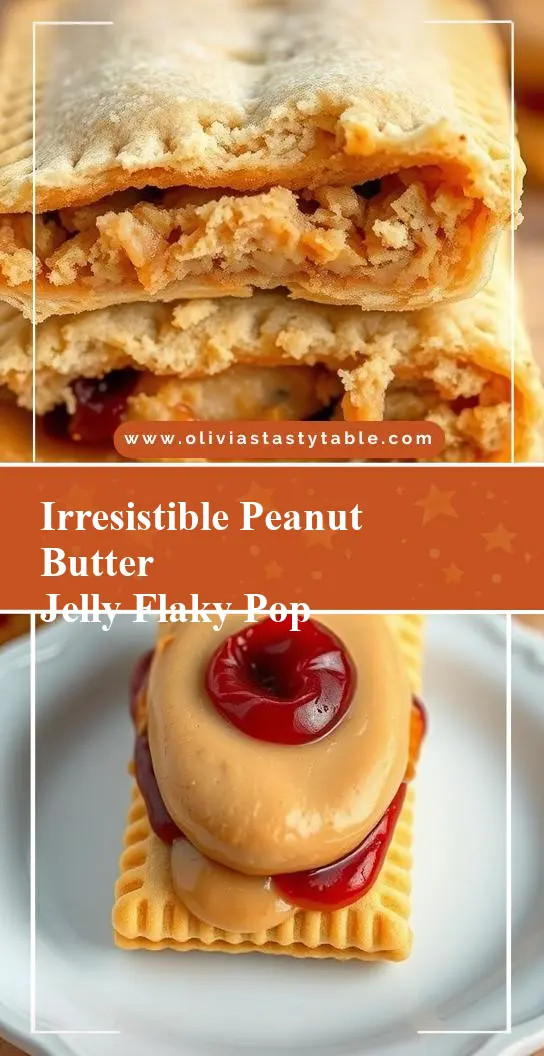
Imagine a delicious treat that combines the classic flavors of peanut butter and jelly with the flaky, buttery goodness of a homemade pastry. Introducing the Irresistible Peanut Butter and Jelly Pop Tarts, a creative twist on the traditional Pop-Tarts that are incredibly easy to make and fun to customize. Using everyday ingredients, you can create these mouthwatering pastries that are sure to impress both kids and adults alike. The best part? They require minimal effort and can be ready in just under 30 minutes, making them the perfect snack or breakfast on-the-go.
Why This Works
- Flavor balance and ingredient accessibility: The combination of peanut butter and jelly is a timeless favorite, and using common ingredients like flour, butter, and jam ensures that everyone can enjoy these treats without having to search for exotic components.
- Ease of preparation: The simplicity of this recipe lies in its straightforward instructions, requiring no advanced baking skills. Just mix, roll, fill, and bake – it’s that straightforward.
- Impressive results with minimal effort: Despite the simplicity, the end result looks and tastes like it came from a professional bakery, making it perfect for surprising your family or impressing your friends.
Key Ingredients
The main ingredients for these Irresistible Peanut Butter and Jelly Pop Tarts include all-purpose flour, cold butter, peanut butter, jelly or jam of your choice, and a pinch of salt. For practical substitutions, you can use almond butter or any other nut butter in place of peanut butter, and experiment with different flavors of jam to find your favorite combination. Additionally, if you’re looking for a gluten-free option, consider substituting the all-purpose flour with a gluten-free flour blend.
Instructions
- Step 1: Begin by preheating your oven to 375°F (190°C). In a large mixing bowl, combine 2 cups of all-purpose flour and a pinch of salt. Gradually add in 1/2 cup of cold butter, using a pastry blender or your fingers to work the butter into the flour until the mixture resembles coarse crumbs.
- Step 2: Slowly pour in cold water, mixing with a fork until the dough comes together in a ball. Wrap the dough in plastic wrap and refrigerate for at least 5 minutes to allow it to rest.
- Step 3: On a lightly floured surface, roll out the chilled dough to a thickness of about 1/8 inch. Using a rectangle cookie cutter or a knife, cut out rectangles of dough that are approximately 4 inches by 6 inches. Spoon a small amount of peanut butter onto one half of each rectangle, leaving a 1/2 inch border around the edges. Top the peanut butter with a dollop of jelly or jam.
- Step 4: Fold the other half of the dough rectangle over the filling, pressing the edges to seal. Use a fork to crimp the edges and create a decorative border. Place the pop tarts on a baking sheet lined with parchment paper, leaving about 1 inch of space between each tart. Brush the tops with a little bit of milk or beaten egg for a golden glaze. Bake for 20-25 minutes, or until the pastry is golden brown.
Handy Tips
- Make sure to keep your butter cold, as this will help the pastry to be flaky and prevent it from becoming too tough or dense.
- Don’t overfill the pop tarts, as the filling can spill out during baking. Just a small amount of peanut butter and jelly is enough to give each tart plenty of flavor.
- Experiment with different shapes and sizes of cookie cutters to create fun and unique pop tarts. Heart-shaped pop tarts, for example, would be perfect for Valentine’s Day.
Heat Control
When baking the pop tarts, it’s crucial to maintain the right temperature to ensure that the pastry cooks evenly and doesn’t burn. Keep your oven at 375°F (190°C) and check on the pop tarts after 15 minutes. If they’re not yet golden brown, continue to bake in 5-minute increments until they’re perfectly cooked. Signs of doneness include a golden brown color and a firm texture to the touch.
Crunch Factor
The crunch factor in these pop tarts comes from the flaky pastry exterior giving way to a soft and chewy interior. To achieve this, make sure not to overwork the dough, and keep the butter cold. This will help the pastry to retain its layers and bake up with a beautiful texture. Additionally, avoid overbaking, as this can cause the pastry to become too crispy or hard.
Pro Kitchen Tricks
- For an extra flaky pastry, try laminating the dough. This involves rolling and folding the dough multiple times to create layers of butter and dough, similar to making puff pastry.
- To make cleanup easier, line your baking sheet with parchment paper before placing the pop tarts on it. This will prevent the pastry from sticking and make it easier to remove the tarts once they’re baked.
- Consider using a pastry brush to apply the egg wash or milk glaze to the tops of the pop tarts. This will give them a smooth, even finish and help the glaze to adhere evenly.
Storage Tips
- Leftover pop tarts can be stored in an airtight container at room temperature for up to 2 days. For longer storage, consider freezing the baked pop tarts and reheating them in the microwave or oven when you’re ready to serve.
- To reheat, simply place the frozen pop tart in the microwave for 10-15 seconds, or until it’s warmed through. Alternatively, you can bake frozen pop tarts in a preheated oven at 350°F (180°C) for 5-7 minutes, or until they’re crispy and golden brown.
- The best containers for storing pop tarts are airtight containers or zip-top bags. These will help to keep the pop tarts fresh and prevent them from becoming stale or soggy.
Gift Packaging Ideas
If you’re looking to give these Irresistible Peanut Butter and Jelly Pop Tarts as a gift, consider packaging them in a decorative tin or jar. You can wrap each pop tart individually in plastic wrap or wax paper and place them in the tin, or create a beautiful gift basket filled with other homemade treats like cookies, candies, or jams. Add a ribbon or gift tag with a personal message, and you have a thoughtful and delicious gift that’s sure to be appreciated.
Flavor Variations
- 🌟 Different spices: Try adding a pinch of cinnamon or nutmeg to the dough for an extra boost of flavor. You can also experiment with different types of jam or jelly, like strawberry or apricot, for a unique twist.
- 🌟 Creative toppings: Consider adding some creative toppings to your pop tarts, like chopped nuts, shredded coconut, or even candy pieces. These will add texture and visual interest to the finished pastries.
- 🌟 Ingredient swaps: If you’re looking for a gluten-free option, try substituting the all-purpose flour with a gluten-free flour blend. You can also use almond butter or cashew butter in place of peanut butter for a different flavor profile.
Troubleshooting
- Texture problems: If your pop tarts turn out too dense or tough, it may be because the dough was overworked. Try to mix the ingredients just until they come together, and avoid rolling the dough out too thinly.
- Ingredient replacements: If you don’t have peanut butter, you can substitute it with another nut butter like almond butter or cashew butter. Just be aware that the flavor may be slightly different.
- Over/undercooking signs: If your pop tarts are undercooked, they may be pale and soft to the touch. If they’re overcooked, they may be dark brown or even burnt. Keep an eye on them while they’re baking, and adjust the cooking time as needed.
FAQs
- Can I freeze it? Yes, you can freeze the baked pop tarts for up to 2 months. Simply place them in a freezer-safe bag or container and store in the freezer. When you’re ready to serve, simply thaw at room temperature or reheat in the microwave or oven.
- Is it gluten-free? Not unless you use a gluten-free flour blend in place of the all-purpose flour. However, this is a great option for those with gluten intolerance or sensitivity.
- Can I double the recipe? Yes, you can easily double or even triple the recipe if you need to make a larger batch. Just be aware that you may need to adjust the baking time slightly, depending on the size of your pop tarts.
Conclusion
In conclusion, these Irresistible Peanut Butter and Jelly Pop Tarts are a delicious and easy-to-make treat that’s perfect for any occasion. With their flaky pastry exterior and soft, chewy interior, they’re sure to be a hit with both kids and adults alike. So why not give them a try? With these simple instructions and helpful tips, you’ll be enjoying your own homemade pop tarts in no time. Don’t be afraid to experiment with different flavors and ingredients, and have fun sharing your creations with friends and family. Happy baking!