What makes the perfect cookie? Try these easy homemade coconut flour cookies made with simple ingredients for a quick family favorite treat, save for later
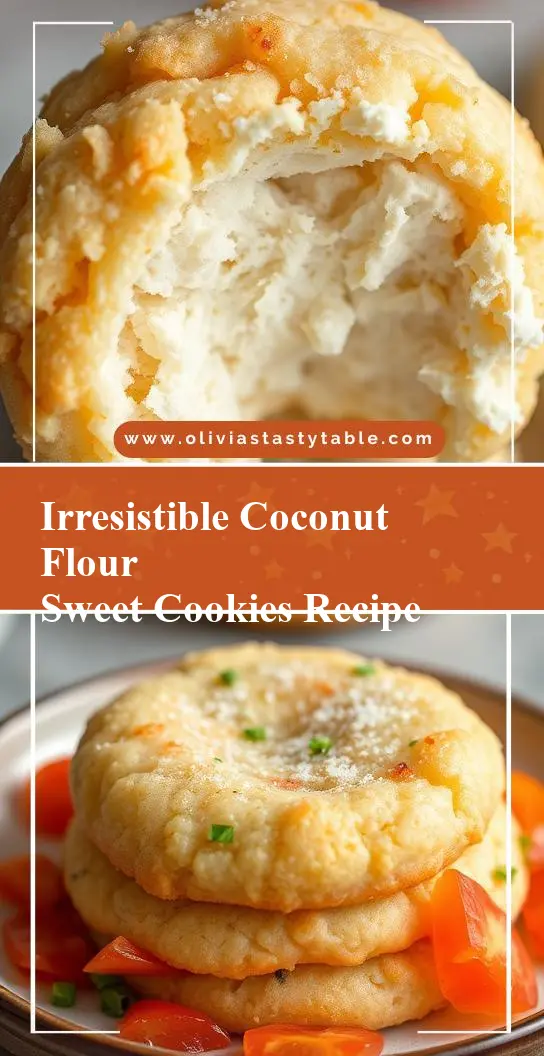
Irresistible Coconut Flour Cookies Recipe
Introduction
Baking doesn’t have to be complicated or time-consuming, especially when you’re using everyday ingredients to create something truly special. These irresistible coconut flour cookies are a perfect example of how simplicity can lead to extraordinary flavor and texture. With the ease of preparation and the versatility of coconut flour, you can unleash your creativity and make these cookies your own. Whether you’re a seasoned baker or just starting out, this recipe is sure to become a favorite. The combination of coconut flour, sweetener, and spices creates a unique taste experience that will leave you wanting more. Plus, the best part is that you can customize them to your liking with various add-ins and toppings, making each batch a new adventure.
Why This Works
- Flavor balance and ingredient accessibility: The recipe strikes a perfect balance between sweet and savory, using ingredients that are easily found in most grocery stores.
- Ease of preparation: With a simple list of ingredients and straightforward instructions, these cookies can be mixed and baked in no time, perfect for a quick dessert or snack.
- Impressive results with minimal effort: Despite the simplicity of the recipe, the end result is a batch of deliciously textured and flavored cookies that are sure to impress friends and family.
Key Ingredients
The main ingredients in this recipe include coconut flour, which provides a unique texture and flavor; a sweetener of your choice, such as sugar or honey, to balance out the savory taste of the coconut; eggs, which act as a binder; and spices or add-ins like vanilla, chocolate chips, or nuts to enhance the flavor and texture. Practical substitutions can be made for some of these ingredients, such as using almond flour instead of coconut flour for a different nutritional profile, or swapping sugar for a natural sweetener like maple syrup for a slightly different flavor.
Instructions
- Step 1: Begin by preheating your oven to 350°F (175°C). In a medium-sized bowl, whisk together the coconut flour, salt, and any dry spices you’re using. In a larger bowl, whisk together the eggs, sweetener, and any wet ingredients like vanilla extract.
- Step 2: Gradually add the dry ingredients to the wet ingredients, mixing until well combined. The mixture will be thick due to the nature of coconut flour, which absorbs more liquid than traditional flours. If using, add in chocolate chips, nuts, or other mix-ins and fold them into the dough.
- Step 3: Scoop tablespoon-sized balls of the dough onto a baking sheet lined with parchment paper, leaving about 2 inches of space between each cookie to allow for spreading. You can also shape the cookies slightly with your hands if desired.
- Step 4: Bake the cookies for 15-20 minutes, or until they are lightly golden on the edges and firm to the touch. The exact baking time may vary depending on the size of your cookies and your oven’s temperature accuracy. Once done, remove the cookies from the oven and let them cool on the baking sheet for a few minutes before transferring them to a wire rack to cool completely.
Handy Tips
- One of the most helpful tips when working with coconut flour is to ensure you’re using the right ratio of liquid to flour, as coconut flour absorbs significantly more liquid than traditional wheat flour. Also, don’t overmix the dough, as this can lead to tough cookies. If you find your cookies are too dense, try adding an extra egg or a little more liquid to the next batch.
Heat Control
For these cookies, maintaining the right oven temperature is crucial. An oven that’s too hot can cause the cookies to burn on the outside before they’re fully cooked on the inside, while an oven that’s too cool can result in cookies that are undercooked or spread too much. Use an oven thermometer to ensure your oven is at the correct temperature, and keep an eye on the cookies as they bake, adjusting the baking time as needed based on their appearance and texture.
Crunch Factor
The desired texture of these cookies can range from soft and chewy to crispy on the edges and tender in the center. To achieve a crunchier cookie, bake them for a couple of minutes longer, keeping a close eye to prevent burning. For a chewier cookie, bake them for the minimum recommended time and remove them from the oven when they’re just lightly golden and still slightly soft to the touch.
Pro Kitchen Tricks
- One expert tip for enhancing the flavor of your cookies is to use high-quality ingredients, such as real vanilla extract instead of imitation, and to not skip the step of whisking your eggs and sugar until they’re light and fluffy, as this incorporates air and helps the cookies to bake up lighter.
Storage Tips
- These cookies can be stored in an airtight container at room temperature for up to 5 days. For longer storage, consider freezing them. Place the cooled cookies in a single layer in a freezer-safe bag or container and store in the freezer for up to 2 months. To thaw, simply leave the cookies at room temperature or reheat them in the microwave for a few seconds.
Gift Packaging Ideas
If you’re considering gifting these cookies, they can be beautifully packaged in decorative jars, tins, or bags. Wrap the cookies individually in plastic wrap or parchment paper and place them in your chosen container. Add a ribbon or a gift tag with a personal message for a touch of elegance. You could also include a batch of your favorite coffee or tea to complement the cookies.
Flavor Variations
- 🌟 Different spices: Try adding a pinch of cinnamon, nutmeg, or cardamom to give your cookies a unique twist.
- 🌟 Creative toppings: Before baking, press a few chocolate chips, nuts, or dried cranberries into the top of each cookie for added texture and flavor.
- 🌟 Ingredient swaps: Substitute some of the coconut flour with almond flour for a different nutritional profile, or use coconut sugar instead of regular sugar for a slightly caramel-like flavor.
Troubleshooting
- Texture problems: If your cookies turn out too dense, it might be because the dough was overmixed or there wasn’t enough liquid. If they’re too spread out, it could be due to overly warm ingredients or incorrect oven temperature.
- Ingredient replacements: Always replace ingredients with similar alternatives. For example, if you’re out of eggs, you could try using flax eggs or mashed banana as a binder, though this may affect the texture slightly.
- Over/undercooking signs: Keep an eye on your cookies as they bake. Undercooked cookies will be soft and pale, while overcooked ones will be hard and dark. Adjust the baking time based on your oven and the size of your cookies.
FAQs
- Can I freeze it? Yes, these cookies freeze well. Simply place them in a freezer-safe bag or container and store for up to 2 months.
- Is it gluten-free? Yes, since the recipe uses coconut flour, it is naturally gluten-free, making it a great option for those with gluten intolerance or sensitivity.
- Can I double the recipe? Absolutely. Just keep in mind that you may need to adjust the baking time slightly if you’re making a larger batch of cookies.
Conclusion
In conclusion, these irresistible coconut flour cookies offer a delicious, gluten-free alternative to traditional cookies, with the added benefit of being easy to make and highly customizable. Whether you’re a fan of coconut flour or just looking to mix things up in your baking routine, this recipe is sure to please. Don’t be afraid to experiment with different spices, add-ins, and toppings to make the recipe your own, and consider sharing your creations with friends and family as a thoughtful gift. With a little practice and patience, you’ll be a coconut flour cookie expert in no time, whipping up batches of these tasty treats with ease and enjoying the satisfaction of baking something truly special.