Looking for a quick dessert to impress your family? These easy cherry cream cheese mini pies are a homemade favorite, made with fresh cherries and a flaky crust, perfect for a weeknight treat, save for later
Irresistible Cherry Cream Cheese Mini Pies (So Easy and Dreamy!)
Introduction
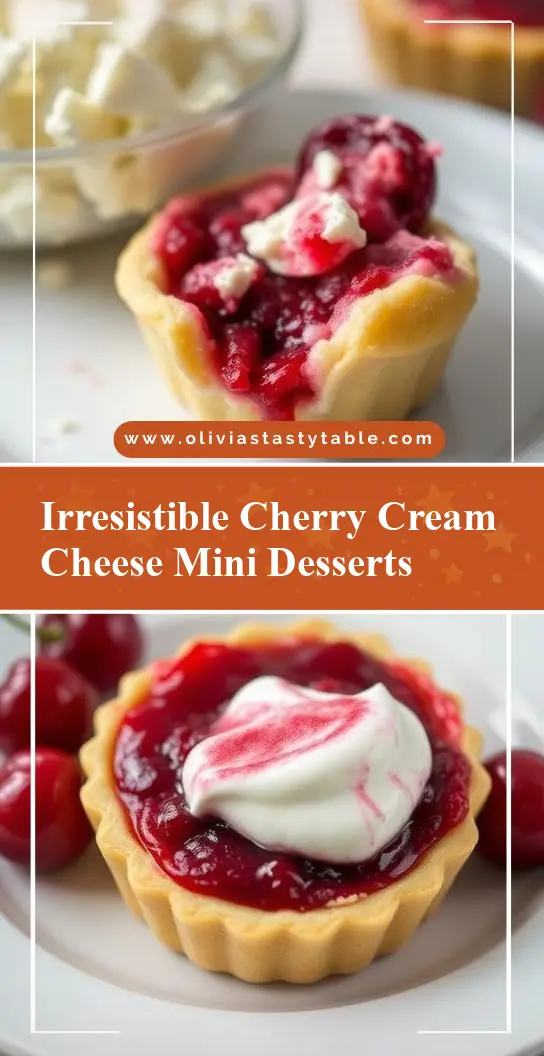
Imagine sinking your teeth into a tender, flaky pastry crust filled with a rich cherry and cream cheese mixture that’s simply divine. These Irresistible Cherry Cream Cheese Mini Pies are not just a delight to taste, but they’re also incredibly easy to make, requiring minimal effort for a dessert that’s sure to impress. Using everyday ingredients, you can create a masterpiece that’s perfect for any occasion, whether it’s a family gathering, a potluck, or just a sweet treat for yourself. The combination of flavors and textures in these mini pies is a true testament to the magic that happens when simplicity meets creativity in the kitchen.
Why This Works
- Flavor balance and ingredient accessibility: The recipe strikes a perfect balance between the sweetness of cherries and the tanginess of cream cheese, all made possible with ingredients that are easily found in most supermarkets.
- Ease of preparation: Despite their impressive appearance, these mini pies are surprisingly simple to prepare. The filling can be mixed in minutes, and the pastry crust, while flaky and delicious, doesn’t require extensive rolling or chilling.
- Impressive results with minimal effort: What’s most appealing about this recipe is the disproportionate return on investment. With just a bit of effort, you end up with a dessert that looks and tastes like it was made by a professional pastry chef.
Key Ingredients
The foundation of these Irresistible Cherry Cream Cheese Mini Pies lies in a few key ingredients. You’ll need a package of frozen puff pastry, thawed, which serves as the base of your mini pies. For the filling, you’ll require a block of cream cheese, softened to ensure it mixes smoothly, a can of cherry pie filling for that sweet and fruity flavor, and an egg, beaten, for brushing the pastry edges to create a golden glaze. Practical substitutions can be made, such as using fresh cherries cooked with sugar and cornstarch for a homemade pie filling or substituting the cream cheese with a similar soft cheese like mascarpone for a slightly different flavor profile.
Instructions
- Step 1: Begin by preheating your oven to 400°F (200°C). On a lightly floured surface, roll out the puff pastry to a thickness of about 1/8 inch. Cut out circles of pastry using a cookie cutter or the rim of a glass, about 3-4 inches in diameter. You should be able to get around 12 circles.
- Step 2: In a medium bowl, mix the softened cream cheese with a spoon until it’s smooth. Then, add the cherry pie filling and mix until well combined. Be gentle to avoid introducing too much air into the mixture.
- Step 3: To assemble the mini pies, place a tablespoon or two of the cherry and cream cheese mixture onto a pastry circle, leaving a 1/2 inch border around the edges. Brush the edges with the beaten egg for a golden glaze, then fold the pastry in half over the filling, pressing the edges to seal. Use a fork to crimp the edges and create a decorative border.
- Step 4: Place the mini pies on a baking sheet lined with parchment paper, leaving about an inch of space between each pie. Brush the tops with the remaining egg wash and cut a small slit in the top of each pie to allow steam to escape during baking. Bake for 20-25 minutes, or until the pastry is golden brown.
Handy Tips
- One of the most helpful tips for working with puff pastry is to keep it cold. This will help the pastry hold its shape and prevent it from becoming too soft and difficult to work with. If you find your pastry is getting too warm, pop it into the fridge for a few minutes to firm up before continuing.
Heat Control
When baking these mini pies, it’s crucial to maintain the right temperature to ensure the pastry cooks evenly and doesn’t burn. The ideal temperature is 400°F (200°C), and the pies should be baked for 20-25 minutes. Signs of doneness include a golden brown color on the pastry and the filling being warm and set. If you’re unsure, you can always check one of the pies by carefully opening it; the filling should be hot and the pastry flaky.
Crunch Factor
The crunch factor in these mini pies comes from the flaky pastry crust, which should be tender on the inside and crispy on the outside. To achieve this, make sure not to overwork the pastry dough, keep it cold, and don’t overbake the pies. The right amount of baking time will ensure the pastry is golden and crispy without becoming too hard or dark.
Pro Kitchen Tricks
- A professional tip for making these mini pies look even more appealing is to brush them with an egg wash before baking. This gives the pastry a beautiful golden color and adds to the visual appeal of the dessert.
Storage Tips
- For storing leftovers, it’s best to keep the mini pies in an airtight container in the refrigerator. They can be stored for up to 3 days. For reheating, place the pies in the oven at 350°F (175°C) for about 5-7 minutes, or until warmed through. It’s also possible to freeze the pies before baking; simply place them on a baking sheet, freeze until solid, then transfer to a freezer-safe bag or container for up to 2 months. Bake frozen pies for an additional 5-10 minutes, or until golden brown.
Gift Packaging Ideas
If you’re considering gifting these Irresistible Cherry Cream Cheese Mini Pies, there are several charming ways to package them. Place the pies in a decorative tin or a wooden crate lined with parchment paper, add some fresh cherries or a sprinkle of powdered sugar on top for a pop of color, and finish with a ribbon or a gift tag. Alternatively, you could wrap each pie individually in plastic wrap or aluminum foil and place them in a gift basket filled with other sweet treats.
Flavor Variations
- 🌟 Different spices: Consider adding a pinch of cinnamon or nutmeg to the cherry filling for a warm, spicy flavor.
- 🌟 Creative toppings: Before baking, top the pies with a sprinkle of granulated sugar or a few sliced almonds for added texture and flavor.
- 🌟 Ingredient swaps: For a different twist, use other types of fruit preserves like raspberry or blueberry, or substitute the cream cheese with another soft cheese like goat cheese for a tangier flavor.
Troubleshooting
- Texture problems: If the pastry is too soft, it may be too warm. Try chilling it in the fridge for a few minutes. If the filling is too runny, it might not have been mixed well or could be due to using low-quality cream cheese.
- Ingredient replacements: If you can’t find puff pastry, you could use a homemade pie crust recipe, though this will add more time and effort to the preparation.
- Over/undercooking signs: Keep an eye on the pies while they’re baking. If they’re browning too quickly, cover the tops with foil. If they seem undercooked, give them a few more minutes, checking frequently to avoid overcooking.
FAQs
- Can I freeze it? Yes, you can freeze the mini pies before baking. Place them on a baking sheet, freeze until solid, then transfer to a freezer-safe bag or container for up to 2 months.
- Is it gluten-free? Unfortunately, traditional puff pastry contains gluten, making this recipe not suitable for those with gluten intolerance or sensitivity unless a gluten-free pastry substitute is used.
- Can I double the recipe? Absolutely, you can easily double or even triple this recipe if you’re planning for a larger gathering. Just be sure to have enough baking sheets and parchment paper on hand.
Conclusion
These Irresistible Cherry Cream Cheese Mini Pies are a true delight, offering a perfect blend of flavors and textures that are sure to please even the most discerning palates. With their ease of preparation and the impressive results they yield, they’re an ideal choice for anyone looking to make a delicious dessert without spending hours in the kitchen. Feel free to experiment with different flavors and toppings to make the recipe your own, and don’t hesitate to share your creations with friends and family. Happy baking!