Craving something decadent? This easy homemade salted caramel chocolate fudge cake is a family favorite, made with rich chocolate and gooey caramel, perfect for a weeknight dinner dessert, save for later
Indulgent Salted Caramel Chocolate Fudge Cake Recipe 🍰 | Easy Dessert Idea
Introduction
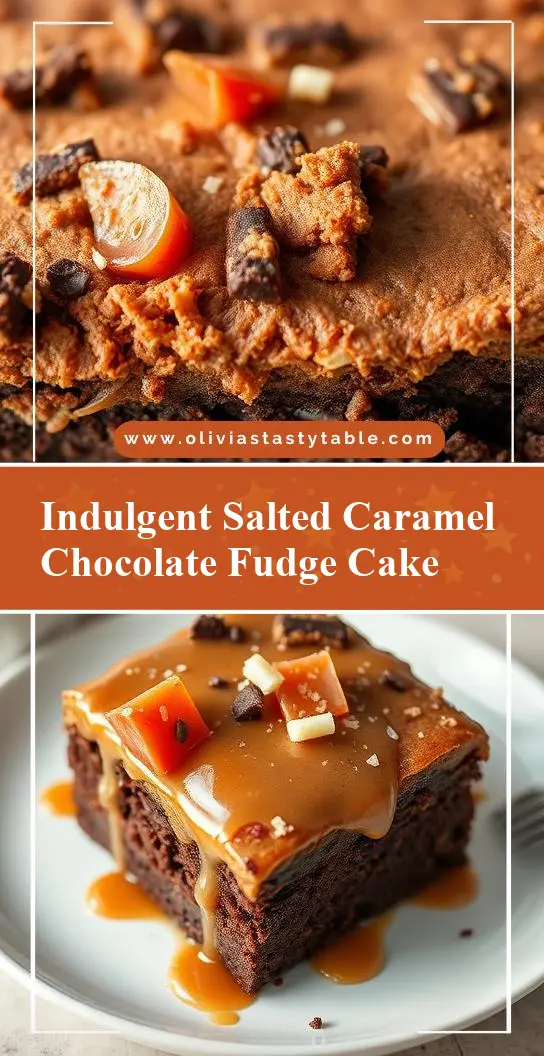
Imagine a rich, velvety cake that combines the deep flavors of chocolate and caramel, elevated by the subtle crunch of salted caramel bits. This Indulgent Salted Caramel Chocolate Fudge Cake Recipe is not just a dessert; it’s an experience that will leave your taste buds dancing. The best part? It’s surprisingly easy to make, using everyday ingredients that you might already have in your pantry. With its perfect balance of flavors and textures, this cake is sure to become your new favorite dessert. Whether you’re a beginner in the kitchen or a seasoned baker, this recipe is designed to impress with minimal fuss, making it perfect for special occasions or as a creative treat any time of the week.
Why This Works
- Flavor balance and ingredient accessibility: The combination of dark chocolate, caramel, and a hint of salt creates a depth of flavor that is both decadent and approachable. The ingredients are easily found in most supermarkets, making this recipe accessible to anyone.
- Ease of preparation: Despite its indulgent nature, the cake is straightforward to prepare. The steps are simple, and the use of store-bought caramel sauce simplifies the process without compromising on flavor.
- Impressive results with minimal effort: The end result is a cake that looks and tastes like it was made in a professional bakery, yet it requires minimal effort and time. This makes it perfect for those looking to impress without spending hours in the kitchen.
Key Ingredients
The magic of this cake lies in its ingredients. You’ll need:
– 1 and 1/2 cups of all-purpose flour
– 1 cup of granulated sugar
– 6 ounces of best-quality dark chocolate (at least 70% cocoa), broken into small pieces
– 1/2 cup of unsalted butter, at room temperature
– 4 large eggs
– 2 teaspoons of pure vanilla extract
– 1 cup of store-bought or homemade caramel sauce
– 1 teaspoon of flaky sea salt
– 1 cup of semi-sweet chocolate chips for the ganache
– Chopped nuts or sea salt for garnish, optional
You can substitute the dark chocolate with milk chocolate for a sweeter cake, or use different types of sugar like brown sugar for a deeper flavor profile. For those looking for a gluten-free option, consider substituting the all-purpose flour with a gluten-free flour blend.
Instructions
- Step 1: Preheat your oven to 350°F (180°C). Grease two 9-inch round cake pans and line the bottoms with parchment paper. In a medium bowl, whisk together flour and sugar. Set aside.
- Step 2: In a large mixing bowl, melt the chocolate in the microwave in 30-second increments, stirring between each interval, until smooth. Allow the chocolate to cool slightly. Add the room temperature butter to the chocolate and mix until well combined. Beat in the eggs one at a time, followed by the vanilla extract.
- Step 3: Gradually add the flour mixture to the chocolate mixture, mixing until just combined. Divide the batter evenly between the prepared pans and smooth the tops. Drizzle the caramel sauce over the batter in each pan, using a knife or spatula to create a marbled effect. Sprinkle with flaky sea salt.
- Step 4: Bake for 35-40 minutes or until a toothpick inserted into the center comes out with a few moist crumbs attached. Let the cakes cool in the pans for 10 minutes before transferring them to a wire rack to cool completely. Once the cakes are cool, you can make the chocolate ganache by heating the chocolate chips in the microwave in 30-second increments, stirring between each interval, until smooth. Place one cake layer on a serving plate and spread a layer of ganache on top. Place the second cake layer on top and frost the entire cake with the remaining ganache. Garnish with chopped nuts or additional sea salt, if desired.
Handy Tips
- For a cleaner cake release, make sure to grease the pans properly and let the cakes cool in the pans for the recommended time.
- Don’t overmix the batter, as this can result in a dense cake.
- If using homemade caramel sauce, ensure it’s cooled and thickened before using to avoid a too-wet batter.
Heat Control
When baking, it’s crucial to maintain the right temperature. Ensure your oven is at 350°F (180°C) for even baking. The cakes are done when a toothpick inserted into the center comes out with a few moist crumbs. Overbaking can lead to dry cakes, so keep an eye on them after the 30-minute mark.
Crunch Factor
The crunch in this cake comes from the flaky sea salt sprinkled on top of the batter before baking and potentially from chopped nuts used as garnish. The sea salt adds a satisfying textural element and a burst of salty flavor against the sweetness of the caramel and chocolate.
Pro Kitchen Tricks
- Use high-quality chocolate for the best flavor.
- Don’t overbake; the cakes should be moist and slightly tender in the center.
- For a glossy ganache, ensure the chocolate is at room temperature before melting, and avoid overheating.
Storage Tips
- Store the cake at room temperature for up to 3 days, covered with plastic wrap or aluminum foil.
- For longer storage, the cake can be refrigerated for up to 5 days or frozen for up to 2 months. When freezing, it’s best to freeze the cake layers separately before assembling and frosting.
- When reheating, let the cake come to room temperature or warm it gently in the microwave.
Gift Packaging Ideas
This cake makes a wonderful gift, especially for chocolate lovers. Consider packaging the cake in a decorative cake box or wrapping it tightly in plastic wrap and then in a festive towel or bag. Adding a ribbon or a handwritten note can make it an even more thoughtful gift. If you’re gifting just the cake layers or components (like the caramel sauce), mason jars with decorative lids or ribbon ties are a charming way to present them.
Flavor Variations
- 🌟 Different spices: Add a pinch of cinnamon, nutmeg, or cayenne pepper to the batter for unique twists.
- 🌟 Creative toppings: Use different types of nuts (walnuts, pecans), dried fruits (cranberries, cherries), or even candy pieces (M&M’s, chopped peanut butter cups) on top of the ganache for varied textures and flavors.
- 🌟 Ingredient swaps: Replace some of the sugar with honey or maple syrup for a different flavor profile, or use coconut oil instead of butter for a dairy-free option.
Troubleshooting
- Texture problems: If the cake turns out too dense, it might be due to overmixing. If it’s too dry, it could be overbaked.
- Ingredient replacements: Always consider the flavor and texture profile when substituting ingredients. For example, using milk chocolate instead of dark chocolate will result in a sweeter cake.
- Over/undercooking signs: Keep an eye on the baking time and check the cakes frequently towards the end of the baking time. A toothpick inserted into the center should come out with a few moist crumbs for the perfect doneness.
FAQs
- Can I freeze it? Yes, you can freeze the cake layers or the assembled cake. It’s best to freeze the layers separately, then assemble and frost when you’re ready to serve.
- Is it gluten-free? The original recipe uses all-purpose flour, which contains gluten. However, you can substitute the flour with a gluten-free flour blend to make it gluten-free.
- Can I double the recipe? Yes, you can double the recipe to make a larger cake. Just ensure you have enough pans and adjust the baking time accordingly.
Conclusion
This Indulgent Salted Caramel Chocolate Fudge Cake Recipe is a game-changer for any dessert lover. With its rich, velvety chocolate, gooey caramel, and crunchy sea salt, it’s a treat that will satisfy any sweet tooth. The best part is how accessible it is—using common ingredients and straightforward steps, anyone can create this masterpiece. Whether you’re celebrating a special occasion or just need a pick-me-up, this cake is sure to impress. So go ahead, get baking, and indulge in a slice (or two) of this heavenly dessert. Don’t forget to share your creations and tag us; we love seeing your baking adventures!