Craving a weeknight dinner that’s easy and delicious? Try this quick homemade honey BBQ chicken and rice skillet made with tender chicken and sweet honey BBQ sauce, perfect for a family favorite meal, save for later
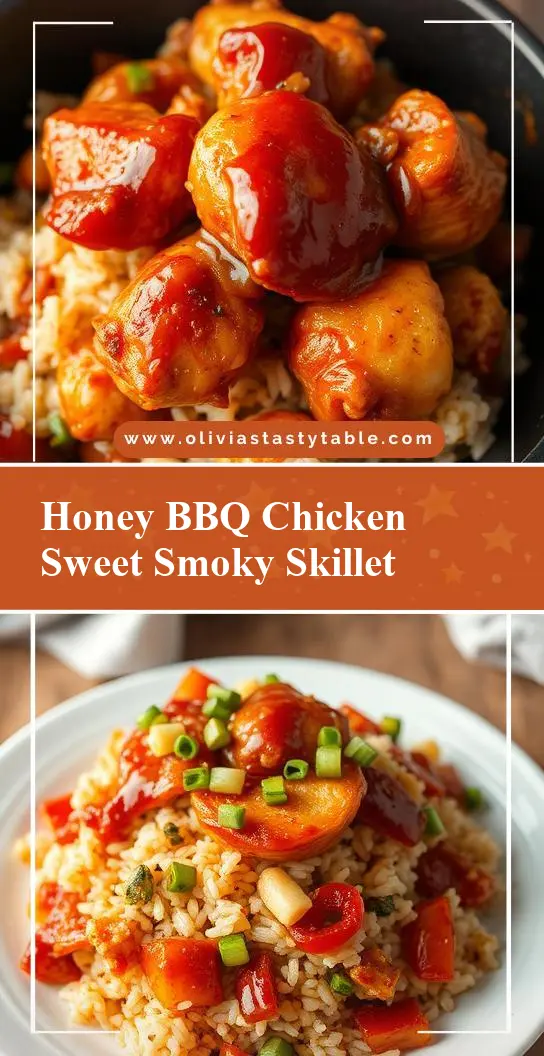
Honey BBQ Chicken and Rice Skillet – Sweet, Smoky and One-Pan Delicious!
Introduction
Imagine a dish that combines the sweetness of honey, the smokiness of BBQ sauce, and the comfort of chicken and rice, all in one pan. This Honey BBQ Chicken and Rice Skillet is not just a meal, it’s an experience. It’s about taking everyday ingredients and turning them into something truly special with minimal effort. The best part? It’s incredibly easy to make, requiring just a few ingredients and some basic cooking skills. Whether you’re a busy parent looking for a quick weeknight dinner or an avid cook seeking a new challenge, this recipe is sure to delight. So, let’s dive in and explore what makes this dish so unique and how you can bring it to life in your own kitchen.
Why This Works
- Flavor balance and ingredient accessibility: The combination of honey and BBQ sauce creates a perfect balance of sweet and smoky, while using common ingredients that are easily found in most supermarkets.
- Ease of preparation: This recipe requires minimal prep work and can be cooked in just one pan, making it perfect for those looking for a hassle-free cooking experience.
- Impressive results with minimal effort: Despite its simplicity, the Honey BBQ Chicken and Rice Skillet presents beautifully and tastes amazing, making it ideal for serving to guests or enjoying as a family meal.
Key Ingredients
The success of this dish lies in the quality and combination of its ingredients. You’ll need boneless, skinless chicken breasts, uncooked white or brown rice, olive oil, a bell pepper, onion, garlic, honey, BBQ sauce, salt, and pepper. For practical substitutions, you can use different colored bell peppers for varied flavor and texture, or swap the chicken with shrimp or tofu for a vegetarian option. The honey and BBQ sauce are key to the dish’s flavor profile, but you can adjust the amount to suit your taste preferences.
Instructions
- Step 1: Begin by chopping the bell pepper and onion into bite-sized pieces. Mince the garlic and set aside. This prep work will make the cooking process much smoother and faster.
- Step 2: Heat a couple of tablespoons of olive oil in a large skillet over medium-high heat. Add the chicken and cook until browned on both sides and cooked through, about 5-7 minutes per side. Remove the chicken from the skillet and set aside.
- Step 3: In the same skillet, add a bit more oil if necessary, then add the chopped bell pepper and onion. Cook until the vegetables are tender, about 5 minutes. Add the minced garlic and cook for an additional minute, stirring constantly to prevent burning.
- Step 4: Add the uncooked rice to the skillet, stirring to combine with the vegetables and oil. Cook for about 2 minutes. Then, add in your chicken broth, honey, and BBQ sauce. Stir well to combine, ensuring the rice is well coated. Return the chicken to the skillet and bring the mixture to a boil. Reduce the heat to low, cover, and simmer until the rice is cooked and the liquid is absorbed, about 20-25 minutes. Season with salt and pepper to taste.
Handy Tips
- Always use fresh ingredients for the best flavor. If using frozen chicken or vegetables, ensure they are fully thawed before cooking.
- Don’t overcrowd the skillet. Cook the chicken and vegetables in batches if necessary, to ensure they cook evenly and don’t steam instead of sear.
- For an extra crispy top, broil the skillet for a couple of minutes after cooking. Keep an eye on it to avoid burning.
Heat Control
Heat control is crucial in this recipe. Start with medium-high heat to sear the chicken and cook the vegetables, then reduce to low heat to simmer the rice and chicken in the BBQ and honey sauce. This ensures the chicken is cooked through, the vegetables are tender, and the rice is perfectly cooked without burning the bottom. Use a thermometer if available, aiming for an internal temperature of 165°F for the chicken.
Crunch Factor
The crunch factor in this dish comes from the slightly caramelized vegetables and the crispy exterior of the chicken. To achieve this, make sure to not stir the chicken too much when it’s cooking, allowing it to develop a nice crust. For the vegetables, cook them until they’re tender but still retain some crunch. If desired, add some toasted nuts or seeds on top of the dish before serving for an extra crunchy element.
Pro Kitchen Tricks
- Use a cast-iron or stainless steel skillet for even heat distribution and to achieve a nice crust on the chicken and vegetables.
- Don’t skip the step of cooking the rice with the vegetables and sauce. This step infuses the rice with flavor and ensures it cooks evenly.
- For easier cleanup, line the skillet with parchment paper or aluminum foil before cooking, especially if you plan to broil the dish at the end.
Storage Tips
- Leftovers can be stored in an airtight container in the refrigerator for up to 3 days. Reheat in the microwave or on the stovetop until warmed through.
- For longer storage, cool the dish completely, then freeze in airtight containers or freezer bags for up to 2 months. Reheat thawed leftovers as described above.
- Best containers for storage are those that are airtight and can withstand freezing and reheating temperatures, such as glass containers with tight-fitting lids or heavy-duty freezer bags.
Gift Packaging Ideas
If you’re considering gifting this dish, perhaps for a potluck or as a meal for a friend in need, consider packaging it in a decorative cast-iron skillet or a ceramic dish covered with foil and decorated with a ribbon. For a more portable option, portion the dish into individual serving containers, such as mason jars or microwave-safe containers, and add a gift tag with reheating instructions.
Flavor Variations
- 🌟 Different spices: Add some cumin for a southwestern twist, smoked paprika for a deeper smoky flavor, or dried herbs like thyme or rosemary for an earthy note.
- 🌟 Creative toppings: Top the dish with diced fresh tomatoes, shredded cheese, sour cream, or diced avocado for added flavor and texture.
- 🌟 Ingredient swaps: Use beef or pork instead of chicken, or add some heat with diced jalapeños or red pepper flakes.
Troubleshooting
- Texture problems: If the rice is too mushy, it may have been overcooked. Try reducing the cooking time or using less liquid in future attempts. If the chicken is dry, it may have been overcooked; ensure it reaches an internal temperature of 165°F without overcooking.
- Ingredient replacements: If you don’t have BBQ sauce, you can make a substitute by mixing ketchup, brown sugar, vinegar, and spices. For honey, maple syrup or agave nectar can be used as alternatives.
- Over/undercooking signs: Check the chicken for doneness by cutting into it; if it’s pink, it needs more time. The rice should be tender but not mushy. If the vegetables are too raw, cook for a few minutes longer.
FAQs
- Can I freeze it? Yes, this dish can be frozen after it has cooled completely. Portion it into airtight containers or freezer bags and store for up to 2 months. Reheat thawed leftovers in the microwave or on the stovetop until warmed through.
- Is it gluten-free? This recipe is naturally gluten-free, making it a great option for those with gluten intolerance. However, ensure that the BBQ sauce and any store-bought ingredients are gluten-free.
- Can I double the recipe? Yes, you can easily double or triple this recipe for larger crowds. Just ensure you have a large enough skillet and adjust the cooking time slightly for the increased quantity of ingredients.
Conclusion
In conclusion, the Honey BBQ Chicken and Rice Skillet is a versatile, delicious, and surprisingly easy dish to prepare. With its perfect balance of sweet, smoky, and savory flavors, it’s sure to become a favorite in your household. Don’t be afraid to experiment with different ingredients and spices to make the dish your own, and enjoy the process of cooking and sharing a meal with loved ones. Whether you’re a seasoned cook or just starting out, this recipe is a great addition to any meal rotation, offering comfort, flavor, and a satisfying dining experience.