Want a delicious weeknight dinner solution? Try this easy garlic butter baked chicken recipe, made with simple homemade ingredients, perfect for a quick family favorite meal, save for later
Garlic Butter Baked Chicken – Juicy and Flavorful Recipe
Introduction
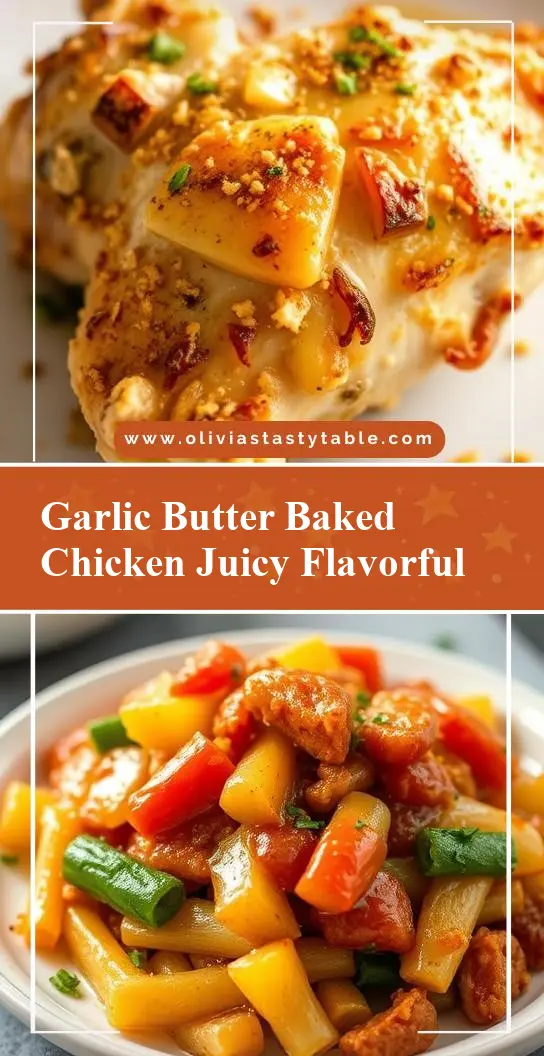
Imagine a dish that’s as easy to make as it is impressive to serve, with flavors that dance on your palate and a juiciness that leaves everyone wanting more. Look no further than this Garlic Butter Baked Chicken recipe, a culinary masterpiece that transforms everyday ingredients into a truly unforgettable meal. The beauty of this recipe lies in its simplicity, requiring minimal effort while yielding results that are sure to impress even the most discerning palates. Whether you’re a seasoned chef or a beginner in the kitchen, this garlic butter baked chicken is sure to become a staple in your household, perfect for weeknight dinners, special occasions, or anytime you want to add a little extra flavor to your meal.
Why This Works
- Flavor balance and ingredient accessibility: This recipe strikes a perfect balance between the richness of the butter, the pungency of the garlic, and the natural flavors of the chicken, all of which are easily accessible in most supermarkets.
- Ease of preparation: With a preparation time of just 10 minutes and a cooking time of 20 minutes, this recipe is quick, easy, and perfect for busy schedules.
- Impressive results with minimal effort: Despite its simplicity, the end result is a dish that looks and tastes like it was prepared in a high-end restaurant, making it perfect for entertaining guests or special occasions.
Key Ingredients
The success of this Garlic Butter Baked Chicken recipe hinges on a few key ingredients, each of which plays a crucial role in the overall flavor and texture of the dish. These include:
– 2 large chicken breasts: The main event, chicken breasts provide the protein and substance of the meal. For a leaner option, you can use chicken breasts with the skin removed.
– 4 cloves of garlic, minced: Garlic is the backbone of the flavor profile, adding a deep, rich taste that complements the chicken perfectly. For those who prefer a milder flavor, you can reduce the amount of garlic or substitute it with garlic powder.
– 1/2 cup (1 stick) of unsalted butter, softened: The butter not only adds moisture to the chicken but also acts as a carrier for the flavors of the garlic and any additional herbs or spices you might choose to add. For a lighter version, you can reduce the amount of butter or substitute it with a low-fat alternative.
– 1 tsp dried thyme: Thyme adds a subtle, slightly earthy flavor that enhances the overall dish without overpowering it. Feel free to experiment with other herbs like rosemary or parsley for different flavor profiles.
– Salt and pepper, to taste: Seasoning is crucial for bringing out the natural flavors of the ingredients. Be sure to taste as you go and adjust the seasoning accordingly.
– 1 lemon, cut into wedges (optional): A squeeze of fresh lemon juice can add a bright, citrusy note to the dish, cutting through the richness of the butter and garlic.
Instructions
- Step 1: Preheat your oven to 400°F (200°C). While the oven is heating up, prepare your ingredients. Rinse the chicken breasts and pat them dry with paper towels. Mince the garlic and mix it with the softened butter, thyme, salt, and pepper until you have a smooth, well-combined paste.
- Step 2: Place the chicken breasts in a baking dish lined with parchment paper. Divide the garlic butter mixture evenly between the two chicken breasts, spreading it generously over each breast to ensure they are fully coated.
- Step 3: Place the baking dish in the oven and bake for 20-25 minutes, or until the chicken is cooked through and the internal temperature reaches 165°F (74°C). The chicken should be juicy and tender, with a beautifully golden-brown crust courtesy of the garlic butter.
- Step 4: Once the chicken is done, remove it from the oven and let it rest for a few minutes before slicing. Serve hot, garnished with lemon wedges if desired, and enjoy the oohs and aahs from your family or guests as you present this masterpiece.
Handy Tips
- For an extra crispy skin, make sure the chicken is dry before applying the garlic butter, and consider broiling the chicken for an additional 2-3 minutes after baking. Keep a close eye to prevent burning.
- Don’t overcrowd the baking dish, as this can affect the even cooking of the chicken. If necessary, use two dishes to ensure that each breast has enough room.
- Experiment with different seasonings and herbs in the garlic butter to give the dish your personal touch. Paprika, chili flakes, or dried oregano can add interesting dimensions to the flavor.
Heat Control
The key to achieving perfectly cooked chicken is in the heat control. Preheating the oven to the correct temperature and using a thermometer to check the internal temperature of the chicken are crucial steps. Make sure the oven is at a steady 400°F (200°C) and that the chicken reaches an internal temperature of 165°F (74°C) to ensure it is cooked through and safe to eat. Also, keep an eye on the chicken during the last few minutes of cooking, as the garlic butter can quickly go from perfectly golden to burnt.
Crunch Factor
The crunch factor in this recipe comes from the crispy, caramelized garlic butter crust that forms on the chicken during baking. To enhance this, make sure the chicken is patted dry before applying the garlic butter, and consider adding some breadcrumbs or grated Parmesan cheese to the butter mixture for an extra crunchy texture. The contrast between the crunchy exterior and the juicy interior is part of what makes this dish so appealing.
Pro Kitchen Tricks
- Let the chicken come to room temperature before baking to ensure it cooks more evenly.
- Use high-quality ingredients, including fresh garlic and real butter, for the best flavor.
- Don’t press down on the chicken with your spatula while it’s baking, as this can squeeze out juices and make the chicken dry.
Storage Tips
- Leftover chicken can be stored in the refrigerator for up to 3 days. Let it cool completely before storing it in an airtight container.
- For longer storage, consider freezing the cooked chicken. It will keep for up to 3 months in the freezer. When you’re ready to eat it, thaw it overnight in the fridge and reheat it in the oven or microwave until warmed through.
- When reheating, make sure the chicken reaches an internal temperature of 165°F (74°C) to ensure food safety.
Gift Packaging Ideas
If you’re looking to share this delicious Garlic Butter Baked Chicken with friends or family as a gift, consider packaging it in a beautiful, reusable baking dish covered with aluminum foil and garnished with fresh herbs. You could also portion it out into individual servings, place them in microwave-safe containers, and add a side of roasted vegetables or a salad for a complete meal. Don’t forget to include the recipe and some tips for reheating, making it a thoughtful and practical gift for anyone who loves good food.
Flavor Variations
- 🌟 Different spices: Try adding some smoked paprika for a smoky flavor, or a pinch of cayenne pepper for a spicy kick.
- 🌟 Creative toppings: Once the chicken is cooked, top it with some caramelized onions, roasted bell peppers, or a sprinkle of crumbled feta cheese for added flavor and texture.
- 🌟 Ingredient swaps: Substitute the chicken with shrimp or scallops for a seafood version, or use turkey breast for a slightly leaner option. You can also experiment with different types of butter, such as garlic and herb butter or Mediterranean oregano butter, for unique flavor profiles.
Troubleshooting
- Texture problems: If the chicken turns out dry, it may be overcooked. Check the internal temperature and the cooking time to ensure it’s not being overcooked. For a crisper crust, try broiling the chicken for a few minutes after baking.
- Ingredient replacements: If you don’t have thyme, you can substitute it with rosemary or oregano. For a dairy-free version, consider replacing the butter with a vegan alternative.
- Over/undercooking signs: Undercooked chicken will be pink and juicy inside, while overcooked chicken will be dry and white throughout. Make sure to check the internal temperature and the juices running clear to ensure the chicken is cooked just right.
FAQs
- Can I freeze it? Yes, you can freeze the cooked chicken for up to 3 months. Thaw it overnight in the fridge and reheat it until warmed through.
- Is it gluten-free? Yes, this recipe is naturally gluten-free, making it a great option for those with gluten intolerance or sensitivity.
- Can I double the recipe? Absolutely! Simply double all the ingredients and adjust the cooking time slightly, keeping an eye on the internal temperature to ensure the chicken is cooked through.
Conclusion
This Garlic Butter Baked Chicken recipe is a true gem, offering a perfect blend of ease, flavor, and creativity that’s sure to delight both you and your guests. With its rich, buttery flavor and the depth of garlic, this dish is not only a crowd-pleaser but also incredibly versatile, allowing for countless variations and substitutions to suit any taste or dietary need. So go ahead, give it a try, and watch as it becomes a staple in your kitchen, a dish you’ll return to time and time again for its simplicity, its flavor, and the joy it brings to the table.