What makes the perfect weeknight dinner bread? This easy artisan bread recipe uses simple homemade ingredients like yeast and flour to create a delicious family favorite, perfect for a quick weeknight meal, save for later
Artisan Bread
Introduction
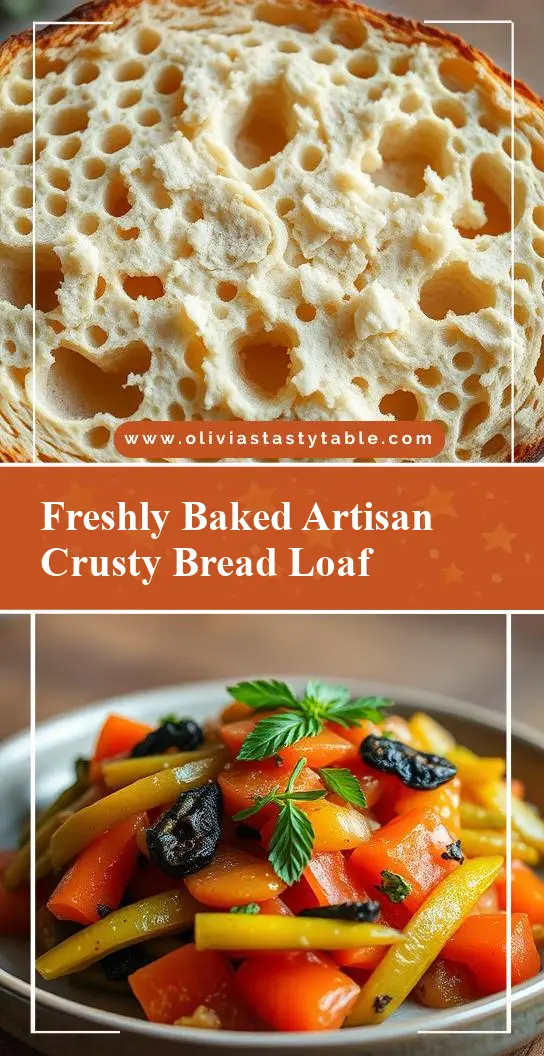
Imagine the aroma of freshly baked bread wafting from your kitchen, enticing everyone with its warm, comforting scent. Artisan bread is more than just a staple; it’s an experience that combines ease, flavor, and creativity, all using everyday ingredients. With a few simple steps and a bit of patience, you can create a delicious, crusty loaf that’s perfect for snacking, sandwich-making, or serving alongside your favorite soups and stews. The best part? You don’t need to be a professional baker to achieve professional results. This recipe is designed to guide you through the process with clarity and simplicity, ensuring that your first loaf is not only delicious but also sets the stage for endless experimentation and fun.
Why This Works
- Flavor balance and ingredient accessibility: This recipe strikes a perfect balance between flavors, using ingredients that are readily available in most supermarkets. The combination of yeast, salt, sugar, and flour creates a bread that is both savory and slightly sweet, appealing to a wide range of tastes.
- Ease of preparation: One of the most appealing aspects of this artisan bread recipe is its simplicity. With just a few ingredients and straightforward instructions, you can have your dough mixed and rising in no time. The process is incredibly forgiving, making it perfect for beginners.
- Impressive results with minimal effort: Despite the simplicity of the recipe, the end result is a beautifully crafted loaf of bread that looks and tastes like it came from a professional bakery. The crust is crispy, the interior is soft and airy, and the overall presentation is impressive enough to serve at any gathering or dinner party.
Key Ingredients
The foundation of a great artisan bread lies in its ingredients. For this recipe, you’ll need:
– 1 1/2 cups of warm water
– 2 teaspoons of active dry yeast
– 1 tablespoon of sugar
– 3 1/2 cups of all-purpose flour
– 1 teaspoon of salt
These ingredients are not only accessible but also provide the perfect balance for a delicious artisan bread. The yeast ensures the bread rises, the sugar feeds the yeast, the flour provides structure, and the salt enhances the flavor. You can also experiment with whole wheat flour for a nuttier flavor or add herbs and spices for extra depth.
Instructions
- Step 1: Begin by activating the yeast. In a large mixing bowl, combine the warm water, yeast, and sugar. Stir gently to dissolve the yeast, and let it sit for about 5-10 minutes, or until the mixture becomes frothy.
- Step 2: Add the flour, salt, and any additional ingredients (like herbs or spices) to the bowl. Mix until a shaggy dough forms. Turn the dough out onto a floured surface and knead for about 10 minutes, or until the dough becomes smooth and elastic.
- Step 3: Place the dough in a lightly oiled bowl, cover it with plastic wrap, and let it rise in a warm, draft-free place for about 1-2 hours, or until it has doubled in size.
- Step 4: Preheat your oven to 425°F (220°C). Gently punch down the dough and shape it into a round or oblong loaf. Place the loaf onto a baking sheet lined with parchment paper, cover it with a clean towel, and let it rise for another 30-45 minutes. Bake the bread for 25-35 minutes, or until it’s golden brown and sounds hollow when tapped on the bottom.
Handy Tips
- Use a digital thermometer to ensure your water is at the right temperature for yeast activation (between 100°F and 110°F).
- Don’t overmix the dough, as this can lead to a dense bread. Mix just until the ingredients come together in a shaggy mass, then let the kneading process develop the dough’s texture.
- Keep your rising area draft-free and at a comfortable room temperature. Yeast thrives in warm, stable environments.
Heat Control
Heat control is crucial when baking artisan bread. Your oven should be preheated to 425°F (220°C) to achieve a crispy crust and a well-cooked interior. It’s also important to ensure your baking sheet or stone is preheated to prevent the bread from spreading too much during baking. The baking time will depend on the size and shape of your loaf, but a general rule of thumb is to bake for 25-35 minutes for a smaller loaf and up to 45 minutes for a larger one. The bread is done when it’s golden brown and sounds hollow when tapped on the bottom.
Crunch Factor
Achieving the perfect crunch on your artisan bread involves a few key steps. First, ensure your oven is hot before placing the bread inside. A preheated baking stone or baking steel can also help create a crispy crust. During the last 10-15 minutes of baking, you might consider using the broiler to enhance browning and crunch, but keep a close eye to prevent burning. Finally, let the bread cool on a wire rack to allow air to circulate around it, which helps maintain the crunch of the crust.
Pro Kitchen Tricks
- Use a baking stone or baking steel in your oven to enhance the crust’s crispiness. Preheat the stone or steel along with your oven for the best results.
- For an extra crispy crust, try baking the bread with steam. You can achieve this by placing a pan of water in the oven as the bread bakes or by using a steam injector if your oven is equipped with one.
- Consider using a sourdough starter instead of commercial yeast for a more complex, tangy flavor. This will require a longer preparation time, as you’ll need to feed and maintain your starter, but the end result is well worth the effort.
Storage Tips
- Once your artisan bread has cooled completely, store it in an airtight container at room temperature for up to 3 days. You can also freeze it for up to 2 months. When freezing, consider slicing the bread first and then placing the slices in a freezer-safe bag or container for easy thawing and use.
- To reheat, simply place the bread in a low-temperature oven (around 300°F or 150°C) for 10-15 minutes, or until warmed through. You can also toast slices for a crispy snack.
- For the best flavor and texture, consume your artisan bread within a day or two of baking. However, with proper storage, it can remain fresh for several days.
Gift Packaging Ideas
Artisan bread makes a wonderful gift, especially when presented beautifully. Consider wrapping your cooled loaf in a rustic paper or cloth, tying it with a twine or ribbon, and adding a few fresh herbs or a handwritten note for a personal touch. You can also package slices in decorative jars or bags for a more portable gift. For a complete gift basket, pair your artisan bread with cheese, jams, olives, or other gourmet goodies.
Flavor Variations
- 🌟 Different spices: Try adding cinnamon for a sweet bread, rosemary for a herby flavor, or garlic for an aromatic twist.
- 🌟 Creative toppings: Before baking, brush the loaf with olive oil and sprinkle with sesame seeds, poppy seeds, or coarse salt for added texture and flavor.
- 🌟 Ingredient swaps: Substitute some of the all-purpose flour with whole wheat flour for a nuttier flavor, or use ancient grains like Kamut or Spelt for a different texture and taste.
Troubleshooting
- Texture problems: If your bread turns out too dense, it might be due to overmixing the dough. Try mixing the ingredients just until they come together, then let the kneading process develop the gluten.
- Ingredient replacements: If you’re out of yeast, consider making a flatbread or focaccia, which can be made without yeast. For gluten-free options, look into gluten-free flours and adjust the recipe accordingly, keeping in mind that gluten-free doughs often require more liquid and a different kneading technique.
- Over/undercooking signs: Keep an eye on your bread while it’s baking. If it’s browning too quickly, cover it with foil to prevent burning. If it’s not browning enough, increase the oven temperature slightly or use the broiler for a few minutes, watching carefully to avoid burning.
FAQs
- Can I freeze it? Yes, artisan bread can be frozen for up to 2 months. It’s best to slice it before freezing for easy thawing and use.
- Is it gluten-free? The basic recipe provided contains gluten due to the use of all-purpose flour. However, you can experiment with gluten-free flours to create a gluten-free version, adjusting the liquid content and kneading time as necessary.
- Can I double the recipe? Yes, you can easily double or triple the recipe to make more loaves. Just keep in mind that you’ll need to adjust the baking time slightly for larger loaves.
Conclusion
Making artisan bread is a journey that combines simplicity with the potential for endless creativity and experimentation. Whether you’re a seasoned baker or just starting out, this recipe provides a solid foundation for producing delicious, crusty loaves that are sure to impress. Don’t be afraid to try new ingredients, flavor combinations, and techniques to make the recipe your own. Share your loaves with friends and family, and enjoy the process of creation and the joy of sharing something homemade and full of love. Happy baking!