Need a showstopping weeknight dinner idea? This easy swirled garlic herb bread is a quick homemade favorite made with fresh herbs and garlic, perfect for a family favorite meal, Save for later
Swirled Garlic Herb Bread (precise and on-trend phrasing)
Introduction
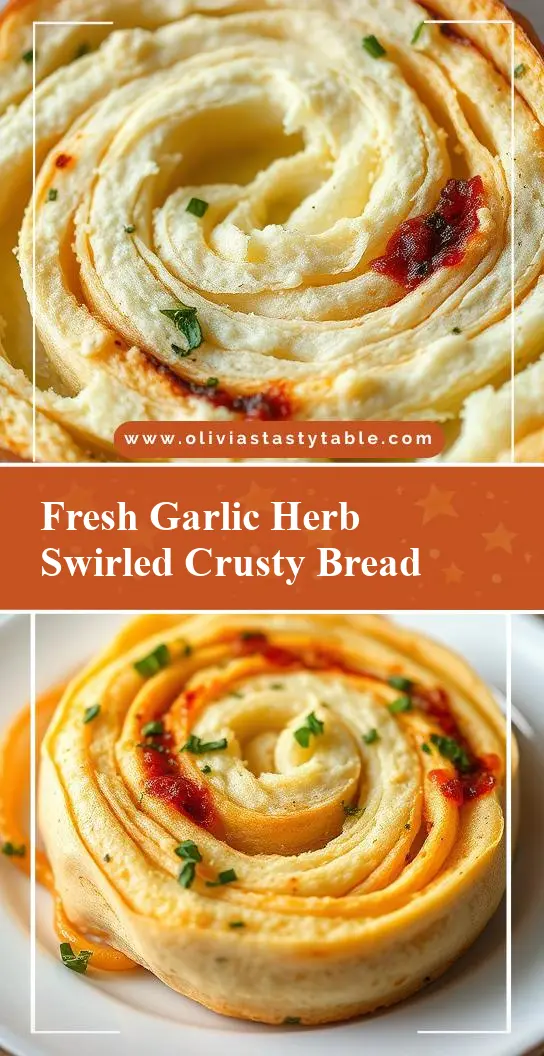
Imagine the aroma of freshly baked bread wafting through your home, enticing everyone with its savory goodness. The Swirled Garlic Herb Bread is a masterclass in ease, flavor, and creativity, utilizing everyday ingredients to create a culinary masterpiece that will elevate any meal or gathering. This recipe is perfect for beginners and seasoned bakers alike, offering a straightforward yet impressive dish that combines the richness of garlic, the freshness of herbs, and the comfort of warm bread. In this article, we’ll guide you through the simple steps to create this stunning bread, sharing tips, tricks, and variations to make it truly your own.
Why This Works
- Flavor balance and ingredient accessibility: The combination of garlic, herbs, and high-quality bread flour creates a balanced flavor profile that is both aromatic and delicious. The ingredients are easily accessible in most supermarkets, making this recipe convenient for anyone to try.
- Ease of preparation: Despite its impressive appearance, the Swirled Garlic Herb Bread requires minimal effort and time. The dough comes together quickly, and the swirling process, although it may seem intricate, is surprisingly simple.
- Impressive results with minimal effort: The swirling technique adds a visually appealing element to the bread, making it perfect for special occasions or as a centerpiece for any dining table. The effort-to-impression ratio is incredibly high, ensuring that you’ll receive praise without sacrificing too much time or energy.
Key Ingredients
The Swirled Garlic Herb Bread relies on a few key ingredients to achieve its distinctive flavor and texture. These include high-quality bread flour, which provides structure and chew; active dry yeast, which ensures the bread rises beautifully; garlic, for its deep, savory flavor; and a mix of fresh herbs such as parsley, rosemary, or thyme, which add freshness and depth. For practical substitutions, you can use different types of flour like whole wheat or all-purpose flour, though bread flour is preferred for its high protein content. Also, feel free to experiment with various herb combinations to find your favorite flavor profile.
Instructions
- Step 1: Begin by activating the yeast in warm water, then combine it with flour, salt, and a bit of sugar in a large mixing bowl. Mix until a shaggy dough forms, then knead for about 10 minutes until the dough becomes smooth and elastic.
- Step 2: Let the! dough rise in a warm, draft-free place until it has doubled in size. While the dough is rising, prepare the garlic and herb mixture by mincing the garlic and chopping the fresh herbs. Mix them together with some olive oil and set aside.
- Step 3: Once the dough has risen, punch it down and roll it out into a large rectangle. Spread the garlic and herb mixture evenly over the dough, leaving a small border around the edges. Then, roll the dough into a tight log and cut it in half lengthwise. Twist the two halves together to create the swirl effect, and place the dough into a greased loaf pan.
- Step 4: Let the shaped dough rise for another 30-40 minutes, then bake it in a preheated oven at 375°F (190°C) for about 35-40 minutes, or until the bread is golden brown and sounds hollow when tapped on the bottom. Remove the bread from the oven, let it cool for a few minutes, and then transfer it to a wire rack to cool completely.
Handy Tips
- Ensure your yeast is fresh, as this will significantly affect the rise of your bread. If you’re unsure, you can test the yeast by mixing it with warm water and sugar and observing if it becomes frothy.
- Don’t overmix the dough, as this can lead to a dense bread. Mix the ingredients just until they come together, then knead the dough for the recommended time.
- For an extra crispy crust, bake the bread for an additional 5-10 minutes. Keep an eye on it to prevent burning.
Heat Control
Heat control is crucial when baking the Swirled Garlic Herb Bread. The ideal temperature is 375°F (190°C), and the baking time is approximately 35-40 minutes. To check for doneness, tap the bottom of the bread; if it sounds hollow, it’s ready. Also, look for a golden brown color, which indicates a perfectly baked crust.
Crunch Factor
The crunch factor of the Swirled Garlic Herb Bread comes from its crispy crust, which contrasts beautifully with the soft interior. To achieve this, ensure you bake the bread at the right temperature and for the correct amount of time. An extra few minutes of baking can enhance the crunch, but be cautious not to overdo it, as this can lead to a burnt crust.
Pro Kitchen Tricks
- Use a stand mixer with a dough hook attachment to knead the dough, especially if you’re short on time or prefer less manual labor. This can significantly reduce the kneading time and effort.
- For an enhanced flavor, let the dough rise in the refrigerator overnight. This slow rise can develop a deeper, more complex flavor in the bread.
- Experiment with different herb combinations and spices to create unique flavor profiles. This can include dried herbs, spices like garlic powder or paprika, or even grated cheese for added richness.
Storage Tips
- Store the cooled Swirled Garlic Herb Bread in an airtight container at room temperature for up to 3 days. You can also freeze it for up to 2 months; simply thaw at room temperature or reheat in the oven when needed.
- For reheating, wrap the bread in foil and bake in a preheated oven at 350°F (175°C) for about 10-15 minutes, or until warmed through.
- Consider using a bread keeper or paper bag to store the bread, as these can help maintain the bread’s freshness by allowing it to breathe.
Gift Packaging Ideas
The Swirled Garlic Herb Bread makes a wonderful gift, especially when beautifully packaged. Consider wrapping the cooled bread in a rustic paper bag, tying it with twine, and adding a few fresh herbs on top for a charming presentation. You can also place the bread in a wicker basket or a decorative tin, accompanied by a jar of homemade jam or a block of artisanal cheese for a complete gift basket.
Flavor Variations
- 🌟 Different spices: Add some dried oregano, basil, or thyme to the dough for a Mediterranean twist, or use cumin and chili powder for a spicy version.
- 🌟 Creative toppings: Before baking, brush the top of the bread with egg wash and sprinkle with sesame seeds, poppy seeds, or grated cheese for added texture and flavor.
- 🌟 Ingredient swaps: Use whole wheat flour instead of bread flour for a nuttier flavor, or substitute some of the water with olive oil for a richer taste.
Troubleshooting
- Texture problems: If your bread turns out too dense, it may be due to overmixing the dough. Try to mix the ingredients just until they come together, then knead for the recommended time.
- Ingredient replacements: If you’re out of fresh herbs, you can use dried herbs as a substitute, though the flavor may not be as vibrant. Always adjust the amount according to the package instructions, as dried herbs are more potent.
- Over/undercooking signs: Keep an eye on your bread while it’s baking. If it’s undercooked, it will sound dull when tapped on the bottom. If it’s overcooked, the crust will be too dark and hard. Adjust the baking time as needed for your oven.
FAQs
- Can I freeze it? Yes, you can freeze the Swirled Garlic Herb Bread for up to 2 months. Simply thaw at room temperature or reheat in the oven when needed.
- Is it gluten-free? No, this recipe uses bread flour, which contains gluten. However, you can experiment with gluten-free flours, though the texture and rise may vary.
- Can I double the recipe? Yes, you can double the recipe to make a larger loaf. Just ensure you have a large enough mixing bowl and baking sheet. The rising and baking times may also need to be adjusted slightly.
Conclusion
The Swirled Garlic Herb Bread is a versatile and delicious addition to any meal, from casual dinners to special occasions. With its straightforward preparation, impressive presentation, and rich flavor, it’s a recipe that will quickly become a favorite. Feel encouraged to experiment with different herbs, spices, and ingredients to make it your own, and don’t hesitate to share your creations with friends and family. Whether you’re a seasoned baker or just starting out, this bread is sure to bring joy and satisfaction to your kitchen and your table.