Craving a delicious breakfast treat? Try our easy buttermilk waffles made with homemade batter and a quick cooking method, perfect for a family favorite weeknight dinner, Save for later
Buttermilk Waffles
Introduction
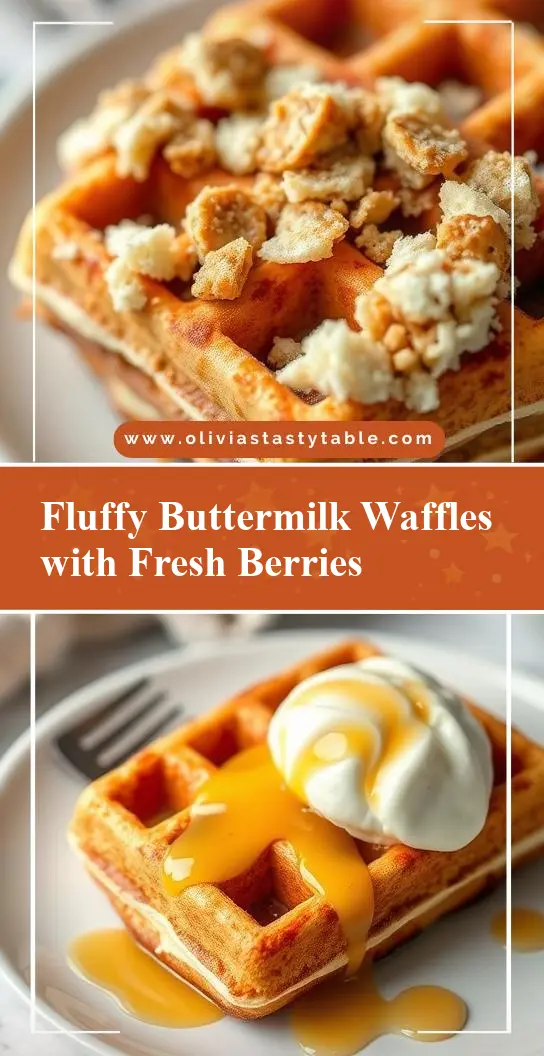
Imagine starting your day with a crispy, golden-brown waffle, fresh from the iron and infused with the tangy sweetness of buttermilk. Buttermilk waffles are a breakfast staple that combines ease, flavor, and creativity, all using everyday ingredients that you likely have on hand. Whether you’re a busy parent looking for a quick and delicious breakfast solution or a food enthusiast eager to experiment with new recipes, buttermilk waffles are a versatile and satisfying choice. In this article, we’ll dive into the world of buttermilk waffles, exploring what makes them special, the key ingredients you’ll need, and a step-by-step guide to making them at home.
Why This Works
- Flavor balance and ingredient accessibility: Buttermilk waffles strike a perfect balance between the tanginess of buttermilk and the sweetness of sugar, all while using ingredients that are easily found in most kitchens.
- Ease of preparation: Despite their impressive appearance and flavor, buttermilk waffles are surprisingly easy to make, requiring minimal prep time and effort.
- Impressive results with minimal effort: The combination of buttermilk, flour, eggs, and a touch of sugar creates a waffle that is both crispy on the outside and fluffy on the inside, making it a perfect breakfast or brunch option that is sure to impress.
Key Ingredients
To make buttermilk waffles, you’ll need a few key ingredients. These include 2 cups of all-purpose flour, which provides the structure and texture of the waffle; 4 teaspoons of baking powder, which helps the waffles rise and gives them a light, airy feel; 1 teaspoon of salt, to balance out the sweetness; 1/4 cup of granulated sugar, for a touch of sweetness; 2 large eggs, which add moisture and richness to the waffles; 1 cup of buttermilk, which is the star of the show and gives the waffles their distinctive tang and tenderness; and 4 tablespoons of melted unsalted butter, which adds flavor and helps to create a crispy exterior. If you don’t have buttermilk on hand, you can easily make a substitute by mixing 1 cup of milk with 1 tablespoon of white vinegar or lemon juice and letting it sit for 5-10 minutes to curdle.
Instructions
- Step 1: Begin by preheating your waffle iron according to the manufacturer’s instructions. While the iron is heating up, whisk together the flour, baking powder, salt, and sugar in a large bowl. In a separate bowl, whisk together the eggs, buttermilk, and melted butter until well combined.
- Step 2: Pour the wet ingredients into the dry ingredients and stir until just combined. The batter should still be slightly lumpy. If you’re using any add-ins, such as blueberries or chocolate chips, fold them into the batter at this stage.
- Step 3: The batter is now ready to be cooked. Brush the preheated waffle iron with a small amount of oil or cooking spray to prevent the waffles from sticking. Using a 1/4 cup measuring cup, scoop the batter onto the center of the iron and spread it out to the edges. Cook the waffle for 3-5 minutes, or until it is golden brown and crispy. Repeat with the remaining batter, greasing the iron between each use.
- Step 4: Once the waffles are cooked, remove them from the iron and serve immediately. You can top them with your favorite toppings, such as fresh fruit, whipped cream, maple syrup, or powdered sugar. For an extra-special treat, try adding a sprinkle of cinnamon or a drizzle of honey on top of the waffles before serving.
Handy Tips
- Make sure to not overmix the batter, as this can create tough, dense waffles. Stop stirring as soon as the ingredients are combined, and don’t worry if the batter is still slightly lumpy.
- If you’re having trouble getting the waffles to cook evenly, try adjusting the heat of your iron or the amount of batter you’re using. You can also try rotating the iron halfway through the cooking time to ensure that the waffles are cooking evenly.
- For an extra-crispy exterior, try chilling the batter in the refrigerator for 30 minutes before cooking the waffles. This will help the waffles to cook up with a crunchy exterior and a fluffy interior.
Heat Control
When it comes to cooking buttermilk waffles, heat control is key. The ideal temperature for cooking waffles is between medium and medium-high heat, depending on your iron and the type of waffles you’re making. If you’re using a non-stick iron, you may be able to get away with a lower heat setting, while cast-iron or stainless steel irons may require a higher heat to cook the waffles evenly. As for timing, cook the waffles for 3-5 minutes, or until they are golden brown and crispy. You can check for doneness by lifting the lid of the iron and peeking inside – if the waffles are still pale or soft, give them a few more minutes to cook.
Crunch Factor
One of the best things about buttermilk waffles is their crunchy exterior and fluffy interior. To achieve this texture, make sure to not overmix the batter, and cook the waffles at the right temperature. You can also try adding a little extra sugar to the batter, which will help to create a crispy exterior. If you’re looking for an extra-crunchy waffle, try chilling the batter in the refrigerator for 30 minutes before cooking, or cooking the waffles in a cast-iron or stainless steel iron, which will help to create a crispy exterior.
Pro Kitchen Tricks
- For a fun twist on traditional buttermilk waffles, try adding different mix-ins to the batter, such as diced fruit, nuts, or chocolate chips.
- To make cleanup easier, try lining the iron with a piece of parchment paper or a silicone mat before cooking the waffles. This will help to prevent the waffles from sticking and make cleanup a breeze.
- If you’re short on time, try making a batch of waffle batter ahead of time and storing it in the refrigerator overnight. This will save you time in the morning and ensure that you have a delicious breakfast ready to go.
Storage Tips
- To store leftover waffles, try wrapping them individually in plastic wrap or aluminum foil and freezing them for up to 3 months. To reheat, simply toast the waffles in the toaster or oven until crispy and warm.
- If you’re planning to serve the waffles at a later time, try keeping them warm in a low-temperature oven (around 200°F) for up to 30 minutes. This will help to keep the waffles warm and crispy until you’re ready to serve.
- For a fun breakfast or brunch option, try making a batch of waffles ahead of time and storing them in an airtight container at room temperature for up to 24 hours. This will save you time in the morning and ensure that you have a delicious breakfast ready to go.
Gift Packaging Ideas
If you’re looking for a fun and creative way to give buttermilk waffles as a gift, try packaging them in a decorative tin or container and topping them with a sprinkle of powdered sugar or a drizzle of honey. You could also try adding a few extra goodies to the package, such as a bag of freshly brewed coffee or a pat of butter, to make the gift even more special. For a more rustic or homespun look, try wrapping the waffles individually in parchment paper or a paper bag and tying them with a piece of twine or a ribbon.
Flavor Variations
- 🌟 Different spices: Try adding a pinch of cinnamon, nutmeg, or cardamom to the batter for a unique and delicious flavor twist.
- 🌟 Creative toppings: Top the waffles with fresh fruit, whipped cream, maple syrup, or powdered sugar for a sweet and indulgent treat.
- 🌟 Ingredient swaps: Try substituting different types of flour, such as whole wheat or almond flour, for a nutty and delicious flavor twist. You could also try using different types of milk, such as almond or soy milk, for a non-dairy version of the waffles.
Troubleshooting
- Texture problems: If your waffles are turning out too dense or tough, try adjusting the ratio of flour to liquid in the batter or adding a little extra leavening agent, such as baking powder or baking soda.
- Ingredient replacements: If you’re missing an ingredient or want to try a substitution, try using a different type of flour or milk, or adding a little extra sugar or spice to the batter.
- Over/undercooking signs: If your waffles are turning out too dark or crispy, try adjusting the heat of your iron or the cooking time. If they’re turning out too pale or soft, try cooking them for a few more minutes or adding a little extra sugar to the batter.
FAQs
- Can I freeze it? Yes, you can freeze buttermilk waffles for up to 3 months. Simply wrap them individually in plastic wrap or aluminum foil and store them in a freezer-safe bag or container.
- Is it gluten-free? No, traditional buttermilk waffles are not gluten-free, as they contain wheat flour. However, you can try substituting gluten-free flour for a gluten-free version of the waffles.
- Can I double the recipe? Yes, you can double the recipe for buttermilk waffles. Simply multiply all of the ingredients by two and cook the waffles in batches, if necessary, to prevent overcrowding the iron.
Conclusion
Buttermilk waffles are a delicious and versatile breakfast or brunch option that can be made with ease and creativity. Whether you’re a busy parent looking for a quick and easy breakfast solution or a food enthusiast eager to experiment with new recipes, buttermilk waffles are a great choice. With their crispy exterior and fluffy interior, they’re sure to please even the pickiest of eaters. So next time you’re in the mood for a delicious and satisfying breakfast, give buttermilk waffles a try. With a little practice and patience, you’ll be making perfect buttermilk waffles in no time.