Looking for a show-stopping dessert to impress your family and friends? This easy braided apple puff pastry is a quick homemade treat made with tender apples and flaky pastry, perfect for a weeknight dinner or special occasion, save for later and make it tonight
Braided Apple Puff Pastry
Introduction
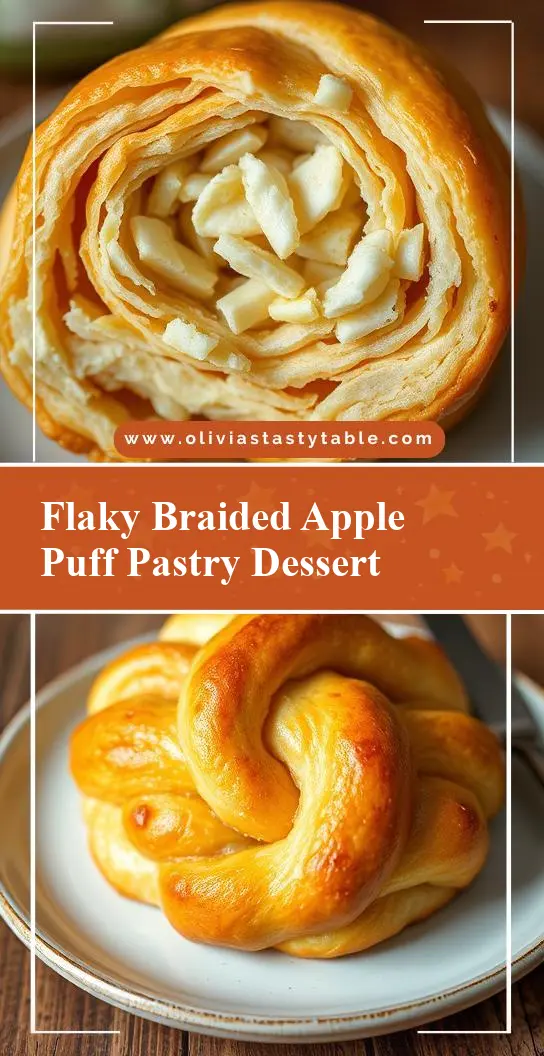
Imagine a dessert that combines the flaky, buttery goodness of puff pastry with the sweet, tender crunch of fresh apples, all woven together in a beautiful braid that’s almost too stunning to eat. The Braided Apple Puff Pastry is a masterpiece of simplicity and elegance, perfect for impressing your guests at any gathering or making a special treat for your family. This recipe is all about ease, flavor, and creativity, using everyday ingredients to create something truly extraordinary. With its perfect balance of textures and tastes, this pastry is sure to become a favorite, and the best part is, it’s incredibly easy to make.
Why This Works
- Flavor balance and ingredient accessibility: The combination of apples, cinnamon, and puff pastry creates a harmonious balance of sweet and savory flavors, and all the ingredients are easily found in most supermarkets.
- Ease of preparation: Despite its impressive appearance, the Braided Apple Puff Pastry requires minimal effort to prepare. The puff pastry can be thawed and rolled out in minutes, and the apple filling is a simple mix of sliced apples, sugar, and cinnamon.
- Impressive results with minimal effort: The braiding technique may seem intimidating, but it’s surprisingly easy to master, and the end result is a pastry that looks like it was made by a professional baker.
Key Ingredients
The main ingredients for this recipe include puff pastry, which can be found in the freezer section of most grocery stores and thawed at home, fresh apples (Granny Smith work well for their tartness and texture), granulated sugar, cinnamon for added warmth and spice, and a bit of lemon juice to prevent the apples from browning. For a practical substitution, other types of apples like Gala or Fuji can be used, and if you prefer a less sweet pastry, you can reduce the amount of sugar or use honey for a different flavor profile.
Instructions
- Step 1: Begin by preheating your oven to 400°F (200°C). Thaw the puff pastry according to the package instructions and roll it out into a large rectangle, about 1/4-inch thick. Peel, core, and slice the apples into thin pieces, mixing them with granulated sugar, cinnamon, and a squeeze of lemon juice in a bowl until they’re well coated.
- Step 2: Place the puff pastry on a lightly floured surface and arrange the apple mixture down the center of the pastry, leaving a 1-inch border on either side. Brush the edges of the pastry with a little water to help it stick together when braided.
- Step 3: To braid the pastry, cut strips of pastry from either side of the apple filling, about 1 inch wide. Begin a regular braid by crossing the right strip over the filling, then the left strip over the right, and continue this pattern until you reach the end of the pastry. Press the ends of the strips together to seal the braid.
- Step 4: Transfer the braided pastry to a baking sheet lined with parchment paper, brush the top with a little bit of egg wash or milk for a golden glaze, and bake for about 25-30 minutes, or until the pastry is golden brown and the apples are tender. Allow it to cool for a few minutes before serving warm, dust with powdered sugar if desired.
Handy Tips
- Make sure to keep the puff pastry cold, as this will help it to hold its shape and bake up flaky. If you find that your pastry is getting too warm and soft, you can refrigerate it for about 10 minutes to firm it up before continuing.
- Avoid overfilling the pastry with apples, as this can make the braid difficult to close and may result in filling spilling out during baking.
- For an extra crispy pastry, you can brush the bottom of the pastry with a little bit of water and sprinkle with granulated sugar before baking.
Heat Control
The ideal temperature for baking the Braided Apple Puff Pastry is 400°F (200°C), and it should be baked for about 25-30 minutes. The pastry is done when it’s golden brown and the apples are tender. You can check for doneness by inserting a knife into one of the apples; if it slides in easily, the pastry is ready.
Crunch Factor
The crunch factor in this pastry comes from the flaky puff pastry and the tender apples. To achieve the perfect crunch, make sure not to overwork the puff pastry, and don’t overbake it. The apples should be cooked until they’re tender but still crisp, adding a delightful texture contrast to the soft pastry.
Pro Kitchen Tricks
- For easier cleanup, line your baking sheet with parchment paper before baking the pastry. This will catch any spills or drips and make cleanup a breeze.
- To add an extra layer of flavor, you can sprinkle the pastry with a bit of cinnamon or nutmeg before baking, or drizzle it with a caramel sauce after it’s cooled.
Storage Tips
- The Braided Apple Puff Pastry can be stored at room temperature for up to 2 days, wrapped tightly in plastic wrap or aluminum foil. For longer storage, it can be frozen for up to 2 months and thawed at room temperature or reheated in the oven.
- For reheating, place the pastry in a preheated oven at 350°F (175°C) for about 10-15 minutes, or until warmed through.
- The best containers for storing the pastry are airtight containers or zip-top bags, which will keep it fresh and prevent it from drying out.
Gift Packaging Ideas
If you want to give the Braided Apple Puff Pastry as a gift, consider packaging it in a beautiful basket or tin, wrapped in decorative paper or a tea towel. You can also add a personal touch by including a handwritten note or a sprinkle of cinnamon on top of the pastry. For a more rustic look, you can wrap the pastry in a piece of parchment paper and tie it with twine, adding a few fresh herbs like rosemary or thyme for a fragrant and charming presentation.
Flavor Variations
- 🌟 Different spices: Try adding a pinch of nutmeg or cardamom to the apple filling for a unique twist on the traditional cinnamon flavor.
- 🌟 Creative toppings: Consider topping the pastry with a crumbly oat and brown sugar topping, or a dollop of whipped cream and caramel sauce.
- 🌟 Ingredient swaps: For a gluten-free version, you can use gluten-free puff pastry or make your own pastry from scratch using gluten-free flours. You can also substitute the apples with other fruits like pears or peaches for a different flavor profile.
Troubleshooting
- Texture problems: If the pastry is too dense or tough, it may be due to overworking the dough. Try to handle the pastry gently and keep it cold to prevent it from becoming too soft and sticky.
- Ingredient replacements: If you don’t have puff pastry, you can make a substitute by layering butter and dough to create a flaky texture. You can also use other types of pastry like phyllo or croissant dough for a different flavor and texture.
- Over/undercooking signs: If the pastry is overcooked, it may be too brown or crispy. If it’s undercooked, it may be pale or soft. Keep an eye on the pastry while it’s baking and adjust the cooking time as needed to achieve the perfect golden brown color and tender texture.
FAQs
- Can I freeze it? Yes, the Braided Apple Puff Pastry can be frozen for up to 2 months and thawed at room temperature or reheated in the oven.
- Is it gluten-free? No, the traditional recipe uses puff pastry which contains gluten. However, you can make a gluten-free version by using gluten-free puff pastry or making your own pastry from scratch using gluten-free flours.
- Can I double the recipe? Yes, you can easily double or triple the recipe to make more pastries. Just keep in mind that you may need to adjust the baking time slightly to ensure that the pastries are cooked through.
Conclusion
The Braided Apple Puff Pastry is a truly special dessert that’s sure to impress your friends and family. With its beautiful braid and delicious flavor, it’s perfect for any occasion. Don’t be afraid to experiment with different ingredients and flavor combinations to make the recipe your own, and don’t hesitate to reach out if you have any questions or need further guidance. Happy baking, and enjoy the ooohs and ahhhs when you present this stunning pastry at your next gathering!