Need a sweet escape from baking hassle? Try this easy no-bake custard slice recipe made with simple ingredients for a quick homemade treat, perfect as a family favorite dessert, save for later
Easy No-Bake Custard Slice Recipe for a Sweet Treat
Introduction
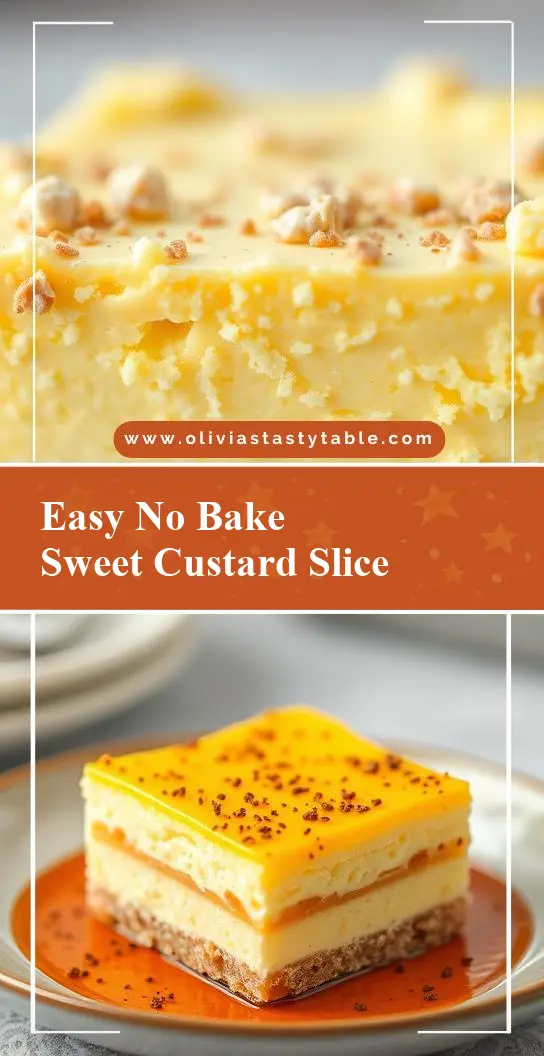
This easy no-bake custard slice recipe is a game-changer for anyone with a sweet tooth. It’s incredibly simple to make, requiring no baking and just a few everyday ingredients. The combination of a crunchy biscuit base, a creamy custard filling, and a layer of sweet caramel on top is a match made in heaven. The best part? You can customize it to your taste with different flavors and toppings, making it perfect for parties, gatherings, or just a quick dessert fix. Whether you’re a seasoned baker or a beginner in the kitchen, this recipe is sure to impress with its ease, flavor, and creativity.
Why This Works
- The balance of flavors and textures in this recipe is what makes it truly special. The crunch of the biscuit base provides a satisfying contrast to the smooth custard, while the caramel adds a touch of sweetness and sophistication.
- The ease of preparation is another major advantage. With no baking required, you can whip up this dessert in no time, making it perfect for last-minute gatherings or unexpected guests.
- Despite its simplicity, this recipe yields impressive results. The layers of flavor and texture create a visually stunning dessert that’s sure to impress your friends and family.
Key Ingredients
The main ingredients in this recipe include a packet of plain biscuits (such as Digestives or Gingernuts), a can of condensed milk, a cup of heavy cream, and a teaspoon of vanilla extract. You’ll also need some unsalted butter and a pinch of salt to bring everything together. If you want to get creative, you can substitute the biscuits with a different type, such as chocolate sandwich cookies or wafers, or add a sprinkle of cinnamon or nutmeg to the custard for extra flavor.
Instructions
- Step 1: Begin by preparing your ingredients. Crush the biscuits in a food processor or place them in a plastic bag and crush them with a rolling pin. Measure out the condensed milk, heavy cream, and vanilla extract, and set them aside.
- Step 2: In a large bowl, mix together the crushed biscuits and melted butter until well combined. Press the mixture into the bottom of a lined or greased slice tin, making sure to get it into the corners. Refrigerate for at least 30 minutes to set.
- Step 3: In a separate bowl, whip the heavy cream until it forms stiff peaks. In another bowl, mix together the condensed milk, vanilla extract, and a pinch of salt. Fold the whipped cream into the condensed milk mixture until well combined, then spread it over the biscuit base. Refrigerate for at least 2 hours or overnight to set.
- Step 4: Just before serving, drizzle the top of the slice with caramel sauce and sprinkle with sea salt or chopped nuts, if desired. Cut into slices and serve chilled.
Handy Tips
- Make sure to use full-fat condensed milk for the best flavor and texture. You can also use a mixture of condensed milk and cream if you prefer a lighter custard.
- If you find that your biscuit base is too crumbly, try adding a little more melted butter to hold it together. Conversely, if it’s too wet, you can add a few more biscuits to absorb the excess moisture.
- Don’t overmix the custard, as this can cause it to become too stiff and separate. Stop folding as soon as the ingredients are combined, and refrigerate immediately to prevent it from setting too firmly.
Heat Control
One of the best things about this recipe is that it requires no heat, making it perfect for hot summer days or for those who are nervous about cooking. However, if you do need to melt the butter or heat the caramel sauce, make sure to do so gently and briefly, as high temperatures can cause the ingredients to separate or become too runny.
Crunch Factor
The crunch factor in this recipe comes from the biscuit base, which provides a satisfying texture contrast to the smooth custard. To achieve the perfect crunch, make sure to chill the base for at least 30 minutes to set, and don’t overmix the ingredients. You can also add some chopped nuts or cookies to the base for extra crunch and flavor.
Pro Kitchen Tricks
- Use a high-quality caramel sauce for the best flavor and texture. You can also make your own caramel by melting sugar and cream in a saucepan, but be careful not to burn it.
- Experiment with different flavors and toppings to make the recipe your own. Some ideas include adding a sprinkle of cinnamon or nutmeg to the custard, using different types of biscuits or cookies for the base, or topping the slice with fresh fruit or whipped cream.
- Make the recipe ahead of time and store it in the fridge for up to 3 days. This will allow the flavors to meld together and the textures to set, making the slice even more delicious and impressive.
Storage Tips
- Store the slice in an airtight container in the fridge for up to 3 days. You can also freeze it for up to 2 months, but make sure to wrap it tightly in plastic wrap or aluminum foil to prevent freezer burn.
- When reheating the slice, make sure to do so gently and briefly, as high temperatures can cause the ingredients to separate or become too runny. You can also serve it chilled, straight from the fridge.
- Use a high-quality container that is airtight and moisture-proof to store the slice. This will help to keep it fresh and prevent it from becoming soggy or stale.
Gift Packaging Ideas
This recipe makes a great gift for friends and family, especially during the holiday season. To package it, simply cut the slice into individual portions and wrap each one in plastic wrap or aluminum foil. You can then place the wrapped slices in a decorative tin or box, or wrap them in a gift bag or ribbon. Add a personalized note or card, and you have a thoughtful and delicious gift that’s sure to impress.
Flavor Variations
- 🌟 Add a sprinkle of cinnamon or nutmeg to the custard for a warm and spicy flavor.
- 🌟 Use different types of biscuits or cookies for the base, such as chocolate sandwich cookies or wafers, for a unique texture and flavor.
- 🌟 Top the slice with fresh fruit, such as strawberries or blueberries, for a sweet and tangy flavor combination.
Troubleshooting
- Texture problems: If the custard is too runny, try refrigerating it for a few more hours to set. If it’s too stiff, you can try whipping in a little more cream to loosen it.
- Ingredient replacements: If you don’t have condensed milk, you can try using a mixture of cream and sugar as a substitute. However, keep in mind that the flavor and texture may be slightly different.
- Over/undercooking signs: Since this recipe requires no heat, you don’t have to worry about overcooking. However, if you do find that the custard is too set or too runny, you can try adjusting the amount of cream or refrigeration time to get the desired texture.
FAQs
- Can I freeze it? Yes, you can freeze the slice for up to 2 months. Simply wrap it tightly in plastic wrap or aluminum foil and store it in the freezer.
- Is it gluten-free? Depending on the type of biscuits you use, this recipe may or may not be gluten-free. If you’re using a gluten-free biscuit, then the recipe should be gluten-free. However, if you’re using a traditional biscuit, then it will contain gluten.
- Can I double the recipe? Yes, you can double the recipe if you need to make a larger batch. Simply multiply all the ingredients by two and follow the same instructions.
Conclusion
This easy no-bake custard slice recipe is a must-try for anyone with a sweet tooth. With its simple ingredients, easy preparation, and impressive results, it’s the perfect dessert for any occasion. Whether you’re a seasoned baker or a beginner in the kitchen, this recipe is sure to delight with its creamy custard, crunchy biscuit base, and sweet caramel topping. So go ahead, give it a try, and enjoy the oohs and aahs from your friends and family!