Need a quick morning pick-me-up? Try these easy no-bake breakfast cookies made with rolled oats and peanut butter, perfect for a homemade family favorite, save for later
No-Bake Breakfast Cookies
Introduction
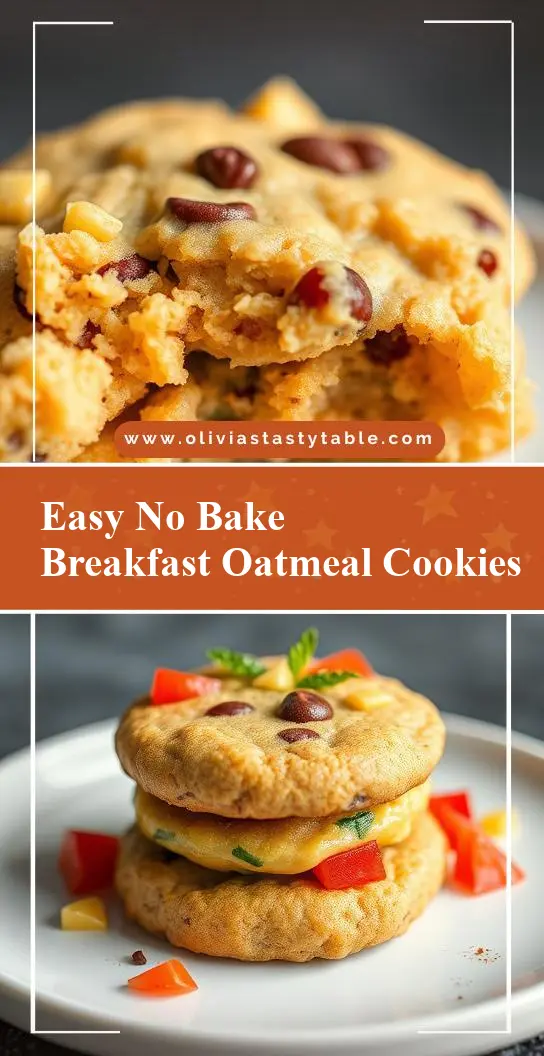
No-bake breakfast cookies are a game-changer for anyone looking for a quick, easy, and delicious breakfast solution. These cookies are not only ideal for busy mornings, but they also offer a versatile canvas for creativity, using everyday ingredients that can be easily found in most kitchens. The best part? They require no baking, making them perfect for hot summer days or for those who prefer to avoid the oven. With a perfect balance of flavors and textures, these no-bake breakfast cookies are sure to become a favorite, whether you’re looking for a healthy start to your day or a tasty snack to keep you going.
Why This Works
- Flavor balance and ingredient accessibility: The combination of oats, nuts, seeds, and dried fruits provides a delightful mix of textures and flavors, while using common ingredients that are easily accessible.
- Ease of preparation: The no-bake aspect of these cookies means that they can be prepared in just a few minutes, with no need to worry about baking times or temperatures.
- Impressive results with minimal effort: Despite the simplicity of the recipe, the end result is a batch of delicious, chewy cookies that are perfect for breakfast or as a snack.
Key Ingredients
The main ingredients in these no-bake breakfast cookies include rolled oats, peanut butter, honey, chia seeds, and dried fruits such as cranberries or raisins. You can also customize the recipe by adding your favorite nuts, seeds, or spices. For example, you could use almond butter instead of peanut butter, or add a sprinkle of cinnamon for extra flavor. Practical substitutions can also be made for dietary restrictions, such as using maple syrup instead of honey for a vegan option.
Instructions
- Step 1: Begin by preparing your ingredients. In a large mixing bowl, combine 2 cups of rolled oats, 1 cup of peanut butter, and 1/2 cup of honey. Mix until well combined, then stir in 1/2 cup of chia seeds and 1/2 cup of dried fruits.
- Step 2: Add in any additional ingredients you like, such as nuts or spices, and mix until they are evenly distributed throughout the dough.
- Step 3: Use your hands to shape the dough into balls, about 1 inch in diameter. You should end up with around 12-15 cookies.
- Step 4: Place the cookies on a baking sheet lined with parchment paper and refrigerate for at least 30 minutes to set. Once set, store the cookies in an airtight container in the refrigerator for up to 5 days.
Handy Tips
- Make sure to use creamy peanut butter for the best results, as it will help to bind the ingredients together.
- If you find the dough too sticky, you can add a little more oats. If it’s too dry, you can add a little more honey.
- Experiment with different combinations of ingredients to find your favorite flavor.
Heat Control
Since these cookies are no-bake, there’s no need to worry about heat control. However, if you’re looking to toast some of the ingredients, such as the nuts or seeds, you can do so in a dry pan over low heat, stirring frequently to avoid burning.
Crunch Factor
The crunch factor in these cookies comes from the nuts, seeds, and dried fruits. To achieve the perfect texture, make sure to not overmix the dough, and avoid compressing the cookies too much when shaping them. This will help to preserve the crunch of the ingredients and give the cookies a nice texture.
Pro Kitchen Tricks
- Use a cookie scoop to portion out the dough and make uniform cookies.
- Roll the cookies in a little extra oats or chopped nuts to give them a decorative coating.
- Make a double batch of the dough and freeze it for up to 2 months, then thaw and shape as needed.
Storage Tips
- Store the cookies in an airtight container in the refrigerator for up to 5 days.
- Freeze the cookies for up to 2 months, then thaw at room temperature or in the refrigerator.
- Keep the cookies fresh by storing them in a cool, dry place, such as a pantry or cupboard.
Gift Packaging Ideas
These no-bake breakfast cookies are perfect for gifting, and can be packaged in a variety of ways. Try placing them in a decorative tin or jar, or wrapping them individually in plastic wrap or parchment paper. You could also add a ribbon or label to make them look more gift-like. Consider packaging them in a gift basket with other breakfast treats, such as granola or yogurt, for a thoughtful and delicious gift.
Flavor Variations
- 🌟 Add a sprinkle of cinnamon or nutmeg for a warm, spicy flavor.
- 🌟 Use different types of nuts or seeds, such as almonds or pumpkin seeds, for a unique texture and flavor.
- 🌟 Add some chocolate chips or cocoa powder for a decadent, chocolatey twist.
Troubleshooting
- Texture problems: If the cookies are too sticky, try adding a little more oats. If they’re too dry, try adding a little more honey.
- Ingredient replacements: If you don’t have peanut butter, you can try using another nut butter, such as almond or cashew butter.
- Over/undercooking signs: Since these cookies are no-bake, there’s no need to worry about overcooking. However, if you’re looking to toast some of the ingredients, make sure to keep an eye on them to avoid burning.
FAQs
- Can I freeze it? Yes, you can freeze the cookies for up to 2 months, then thaw at room temperature or in the refrigerator.
- Is it gluten-free? Yes, these cookies are gluten-free, making them a great option for those with gluten intolerance or sensitivity.
- Can I double the recipe? Yes, you can easily double or triple the recipe to make a larger batch of cookies.
Conclusion
No-bake breakfast cookies are a delicious and convenient breakfast solution that can be customized to suit your tastes and dietary needs. With their perfect balance of flavors and textures, they’re sure to become a favorite in your household. So why not give them a try? Experiment with different ingredients and flavor combinations, and don’t be afraid to get creative and make them your own. Happy baking – or should we say, happy no-baking!