Craving a cool treat? Try these easy homemade frozen peanut butter yogurt bars made with simple ingredients for a quick family favorite dessert, save for later
Easy Frozen Peanut Butter Yogurt Bars Recipe
Introduction
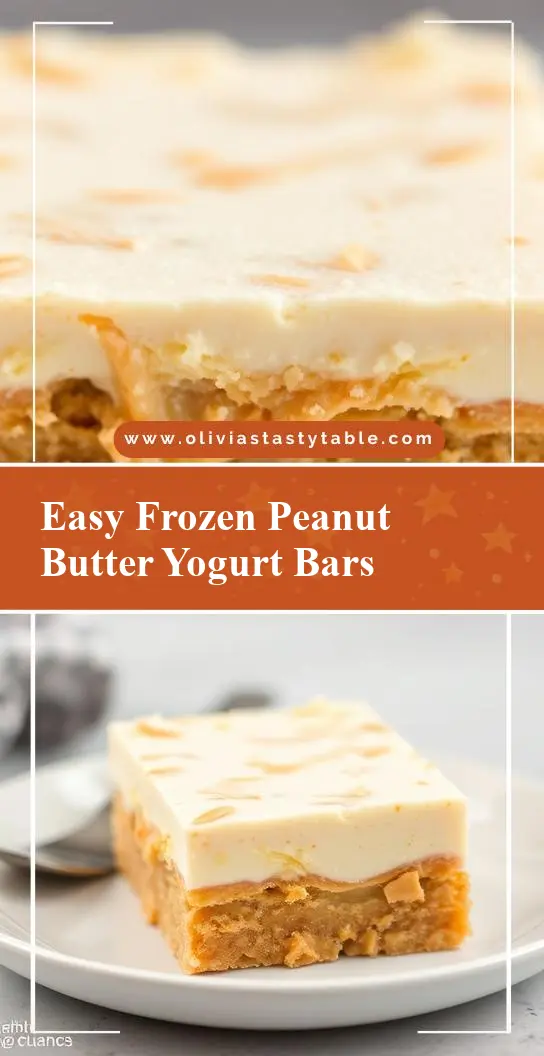
Imagine a dessert that’s not only delicious but also incredibly easy to make, requiring minimal ingredients and effort. The Easy Frozen Peanut Butter Yogurt Bars Recipe is a game-changer for anyone looking to satisfy their sweet tooth without spending hours in the kitchen. This recipe combines the richness of peanut butter with the freshness of yogurt, all wrapped up in a convenient frozen bar that’s perfect for hot summer days or as a quick snack any time of the year. The best part? It’s made with everyday ingredients, allowing you to get creative in the kitchen without breaking the bank or searching for exotic items.
Why This Works
- Flavor balance and ingredient accessibility: The combination of peanut butter and yogurt strikes a perfect balance between rich and refreshing, and both are commonly found in most kitchens.
- Ease of preparation: With just a few simple steps, you can have these bars ready to freeze in no time, making it an ideal recipe for busy days.
- Impressive results with minimal effort: Despite the simplicity of the recipe, the end result is impressive and sure to please both kids and adults, making it a great option for family gatherings or potlucks.
Key Ingredients
The main ingredients for this recipe include creamy peanut butter, plain yogurt, honey or maple syrup for sweetness, and a pinch of salt to enhance the flavors. You’ll also need some graham cracker crumbs or crushed nuts for the crust, which adds a delightful crunch to the bars. For those looking for substitutions, almond butter or cashew butter can replace peanut butter, and coconut sugar can be used instead of honey or maple syrup. The beauty of this recipe lies in its flexibility, allowing you to experiment with different flavors and textures to suit your taste preferences.
Instructions
- Step 1: Begin by preparing your crust. In a medium bowl, mix together the graham cracker crumbs, a pinch of salt, and a drizzle of honey until well combined. Press this mixture into the bottom of a lined or greased 8×8 inch baking dish. Place the dish in the freezer to set while you prepare the filling.
- Step 2: In a large bowl, whip the yogurt until it’s smooth. Add the peanut butter, honey or maple syrup, and a pinch of salt. Mix until the mixture is creamy and well combined. Taste and adjust the sweetness or saltiness to your liking.
- Step 3: Remove the baking dish from the freezer and pour the yogurt and peanut butter mixture over the crust. Smooth out the top and return the dish to the freezer.
- Step 4: Allow the bars to freeze for at least 4 hours or overnight. Once set, remove them from the freezer and let them thaw for about 10 minutes. Cut into bars and serve immediately. You can also store them in an airtight container in the freezer for up to 2 weeks.
Handy Tips
- For a creamier texture, make sure to use full-fat yogurt. If you’re watching your calories, low-fat yogurt can be used, but the bars might not be as rich.
- Avoid overmixing the crust and the filling, as this can lead to a tough or grainy texture.
- Experiment with different types of nut butter and sweeteners to find your favorite combination.
Heat Control
Since this recipe doesn’t require baking, heat control is minimal. However, if you’re toasting your nuts for the crust, keep an eye on them to prevent burning. A light toast can enhance the flavor, but it should be done carefully in a 350°F oven for just a few minutes, or by stirring constantly in a pan over low heat.
Crunch Factor
The crunch factor in these bars comes from the crust, which can be made with either graham cracker crumbs or crushed nuts. For an extra crunchy topping, you can sprinkle some chopped nuts or shaved chocolate over the bars before they freeze. This adds a delightful textural element to each bite.
Pro Kitchen Tricks
- For easier cutting, dip your knife in warm water before slicing the bars. This will help prevent the knife from sticking and make clean cuts.
- Use parchment paper or a silicone mat to line your baking dish for effortless removal of the bars once they’re frozen.
- Consider making these bars in a muffin tin for individual servings. This is perfect for portion control and can make them a great snack for on-the-go.
Storage Tips
- Store the bars in an airtight container in the freezer to keep them fresh for up to 2 weeks.
- For reheating, simply leave a bar at room temperature for about 10 minutes to soften slightly before serving.
- These bars are best served frozen, so there’s no need to thaw them completely unless you prefer a softer texture.
Gift Packaging Ideas
These bars are not only delicious but also make a thoughtful gift, especially during the summer months. Consider packaging them in decorative tins or jars, wrapped in colorful paper or bags, and tied with a ribbon. You can also include a handwritten note with the ingredients used, in case of any dietary restrictions. For a more personalized touch, add a few fresh flowers or a small potted plant to the gift basket.
Flavor Variations
- 🌟 Different spices: Add a pinch of cinnamon, nutmeg, or cardamom to the yogurt mixture for a unique twist.
- 🌟 Creative toppings: Before freezing, top the bars with fresh fruits, shaved coconut, or even candy pieces for added flavor and texture.
- 🌟 Ingredient swaps: Replace peanut butter with another nut butter, or use different types of milk or yogurt for a creamier or lighter version.
Troubleshooting
- Texture problems: If the bars turn out too hard, they might have been frozen for too long. Simply let them thaw for a few more minutes. If they’re too soft, they might not have been frozen long enough.
- Ingredient replacements: Always taste as you go and adjust the sweetness or saltiness based on the ingredients you’ve used.
- Over/undercooking signs: Since these bars are frozen, there’s no risk of overcooking. However, under-freezing can result in bars that are too soft. Make sure they’re fully set before serving.
FAQs
- Can I freeze it? Yes, these bars are meant to be frozen. They can be stored in the freezer for up to 2 weeks.
- Is it gluten-free? Depending on the ingredients used, such as the type of graham cracker crumbs, these bars can be gluten-free. Make sure to use gluten-free alternatives for the crust.
- Can I double the recipe? Absolutely! Simply double all the ingredients and use a larger baking dish. Keep in mind that freezing time might be slightly longer for a larger batch.
Conclusion
With its simplicity, versatility, and delicious flavor, the Easy Frozen Peanut Butter Yogurt Bars Recipe is a must-try for anyone looking for a quick dessert or snack. Whether you’re a fan of peanut butter, a health enthusiast, or just someone who loves to get creative in the kitchen, this recipe has something for everyone. So go ahead, give it a try, and don’t hesitate to experiment with different flavors and ingredients to make it your own. Happy cooking, and enjoy your frozen treats!