Want a romantic breakfast idea? Try these easy homemade heart-shaped red velvet waffles made with buttermilk and cocoa powder for a quick family favorite meal, save for later
Delicious Heart-Shaped Red Velvet Waffles
Introduction
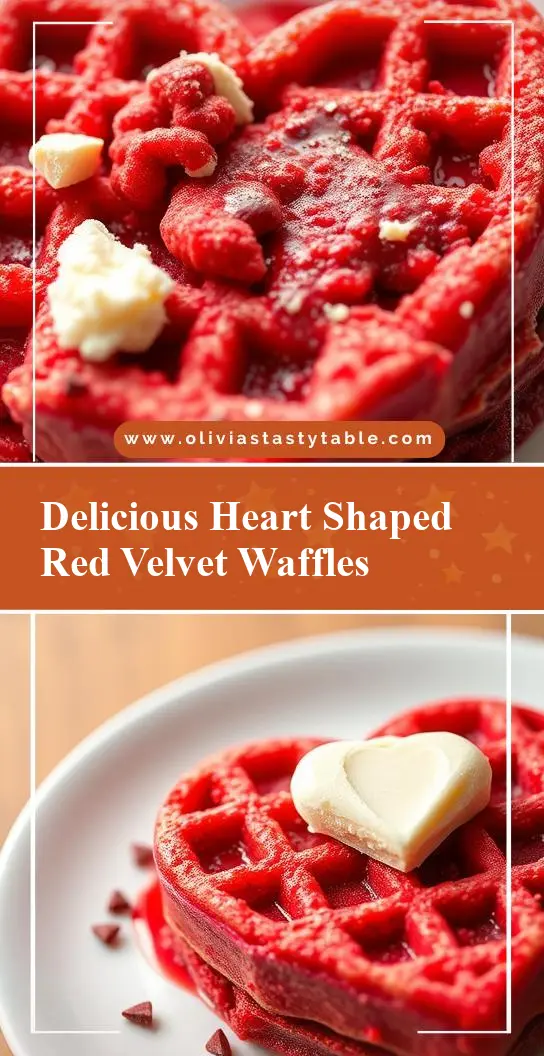
Imagine starting your day with a delicious, heart-shaped red velvet waffle that’s not only a treat to the taste buds but also a feast for the eyes. These waffles are made with everyday ingredients, are surprisingly easy to prepare, and offer a burst of flavor and creativity to your breakfast or brunch. The combination of the deep red color from the red velvet and the heart shape makes them perfect for special occasions like Valentine’s Day or simply for adding a touch of love to any morning. In this recipe, we’ll guide you through the simple steps to create these mouthwatering waffles, ensuring that each bite is as delicious as it is visually appealing.
Why This Works
- Flavor balance and ingredient accessibility: The recipe combines classic waffle ingredients with the distinctive taste of red velvet, making it both familiar and exciting. All the ingredients are easily found in most supermarkets, adding to the recipe’s appeal.
- Ease of preparation: Despite the impressive presentation, these waffles are straightforward to make. The batter comes together quickly, and cooking the waffles in a heart-shaped waffle iron is as easy as making regular waffles.
- Impressive results with minimal effort: The heart shape and vibrant red color of the waffles make them look like they came from a professional bakery, but they require minimal extra effort beyond making regular waffles.
Key Ingredients
To make these delicious heart-shaped red velvet waffles, you’ll need the following main ingredients: all-purpose flour, granulated sugar, baking powder, salt, unsalted butter melted, large eggs, buttermilk, red food coloring, cocoa powder, and vanilla extract. For practical substitutions, you can use regular milk with a tablespoon of white vinegar or lemon juice as a replacement for buttermilk, and adjust the amount of red food coloring to achieve your desired shade of red. Cocoa powder gives the waffles their distinctive red velvet flavor, so it’s essential not to skip this ingredient.
Instructions
- Step 1: Begin by preheating your waffle iron according to the manufacturer’s instructions. In a medium bowl, whisk together flour, sugar, baking powder, and salt. In a large bowl, whisk together melted butter, eggs, buttermilk, red food coloring, cocoa powder, and vanilla extract until well combined.
- Step 2: Add the dry ingredients to the wet ingredients and stir until just combined. The batter should still be slightly lumpy. Do not overmix.
- Step 3: Pour approximately 1/4 cup of the batter onto the center of the preheated heart-shaped waffle iron. Cook for 3-5 minutes, or until the waffles are crispy and golden brown. Repeat with the remaining batter, greasing the waffle iron with cooking spray as needed to prevent sticking.
- Step 4: Once the waffles are cooked, serve them hot with your favorite toppings, such as whipped cream, fresh fruits, maple syrup, or powdered sugar. For an extra-special treat, you can also top them with cream cheese frosting or chopped nuts.
Handy Tips
- Make sure to not overmix the batter, as this can lead to dense waffles. Stop mixing as soon as the ingredients are combined.
- For an extra crispy waffle, make sure the waffle iron is hot before adding the batter. You can test the heat by flicking a few drops of water onto the iron; if they sizzle and evaporate quickly, the iron is ready.
- Don’t open the waffle iron too soon, as this can cause the waffles to break. Wait for the steam to stop coming out, which is usually a sign that the waffles are cooked through.
Heat Control
Heat control is crucial when making waffles. The ideal temperature for cooking waffles is usually medium to medium-high heat. The timing will depend on your waffle iron, but generally, it takes about 3-5 minutes to cook a waffle. Signs of doneness include the waffles being crispy and golden brown, and the steam stopping to come out of the waffle iron. Always refer to your waffle iron’s manual for specific temperature and timing guidelines, as these can vary between models.
Crunch Factor
The crunch factor of your waffles can be adjusted based on your preference. For a crisper waffle, cook them for a minute or two longer, but keep an eye on them to prevent burning. The key to achieving the perfect crunch is to not overcrowd the waffle iron and to ensure it’s hot before adding the batter. A light greasing of the waffle iron with cooking spray can also help achieve a crispy exterior.
Pro Kitchen Tricks
- For easier cleanup, mix your wet and dry ingredients in separate bowls before combining them, and consider using a silicone spatula for scraping the sides of the bowls.
- To keep your waffles warm while cooking the rest, place them on a baking sheet in a low-temperature oven (around 200°F). This will keep them warm and crispy without continuing to cook them.
- Experiment with different flavors by adding various extracts (like almond or coconut) to the batter for unique twists on the classic red velvet taste.
Storage Tips
- Leftover waffles can be stored in an airtight container at room temperature for up to 2 days. For longer storage, consider freezing them. Place the cooled waffles in a single layer in a freezer-safe bag or container and store in the freezer for up to 2 months.
- To reheat frozen waffles, simply toast them in a toaster or toast them in a conventional oven at 350°F for a few minutes until crispy and warm.
- The best containers for storing waffles are those that are airtight to keep them fresh. You can also wrap individual waffles in plastic wrap or aluminum foil for easy grab-and-go breakfasts or snacks.
Gift Packaging Ideas
If you’re considering gifting these delicious heart-shaped red velvet waffles, there are several packaging ideas you can explore. One of the most appealing ways is to package them in decorative tins or jars, layered with parchment paper to prevent sticking. You can also wrap individual waffles in cellophane bags and tie them with a ribbon, adding a personalized gift tag. For a more rustic look, consider using a wooden crate or a basket lined with a checkered cloth, filled with waffles and a few fresh flowers for a charming touch.
Flavor Variations
- 🌟 Different spices: Try adding a pinch of cinnamon, nutmeg, or cardamom to the batter for a unique twist on the traditional flavor.
- 🌟 Creative toppings: Instead of the usual whipped cream or maple syrup, top your waffles with fresh fruits, caramel sauce, or even a scoop of ice cream for a decadent treat.
- 🌟 Ingredient swaps: For a gluten-free version, substitute the all-purpose flour with a gluten-free flour blend. You can also use almond milk or another non-dairy milk for a dairy-free option.
Troubleshooting
- Texture problems: If your waffles turn out too dense, it might be because the batter was overmixed. Try mixing the ingredients just until they come together for a lighter texture.
- Ingredient replacements: If you don’t have buttermilk, you can make a substitute by mixing 1 cup of milk with 1 tablespoon of white vinegar or lemon juice. Let it sit for 5-10 minutes before using.
- Over/undercooking signs: Keep an eye on your waffles while they’re cooking. If they’re undercooked, they’ll be pale and soft. If they’re overcooked, they’ll be dark brown or even burnt. Adjust the cooking time as needed based on your waffle iron’s performance.
FAQs
- Can I freeze it? Yes, you can freeze the waffles for up to 2 months. Simply place them in a freezer-safe bag or container and thaw or reheat as needed.
- Is it gluten-free? The original recipe is not gluten-free, but you can make it gluten-free by substituting the all-purpose flour with a gluten-free flour blend.
- Can I double the recipe? Yes, you can easily double or even triple the recipe if you’re serving a larger crowd. Just ensure you have enough batter for each waffle and adjust the cooking time if necessary.
Conclusion
Making delicious heart-shaped red velvet waffles is a fun and rewarding process that yields a treat that’s both delicious and visually stunning. With these simple steps and handy tips, you’ll be well on your way to creating a breakfast or brunch dish that will impress your family and friends. Don’t be afraid to experiment with different flavors and toppings to make the recipe your own, and consider sharing your creations on social media to inspire others. Whether it’s a special occasion or just a regular day, these waffles are sure to bring a smile to everyone’s face.