Craving something rich and indulgent? This decadent salted caramel chocolate cake is a homemade family favorite made easy with simple ingredients and a quick cooking method, perfect for weeknight dessert – Save for later
Decadent Salted Caramel Chocolate Cake Recipe for Dessert Lovers 🍰
Introduction
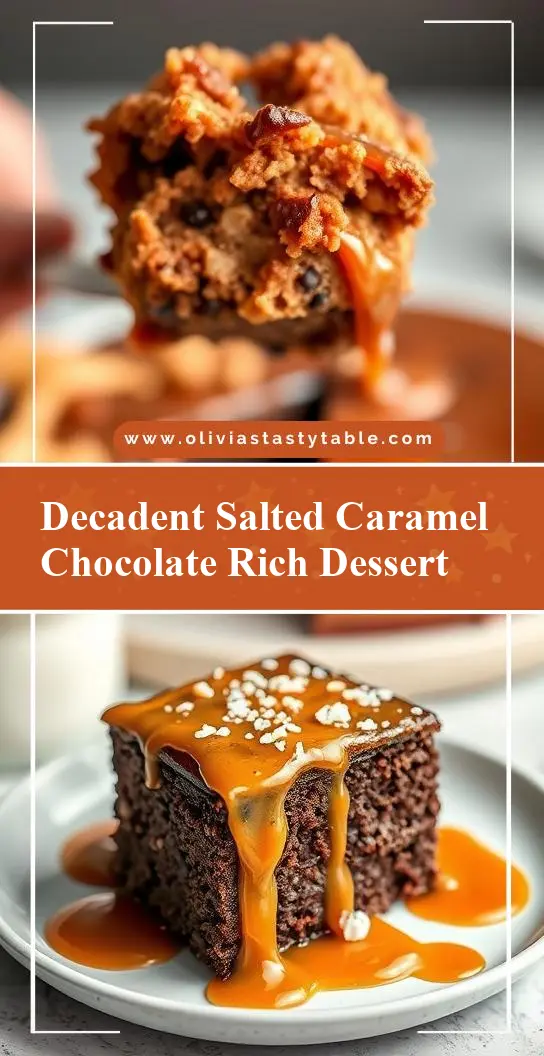
Indulge in the rich flavors of our decadent salted caramel chocolate cake, a masterpiece that combines the deep, velvety smoothness of chocolate with the sweet and salty tang of caramel. This cake is a symphony of textures and tastes, perfect for dessert lovers looking to elevate their celebrations or simply satisfy their sweet tooth. The best part? It’s surprisingly easy to make, using everyday ingredients that you might already have in your pantry. With a little creativity, you can turn a simple gathering into an unforgettable experience, all thanks to this show-stopping dessert.
Why This Works
- Flavor balance and ingredient accessibility: The combination of dark chocolate, salted caramel, and a hint of sea salt creates a perfectly balanced flavor profile that is both decadent and refined. Plus, the ingredients are easily found in most supermarkets, making this recipe accessible to anyone.
- Ease of preparation: Despite its impressive appearance, this cake is relatively simple to prepare. The steps are straightforward, and with some basic kitchen equipment, you can have it ready in no time.
- Impressive results with minimal effort: The salted caramel chocolate cake is sure to impress your guests with its moist, fluffy texture and the gooey, salty caramel sauce drizzled on top. The effort you put into making it will be well worth the oohs and aahs you’ll receive when you present it.
Key Ingredients
To make this decadent dessert, you’ll need a few key ingredients. For the cake, you’ll need all-purpose flour, granulated sugar, unsweetened cocoa powder, baking powder, salt, large eggs, whole milk at room temperature, and vegetable oil. For the salted caramel sauce, you’ll need heavy cream, granulated sugar, unsalted butter, flaky sea salt, and vanilla extract. If you’re looking for substitutions, you can use almond milk instead of whole milk for a dairy-free version, or use dark brown sugar instead of granulated sugar for a deeper flavor. The quality of the chocolate you use will greatly impact the flavor of your cake, so opt for the best dark cocoa powder you can find.
Instructions
- Step 1: Begin by preheating your oven to 350°F (175°C). Prepare two 9-inch round cake pans by greasing them and lining the bottoms with parchment paper. In a medium bowl, whisk together flour, sugar, cocoa powder, baking powder, and salt. In a large bowl, whisk together eggs, milk, and oil. Add the dry ingredients to the wet ingredients and whisk until just combined.
- Step 2: Divide the batter evenly between the prepared pans and smooth the tops. Bake for 30-35 minutes or until a toothpick inserted into the center comes out clean. Let the cakes cool in the pans for 10 minutes before transferring them to a wire rack to cool completely.
- Step 3: To make the salted caramel sauce, combine heavy cream, granulated sugar, and unsalted butter in a small saucepan. Place the saucepan over medium heat and cook, stirring occasionally, until the sugar has dissolved. Bring the mixture to a boil, then reduce the heat to medium-low and simmer for about 5-7 minutes or until the caramel turns a deep amber color. Remove from heat and stir in flaky sea salt and vanilla extract. Let the sauce cool slightly before using it.
- Step 4: To assemble the cake, place one of the cooled cake layers on a serving plate. Drizzle a generous amount of the salted caramel sauce over the top of the cake. Place the second cake layer on top and drizzle with more caramel sauce. You can also sprinkle some flaky sea salt on top for extra flavor and texture.
Handy Tips
- Make sure to not overmix the batter, as this can result in a dense cake. Stop whisking as soon as the ingredients are combined.
- For a more intense caramel flavor, you can cook the caramel sauce for a few minutes longer, but be careful not to burn it.
- If you find that your caramel sauce is too thick, you can thin it out with a little bit of heavy cream. If it’s too thin, you can simmer it for a few more minutes to reduce it.
Heat Control
When making the salted caramel sauce, it’s crucial to control the heat to achieve the perfect caramelization. Start with medium heat to dissolve the sugar, then reduce the heat to medium-low to prevent the caramel from burning. You’ll know the caramel is ready when it turns a deep amber color and has a rich, caramel aroma.
Crunch Factor
The crunch factor in this dessert comes from the flaky sea salt sprinkled on top of the cake. The sea salt adds a nice textural element and a burst of salty flavor to balance out the sweetness of the chocolate and caramel. If you prefer a crunchier topping, you can also sprinkle some chopped nuts or chocolate chips on top of the cake.
Pro Kitchen Tricks
- To ensure that your cakes are evenly baked, rotate the pans halfway through the baking time.
- For a moist and fluffy cake, make sure to not overbake it. Check the cakes frequently towards the end of the baking time, and remove them from the oven as soon as a toothpick inserted into the center comes out clean.
- To prevent the caramel sauce from sticking to the saucepan, make sure to stir it frequently and use a heavy-bottomed saucepan that distributes heat evenly.
Storage Tips
- The cake can be stored at room temperature for up to 3 days. Make sure to cover it tightly with plastic wrap or aluminum foil to prevent it from drying out.
- The salted caramel sauce can be stored in an airtight container in the refrigerator for up to 2 weeks. Reheat it gently over low heat before using.
- For longer storage, you can freeze the cake for up to 2 months. Wrap it tightly in plastic wrap or aluminum foil and place it in a freezer-safe bag. Thaw it overnight in the refrigerator before serving.
Gift Packaging Ideas
This decadent salted caramel chocolate cake makes a wonderful gift for any occasion. To package it as a gift, place the cake on a decorative plate or cake stand and drizzle it with additional caramel sauce. You can then wrap the plate or cake stand with plastic wrap or aluminum foil and tie it with a ribbon. Alternatively, you can place slices of the cake in cute jars or containers and tie them with a ribbon for a more rustic and charming presentation.
Flavor Variations
- 🌟 Different spices: Try adding a pinch of cinnamon, nutmeg, or cayenne pepper to the cake batter for a unique flavor twist.
- 🌟 Creative toppings: Instead of using flaky sea salt, try sprinkling chopped nuts, chocolate chips, or shredded coconut on top of the cake for added texture and flavor.
- 🌟 Ingredient swaps: For a gluten-free version, try substituting the all-purpose flour with almond flour or coconut flour. For a dairy-free version, try using almond milk or coconut milk instead of whole milk.
Troubleshooting
- Texture problems: If your cake turns out too dense, it may be due to overmixing the batter. Try to mix the ingredients just until they’re combined, and stop whisking as soon as you see a uniform batter.
- Ingredient replacements: If you don’t have unsalted butter, you can use salted butter instead. Just omit the additional salt called for in the recipe.
- Over/undercooking signs: If your cake is overcooked, it may be dry and crumbly. If it’s undercooked, it may be raw and soggy in the center. Check the cakes frequently towards the end of the baking time, and remove them from the oven as soon as a toothpick inserted into the center comes out clean.
FAQs
- Can I freeze it? Yes, you can freeze the cake for up to 2 months. Wrap it tightly in plastic wrap or aluminum foil and place it in a freezer-safe bag. Thaw it overnight in the refrigerator before serving.
- Is it gluten-free? No, this recipe uses all-purpose flour, which contains gluten. However, you can try substituting the flour with almond flour or coconut flour for a gluten-free version.
- Can I double the recipe? Yes, you can double the recipe to make a larger cake. Just keep in mind that you may need to adjust the baking time accordingly. Check the cakes frequently towards the end of the baking time, and remove them from the oven as soon as a toothpick inserted into the center comes out clean.
Conclusion
This decadent salted caramel chocolate cake is a game-changer for any dessert lover. With its rich, velvety chocolate and gooey, salty caramel sauce, it’s sure to impress your friends and family. Don’t be intimidated by the recipe – it’s easier than you think, and the results are well worth the effort. So go ahead, give it a try, and enjoy the oohs and aahs as you present this stunning dessert. Happy baking!