Craving a rich dessert? This easy peanut butter cup dump cake is a quick homemade treat made with peanut butter and chocolate, perfect for a weeknight dinner. Save for later and indulge in this family favorite recipe tonight.
Decadent Peanut Butter Cup Dump Cake Recipe
Introduction
Imagine a rich, velvety dessert that combines the deep flavors of chocolate and peanut butter, all in one effortless package. The Decadent Peanut Butter Cup Dump Cake Recipe is your answer to a quick, indulgent treat that’s sure to impress. With minimal preparation and using everyday ingredients, this recipe is perfect for those looking to satisfy their sweet tooth without spending hours in the kitchen. The combination of peanut butter cups, moist cake, and the simplicity of a dump cake makes this dessert not only delicious but also incredibly easy to make.
Why This Works
- Flavor balance and ingredient accessibility: The recipe strikes a perfect balance between the richness of peanut butter and chocolate, using ingredients that are readily available in most supermarkets.
- Ease of preparation: The dump cake method eliminates the need for precise measurements and mixing, making it a stress-free baking experience.
- Impressive results with minimal effort: Despite its simplicity, the Decadent Peanut Butter Cup Dump Cake presents beautifully and tastes like a dessert from a high-end bakery.
Key Ingredients
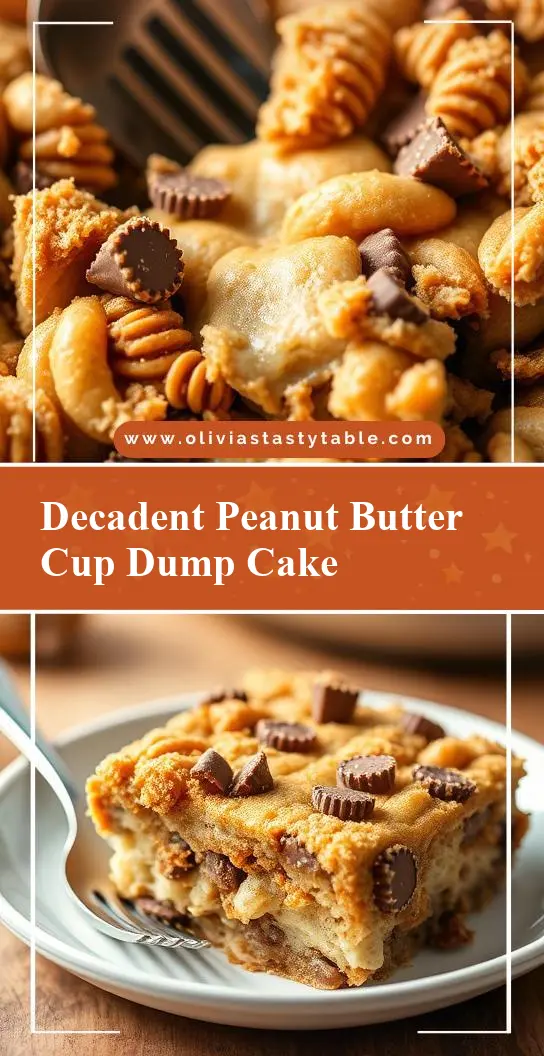
The main ingredients for this recipe include a box of yellow cake mix, peanut butter cups, evaporated milk, melted butter, and a handful of chocolate chips. For those looking for substitutions, almond milk can replace evaporated milk, and dark chocolate chips can add a deeper flavor profile. The peanut butter cups are the star of the show, providing pockets of creamy peanut butter throughout the cake. If you’re feeling adventurous, you could also experiment with different types of chocolate or nuts to add unique flavors to your dump cake.
Instructions
- Step 1: Begin by preheating your oven to 350°F (175°C). While that’s warming up, chop your peanut butter cups into halves or quarters, depending on your desired level of peanut butter distribution throughout the cake.
- Step 2: In a large bowl, mix together the melted butter, evaporated milk, and the contents of the yellow cake! mix. Stir until the batter is smooth and there are no lumps. Then, fold in your chopped peanut butter cups and chocolate chips.
- Step 3: Pour the cake batter into a 9×13 inch baking dish. If you’re using any additional toppings like extra peanut butter cups or chocolate shavings, now is the time to add them on top of the batter.
- Step 4: Place the baking dish in the oven and bake for about 35-40 minutes, or until a toothpick inserted into the center of the cake comes out clean. Remove the cake from the oven and let it cool for a few minutes before serving. You can serve it warm, topped with vanilla ice cream or whipped cream for an extra-special treat.
Handy Tips
- Make sure to not overmix the batter, as this can lead to a dense cake. Stop mixing once the ingredients are just combined.
- Don’t overcrowd the baking dish with too many peanut butter cups on top, as this can make the cake difficult to cut and serve.
- Consider using a water bath for the baking dish to ensure the cake cooks evenly and prevent the edges from becoming too dry.
Heat Control
The ideal temperature for baking this cake is 350°F (175°C), and the baking time should be around 35-40 minutes. However, these times can vary depending on your oven, so keep an eye on the cake after 30 minutes and check it every 5 minutes thereafter until it’s cooked through. A toothpick inserted into the center should come out clean, and the top should be lightly golden brown.
Crunch Factor
The crunch factor in this dessert comes from the peanut butter cups and any additional nuts or chocolate bits you might add on top. To achieve the perfect balance of crunch and softness, don’t overbake the cake, and consider adding some crunchy elements like chopped peanuts or peanut butter cookies on top of the cake before baking.
Pro Kitchen Tricks
- For an extra moist cake, try adding an extra tablespoon or two of evaporated milk to the batter.
- Experiment with different types of cake mix, like chocolate or red velvet, to create unique flavor combinations with the peanut butter cups.
- Use high-quality chocolate for the best flavor. While the recipe calls for semi-sweet chocolate chips, feel free to substitute with dark, milk, or white chocolate for different flavor profiles.
Storage Tips
- Leftover cake can be stored in an airtight container at room temperature for up to 3 days or wrapped tightly and frozen for up to 2 months.
- To reheat, simply thaw the cake overnight in the fridge or reheat individual slices in the microwave for 20-30 seconds.
- Consider using a vacuum sealer to keep the cake fresh for longer and to prevent it from becoming too dry.
Gift Packaging Ideas
This cake makes a wonderful gift, especially for peanut butter and chocolate lovers. Consider packaging individual slices in decorative jars or containers, topped with a ribbon and a gift tag. You could also wrap the entire cake in plastic wrap or aluminum foil and decorate it with a bow. For a more rustic look, place the cake in a wooden crate or a vintage tin and add some greenery like eucalyptus or ferns around it.
Flavor Variations
- 🌟 Different spices: Add a pinch of sea salt or a teaspoon of vanilla extract to the batter for added depth of flavor.
- 🌟 Creative toppings: Experiment with different types of nuts, like walnuts or pecans, or add some dried fruit like cranberries or cherries on top of the cake before baking.
- 🌟 Ingredient swaps: Substitute the peanut butter cups with another candy, like M&M’s or chopped candy bars, for a fun twist on the recipe.
Troubleshooting
- Texture problems: If the cake turns out too dry, it might be overbaked. Try reducing the baking time or adding more milk to the batter. If it’s too wet, it might not have been baked long enough.
- Ingredient replacements: If you don’t have evaporated milk, you can substitute it with regular milk or a non-dairy milk alternative. However, keep in mind that this might affect the texture and flavor of the cake slightly.
- Over/undercooking signs: Keep an eye on the cake while it’s baking, and check it frequently towards the end of the baking time. A toothpick inserted into the center should come out clean, and the top should be lightly golden brown.
FAQs
- Can I freeze it? Yes, you can freeze the cake for up to 2 months. Simply wrap it tightly in plastic wrap or aluminum foil and place it in a freezer-safe bag.
- Is it gluten-free? The traditional recipe uses a yellow cake mix that contains gluten. However, you can experiment with gluten-free cake mixes for a gluten-free version.
- Can I double the recipe? Yes, you can double the recipe to make a larger cake. Just keep in mind that you’ll need to adjust the baking time accordingly.
Conclusion
The Decadent Peanut Butter Cup Dump Cake Recipe is a game-changer for anyone looking for a quick, delicious dessert that’s sure to impress. With its minimal ingredients, easy preparation, and rich flavor profile, this cake is perfect for special occasions or everyday treats. Don’t be afraid to experiment with different ingredients and flavor combinations to make the recipe your own, and enjoy the ooohs and ahhhs from your family and friends when you serve it up.