Are you ready for a show-stopping dessert? This easy homemade cake recipe is a Costco copycat made with moist layers and rich frosting, perfect for a quick family favorite treat, save for later
Decadent Costco Copycat Cake Recipe
Introduction
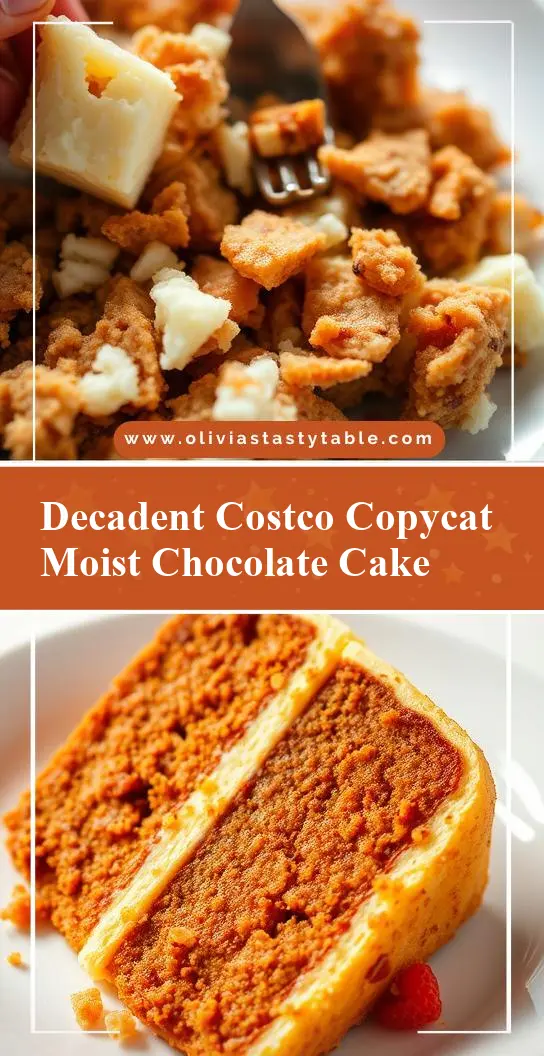
This Decadent Costco Copycat Cake Recipe is a game-changer for any cake lover, offering an unbeatable combination of ease, flavor, and creativity, all using everyday ingredients that you might already have in your pantry. The best part? It tastes just like the famous Costco cakes but can be made in the comfort of your own home. Imagine the joy of indulging in a moist, decadent cake without the need for a special trip to the store. This recipe is perfect for birthdays, anniversaries, or just a sweet treat to brighten up your day. With its rich flavors and impressive presentation, it’s sure to become a favorite among family and friends.
Why This Works
- Flavor balance and ingredient accessibility: The secret to this cake’s success lies in its perfectly balanced flavors, achieved through a combination of common ingredients like butter, sugar, eggs, and flour, making it accessible to bakers of all levels.
- Ease of preparation: Despite its decadent nature, this cake is surprisingly easy to prepare. The instructions are straightforward, and the cake can be ready in no time, perfect for last-minute celebrations or spontaneous dessert cravings.
- Impressive results with minimal effort: What’s most appealing about this recipe is the impressive results it yields with minimal effort. The cake turns out moist, flavorful, and visually stunning, sure to impress anyone who tries it.
Key Ingredients
The main ingredients in this Decadent Costco Copycat Cake Recipe include 2 cups of all-purpose flour, 1 teaspoon of baking powder, 1 teaspoon of salt, 1 cup of unsalted butter softened, 1 3/4 cups of granulated sugar, 3 large eggs at room temperature, 2 teaspoons of pure vanilla extract, and 1 cup of whole milk at room temperature. For the buttercream frosting, you’ll need 2 cups of unsalted butter softened, 4 cups of powdered sugar, 1 teaspoon of salt, and 2 teaspoons of vanilla extract. Practical substitutions can be made for some ingredients, such as using almond milk instead of whole milk for a dairy-free version or replacing granulated sugar with brown sugar for a slightly different flavor profile.
Instructions
- Step 1: Begin by preheating your oven to 350°F (175°C). Prepare two 9-inch round cake pans by greasing them and lining the bottoms with parchment paper. In a medium bowl, whisk together flour, baking powder, and salt. Set aside.
- Step 2: In a large mixing bowl, use an electric mixer to beat the butter until creamy, about 2 minutes. Gradually add the sugar and continue beating until light and fluffy, about 3 minutes. Beat in the eggs one at a time, allowing each egg to fully incorporate before adding the next. Beat in the vanilla extract.
- Step 3: With the mixer on low speed, gradually add the flour mixture to the wet ingredients in three parts, alternating with the milk, beginning and ending with the flour mixture. Beat just until combined.
- Step 4: Divide the batter evenly between the prepared pans and smooth the tops. Bake for 30-35 minutes or until a toothpick inserted into the center comes out clean. Allow the cakes to cool in the pans for 10 minutes before transferring them to a wire rack to cool completely. Once the cakes are cool, you can frost them with the buttercream frosting. To make the frosting, beat the softened butter in a large bowl until creamy. Gradually add the powdered sugar, beating until smooth and creamy. Beat in the salt, vanilla extract, and enough milk to achieve the desired consistency.
Handy Tips
- Ensure all your ingredients are at room temperature for a better texture and easier mixing. Don’t overmix the batter, as this can result in a dense cake. For a more intense flavor, you can add a teaspoon of espresso powder to the batter. If you find the buttercream frosting too sweet, you can reduce the amount of powdered sugar to your taste.
Heat Control
When baking the cake, it’s crucial to maintain the ideal oven temperature of 350°F (175°C) to ensure the cake cooks evenly and doesn’t burn. The cakes are done when a toothpick inserted into the center comes out clean, and they should be lightly golden brown on top. Avoid overbaking, as this can dry out the cake.
Crunch Factor
This cake is designed to be moist and tender, not crunchy. To achieve this texture, make sure not to overbake the cake and keep it away from drafts when it’s cooling. If you’re looking for a crunchy element, you could top the cake with chopped nuts or chocolate shavings after frosting.
Pro Kitchen Tricks
- To ensure your cakes are perfectly level, bake them for the recommended time and then check them every minute thereafter until they’re done. This prevents overbaking. For an extra moist cake, try brushing the tops with simple syrup after they’ve cooled. To make the frosting more stable, especially in warmer temperatures, you can add a tablespoon or two of corn syrup.
Storage Tips
- The cake can be stored at room temperature for up to 3 days. It’s best to keep it in an airtight container to maintain freshness. For longer storage, you can refrigerate the cake for up to 5 days or freeze it for up to 2 months. When freezing, it’s best to freeze the cake layers separately before frosting and assembling. To reheat, thaw the cake overnight in the refrigerator and bring it to room temperature before serving.
Gift Packaging Ideas
This cake makes a wonderful gift for friends and family, especially when beautifully packaged. Consider placing the cake on a decorative cake stand or in a large gift box lined with parchment paper. You can also add a personal touch with a handwritten note or a small bouquet of flowers on top. For a more rustic look, wrap the cake in a cheesecloth and tie it with a ribbon.
Flavor Variations
- 🌟 Different spices: Try adding a pinch of cinnamon, nutmeg, or cardamom to the batter for a unique flavor twist.
- 🌟 Creative toppings: Instead of the traditional buttercream frosting, top your cake with whipped cream, fresh fruits, or a drizzle of chocolate glaze.
- 🌟 Ingredient swaps: For a gluten-free version, replace the all-purpose flour with a gluten-free flour mix. You can also use different types of milk, such as almond or soy milk, for a non-dairy cake.
Troubleshooting
- Texture problems: If your cake turns out too dense, it might be due to overmixing the batter. Try mixing the ingredients just until they come together for a lighter texture.
- Ingredient replacements: If you’re missing an ingredient, there are often substitutions you can make. For example, if you don’t have buttermilk, you can make a substitute by mixing milk with vinegar or lemon juice.
- Over/undercooking signs: Keep an eye on your cake while it’s baking. If the top starts to brown too quickly, cover it with foil. If the cake is undercooked, it will be wet and soggy in the center.
FAQs
- Can I freeze it? Yes, you can freeze the cake for up to 2 months. It’s best to freeze the cake layers separately before frosting and assembling.
- Is it gluten-free? The original recipe is not gluten-free, but you can make a gluten-free version by replacing the all-purpose flour with a gluten-free flour mix.
- Can I double the recipe? Yes, you can double the recipe to make a larger cake. Just keep in mind that you’ll need to adjust the baking time accordingly.
Conclusion
This Decadent Costco Copycat Cake Recipe is a must-try for anyone looking to impress their family and friends with a delicious homemade dessert. With its easy-to-follow instructions, accessible ingredients, and stunning results, it’s the perfect recipe for bakers of all levels. Feel free to experiment with different flavors and toppings to make the cake your own, and don’t hesitate to reach out if you have any questions or need further assistance. Happy baking, and enjoy every decadent bite of your homemade masterpiece!