Want a quick weeknight dinner solution? Try these easy crispy white tuna balls made with tender tuna and crunchy panko breadcrumbs, a homemade family favorite, save for later
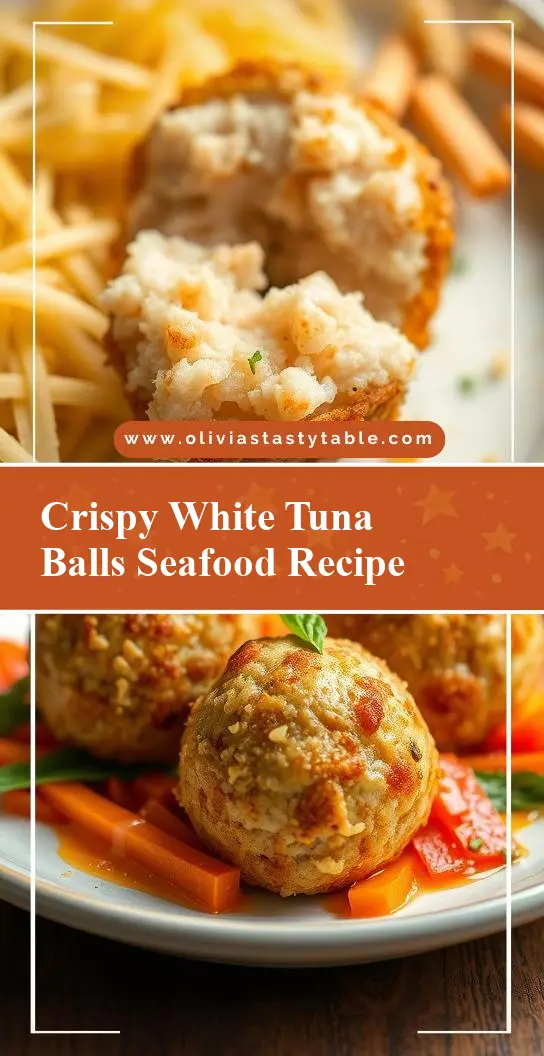
Crispy White Tuna Balls Recipe
Introduction
Imagine a dish that’s not only effortless to make but also bursts with flavor and presents beautifully – welcome to the world of Crispy White Tuna Balls. This recipe is a masterclass in simplicity and elegance, using everyday ingredients to create something truly special. Whether you’re a seasoned chef or a culinary newbie, this dish is sure to impress with its delicate balance of flavors and textures. The best part? It’s incredibly easy to make, requiring minimal preparation and cooking time. So, if you’re looking for a recipe that will elevate your mealtime without breaking a sweat, you’re in the right place.
Why This Works
- Flavor balance and ingredient accessibility: The combination of white tuna, breadcrumbs, and spices creates a harmonious balance of flavors that’s both refreshing and satisfying. Plus, all the ingredients are easily found in most supermarkets.
- Ease of preparation: This recipe requires minimal prep work, with most of the ingredients being mixed together in a bowl. It’s a great option for those short on time or new to cooking.
- Impressive results with minimal effort: Despite its simplicity, the Crispy White Tuna Balls recipe yields impressive results. The crispy exterior and tender interior are sure to wow your family and friends.
Key Ingredients
The star of the show is, of course, the white tuna. Look for high-quality canned white tuna that’s low in mercury and rich in protein. Other key ingredients include panko breadcrumbs, which provide a light and crispy texture, and a mix of spices that add depth and warmth to the dish. If you’re looking for substitutions, you can use whole wheat breadcrumbs for a nuttier flavor or swap out the white tuna for chicken or tofu for a different twist. Some other essential ingredients include olive oil, onions, garlic, and lemon juice, which all come together to create a bright and refreshing flavor profile.
Instructions
- Step 1: Begin by draining and flaking the white tuna into a large bowl. Add the finely chopped onion, minced garlic, and a squeeze of lemon juice, and mix until well combined.
- Step 2: In a separate bowl, mix together the panko breadcrumbs and a pinch of salt and pepper. Gradually add the breadcrumb mixture to the tuna mixture, stirring until everything is fully incorporated.
- Step 3: Using your hands, shape the mixture into small balls, about 1 1/2 inches in diameter. You should end up with around 20-25 balls.
- Step 4: Heat about 1/2 inch of olive oil in a large skillet over medium-high heat. When the oil is hot, add a few of the tuna balls (being careful not to overcrowd the skillet) and fry until they’re golden brown and crispy, about 3-4 minutes on each side. Repeat with the remaining tuna balls.
Handy Tips
- Make sure to handle the tuna mixture gently when shaping the balls, as you want to avoid compacting the ingredients too much. This will help the tuna balls stay light and airy.
- If you find that your tuna balls are falling apart in the oil, try adding a little more breadcrumb mixture to the tuna mixture and reshaping the balls.
- To avoid the tuna balls absorbing too much oil, be sure to not overcrowd the skillet and to not overcook them. You want them to be crispy on the outside and tender on the inside.
Heat Control
When frying the tuna balls, it’s essential to maintain the right temperature. You want the oil to be hot enough to crisp up the exterior quickly, but not so hot that it burns the tuna. Aim for a medium-high heat, around 350-375°F (175-190°C). Also, be sure to not overcook the tuna balls, as they can become dry and tough. You want them to be cooked through but still tender and flaky.
Crunch Factor
The crunch factor is what sets these tuna balls apart from other dishes. To achieve the perfect crunch, make sure to not overmix the tuna mixture, as this can make the tuna balls dense and heavy. Also, be sure to fry the tuna balls at the right temperature, as mentioned earlier. Finally, don’t be afraid to experiment with different coatings, such as grated Parmesan cheese or chopped nuts, to add extra texture and flavor to the tuna balls.
Pro Kitchen Tricks
- Use a thermometer to ensure the oil has reached the right temperature. This will help you achieve the perfect crunch and prevent the tuna balls from absorbing too much oil.
- Don’t overcrowd the skillet, as this can lower the oil temperature and result in greasy or undercooked tuna balls. Fry in batches if necessary.
- For an extra crispy coating, try chilling the shaped tuna balls in the refrigerator for 30 minutes before frying. This will help the coating set and create a crunchier exterior.
Storage Tips
- Once the tuna balls are fried and cooled, you can store them in an airtight container in the refrigerator for up to 24 hours.
- To reheat, simply place the tuna balls on a baking sheet lined with parchment paper and bake in a preheated oven at 350°F (175°C) for about 5-7 minutes, or until crispy and heated through.
- You can also freeze the tuna balls for up to 2 months. Simply place them on a baking sheet lined with parchment paper and freeze until solid, then transfer to a freezer-safe bag or container.
Gift Packaging Ideas
If you’re looking to give the Crispy White Tuna Balls as a gift, consider packaging them in a decorative tin or jar filled with paper towels to absorb any excess oil. You could also wrap them individually in plastic wrap or aluminum foil and place them in a gift basket filled with other gourmet goodies. Add a personalized touch with a handmade card or a sprinkle of fresh herbs, and you’ve got a unique and thoughtful gift that’s sure to impress.
Flavor Variations
- 🌟 Different spices: Try adding some diced jalapeños or red pepper flakes to the tuna mixture for a spicy kick, or some dried herbs like thyme or oregano for a more savory flavor.
- 🌟 Creative toppings: Once the tuna balls are fried and cooled, you can top them with a variety of ingredients, such as diced onions, capers, or chopped hard-boiled eggs.
- 🌟 Ingredient swaps: If you’re looking for a different protein source, you could try using chicken, turkey, or even tofu. Just be sure to adjust the seasoning and cooking time accordingly.
Troubleshooting
- Texture problems: If your tuna balls are falling apart or becoming too dense, try adjusting the amount of breadcrumb mixture or the cooking time.
- Ingredient replacements: If you don’t have panko breadcrumbs, you can try using regular breadcrumbs or even crushed crackers as a substitute.
- Over/undercooking signs: If your tuna balls are overcooked, they may become dry and tough. If they’re undercooked, they may be raw in the center. Be sure to cook them until they’re golden brown and crispy on the outside, and flaky and tender on the inside.
FAQs
- Can I freeze it? Yes, you can freeze the tuna balls for up to 2 months. Simply place them on a baking sheet lined with parchment paper and freeze until solid, then transfer to a freezer-safe bag or container.
- Is it gluten-free? The Crispy White Tuna Balls recipe is gluten-free, making it a great option for those with gluten intolerance or sensitivity. Just be sure to check the ingredients of the panko breadcrumbs and any other store-bought ingredients to ensure they are gluten-free.
- Can I double the recipe? Yes, you can easily double or triple the recipe if you’re feeding a large crowd. Just be sure to adjust the cooking time accordingly, as you may need to fry the tuna balls in batches to prevent overcrowding the skillet.
Conclusion
In conclusion, the Crispy White Tuna Balls recipe is a game-changer for anyone looking for a quick, easy, and impressive dish to add to their repertoire. With its delicate balance of flavors and textures, this recipe is sure to become a favorite in your household. So go ahead, get creative, and experiment with different ingredients and flavor combinations. And don’t forget to share your creations with friends and family – after all, food is meant to be enjoyed and shared with others. Happy cooking!