Need a quick dessert fix? Try these easy crispy strawberry cheesecake tacos made with fresh strawberries and a homemade cheesecake filling for a family favorite treat, save for later
Crispy Strawberry Cheesecake Tacos Recipe for Easy Dessert
Introduction
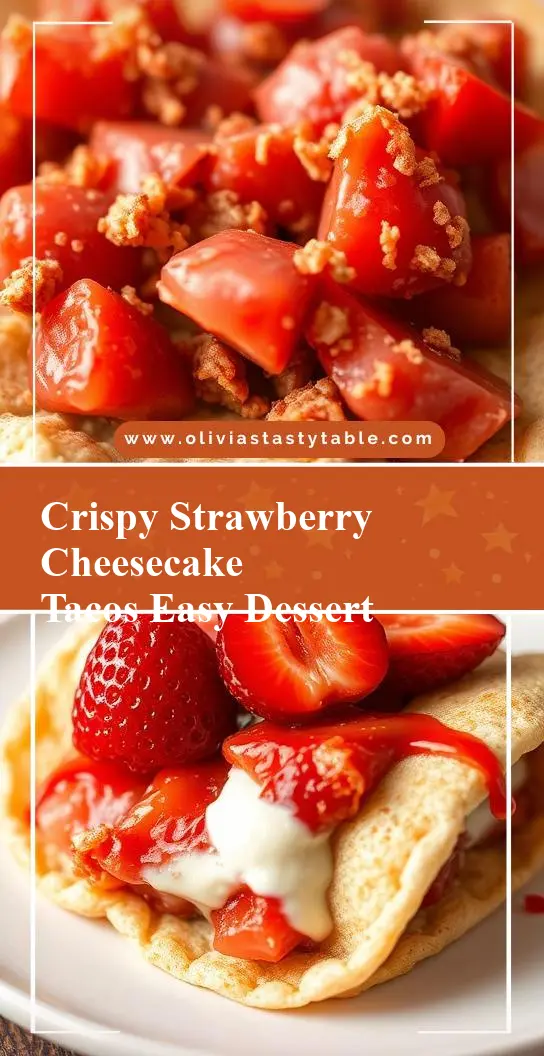
Imagine a dessert that combines the warmth of crispy taco shells with the cool, creamy delight of cheesecake and the sweet, juicy taste of fresh strawberries. This Crispy Strawberry Cheesecake Tacos recipe is an innovative, easy-to-make dessert that transforms everyday ingredients into an extraordinary treat. Perfect for dinner parties, family gatherings, or a simple evening dessert, this recipe showcases how creativity in the kitchen can lead to impressive results with minimal effort. By using accessible ingredients and straightforward preparation steps, anyone can become a master dessert chef and wow their friends and family with this unique dessert.
Why This Works
- Flavor balance and ingredient accessibility: The combination of crispy taco shells, creamy cheesecake filling, and sweet strawberries provides a perfect balance of flavors and textures. Moreover, the ingredients are easily found in most supermarkets, making this dessert accessible to everyone.
- Ease of preparation: Despite its impressive presentation, this dessert is surprisingly easy to prepare. The steps are straightforward, and each component can be prepared separately, allowing for flexibility in preparation time.
- Impressive results with minimal effort: The unique presentation of cheesecake in taco shells, topped with fresh strawberries, makes for an impressive dessert that belies the simplicity of its preparation. This recipe is perfect for those looking to make a statement without spending hours in the kitchen.
Key Ingredients
The main ingredients for this recipe include taco shells, cream cheese, granulated sugar, large eggs, vanilla extract, and fresh strawberries. For the cheesecake filling, you will need to soften the cream cheese and then mix it with sugar, eggs, and vanilla extract until smooth. The taco shells can be store-bought or homemade, depending on your preference. Fresh strawberries are a must for the best flavor and texture. Practical substitutions can be made for the vanilla extract, such as using almond extract for a different flavor profile, and for those with dietary restrictions, sugar substitutes can be used in place of granulated sugar.
Instructions
- Step 1: Begin by preparing your cheesecake filling. Soften the cream cheese and mix it with granulated sugar until well combined. Add the eggs one at a time, mixing well after each addition, followed by the vanilla extract. This step can be done ahead of time, and the mixture can be refrigerated until ready to use.
- Step 2: Prepare your taco shells according to the package instructions if using store-bought, or follow your preferred method for making homemade taco shells. The key is to achieve a crispy shell that can hold the cheesecake filling without becoming too brittle or breaking apart.
- Step 3: Fill the cooled taco shells with the cheesecake mixture, leaving a small border at the top of each shell to allow for even baking and to prevent the filling from overflowing. Place the filled taco shells on a baking sheet lined with parchment paper and bake in a preheated oven until the cheesecake is set and the shells are crispy.
- Step 4: While the cheesecake tacos are baking, prepare your strawberry topping. Slice the fresh strawberries and mix them with a bit of sugar to taste. Once the cheesecake tacos are done, allow them to cool slightly before topping each taco with the strawberry mixture. This step adds natural sweetness and a burst of fresh flavor to each bite.
Handy Tips
- When baking the cheesecake-filled taco shells, keep an eye on them to ensure the shells do not become too dark or the cheesecake overcooked. The ideal cheesecake should be set but still slightly jiggly in the center, and the taco shells should be golden brown and crispy.
- For an extra crunchy texture, you can sprinkle a bit of granola or chopped nuts over the cheesecake filling before baking.
- Avoid overfilling the taco shells, as this can lead to a messy dessert that is difficult to serve. It’s better to have a bit of the shell visible around the filling to maintain the structural integrity of the dessert.
Heat Control
Heat control is crucial in this recipe, especially when baking the cheesecake-filled taco shells. The ideal temperature for baking is around 375°F (190°C), and the baking time will depend on the size of your taco shells and how full they are. Generally, baking for 15-20 minutes should suffice, but it’s essential to check on them frequently to avoid overcooking. The cheesecake is done when it is set and slightly puffed, and the taco shells are crispy and golden brown.
Crunch Factor
Achieving the right crunch factor in this dessert is key to its success. The taco shells should be crispy, providing a satisfying crunch when bitten into, while the cheesecake filling should be creamy and smooth. To enhance the crunch factor, you can also top the cheesecake tacos with additional crunchy elements like chopped nuts, granola, or even crispy cookie crumbs before serving.
Pro Kitchen Tricks
- One expert tip for achieving perfectly crispy taco shells is to bake them in the oven for a few minutes before filling them with cheesecake. This step, known as “pre-crisping,” ensures that the shells are crunchy and less likely to become soggy when filled and baked again.
- For a shortcut in preparation, consider using a store-bought cheesecake mix and preparing it according to the package instructions. This can significantly reduce the preparation time without sacrificing much in terms of flavor and quality.
- Cleanup can be made easier by lining the baking sheet with parchment paper before baking the cheesecake tacos. This prevents the cheesecake from sticking to the pan and makes washing up much simpler.
Storage Tips
- Leftover cheesecake tacos can be stored in an airtight container in the refrigerator for up to 3 days. It’s best to store the components separately (cheesecake filling, taco shells, and strawberry topping) and assemble just before serving to maintain freshness and texture.
- For reheating, place the assembled cheesecake tacos in the oven at a low temperature (around 300°F or 150°C) for a few minutes until the cheesecake is warmed through and the shells are crispy again.
- The best containers for storing cheesecake tacos are those that are airtight and can keep the components fresh. Consider using glass containers with tight-fitting lids or ziplock bags for the strawberry topping.
Gift Packaging Ideas
If you’re considering gifting these cheesecake tacos, presentation is everything. One idea is to place a few tacos in a decorative gift box or a mason jar, layered with fresh strawberries and a sprinkle of sugar on top. You can also wrap individual tacos in cellophane bags and tie them with a ribbon, adding a gift tag with the ingredients used or a personal message. For a more rustic look, consider using paper cones or bags and filling them with the cheesecake tacos, topping with fresh strawberries and a drizzle of chocolate sauce for added elegance.
Flavor Variations
- 🌟 Different spices: Experiment with adding different spices to the cheesecake filling, such as cinnamon, nutmeg, or cardamom, to give it a unique flavor profile.
- 🌟 Creative toppings: Besides strawberries, consider using other fruits like blueberries, raspberries, or even caramelized bananas as toppings. You can also add a drizzle of honey, chocolate sauce, or caramel for added sweetness.
- 🌟 Ingredient swaps: For a gluten-free version, use gluten-free taco shells or substitute the traditional shells with gluten-free alternatives like coconut flakes or almond flour-based shells. You can also swap the cream cheese with a lighter version or a non-dairy cheese alternative for a healthier option.
Troubleshooting
- Texture problems: If the cheesecake turns out too dense, it might be due to overmixing the batter. Try mixing the ingredients just until they come together for a lighter texture. If the taco shells become too brittle, it could be because they were overbaked; try reducing the baking time for a better texture.
- Ingredient replacements: If you find yourself without a specific ingredient, don’t hesitate to get creative with substitutions. For example, if you don’t have granulated sugar, you can use brown sugar or honey as a substitute, keeping in mind that this will change the flavor profile slightly.
- Over/undercooking signs: Keep an eye on your cheesecake tacos while they bake. If the edges start to brown too quickly, cover the tops with foil to prevent overcooking. Undercooked cheesecake will be jiggly in the center; give it a few more minutes in the oven and check again until it’s set.
FAQs
- Can I freeze it? Yes, you can freeze the cheesecake filling and the baked taco shells separately for up to 2 months. When you’re ready to serve, thaw the components overnight in the refrigerator, assemble, and serve.
- Is it gluten-free? The recipe can be adapted to be gluten-free by using gluten-free taco shells. Be mindful of the ingredients in the cheesecake filling, as some may contain gluten; ensure all ingredients are gluten-free for a gluten-free dessert.
- Can I double the recipe? Absolutely, this recipe can be doubled or even tripled depending on your needs. Just keep in mind that you may need to adjust the baking time slightly if you’re making a larger batch.
Conclusion
This Crispy Strawberry Cheesecake Tacos recipe is a game-changer for anyone looking to impress with a unique dessert. With its perfect balance of flavors, ease of preparation, and impressive presentation, it’s sure to become a favorite. Feel free to adapt the recipe to your taste, experiment with different flavors, and don’t hesitate to reach out if you have any questions. The beauty of cooking and baking lies in the creativity and joy it brings, so have fun with it, and happy baking!