Craving a Chick-Fil-A fix at home? Make this easy homemade chicken sandwich with crispy breading and juicy chicken for a quick weeknight dinner, save for later and enjoy your new family favorite
Crispy Homemade Chick-Fil-A Chicken Sandwich Recipe
Introduction
Imagine sinking your teeth into a juicy, crispy chicken sandwich that’s almost indistinguishable from the iconic Chick-Fil-A original, all from the comfort of your own home. This Crispy Homemade Chick-Fil-A Chicken Sandwich Recipe is designed to be both accessible and impressive, using everyday ingredients to replicate the unmistakable flavor and crunch of the beloved fast-food favorite. With a focus on ease, flavor, and creativity, this recipe invites you to experiment with the magic of homemade versions of your favorite treats, all while avoiding the need for exotic or hard-to-find ingredients.
Why This Works
- Flavor balance and ingredient accessibility: The recipe strikes a perfect balance between flavors and uses ingredients that are easily found in most supermarkets, making it convenient for anyone to try.
- Ease of preparation: Despite the impressive outcome, the preparation and cooking process are straightforward and simple, requiring minimal culinary expertise.
- Impressive results with minimal effort: The combination of a well-seasoned chicken breast, a crispy exterior, and a soft bun creates a dish that is sure to impress family and friends without requiring an excessive amount of time or effort.
Key Ingredients
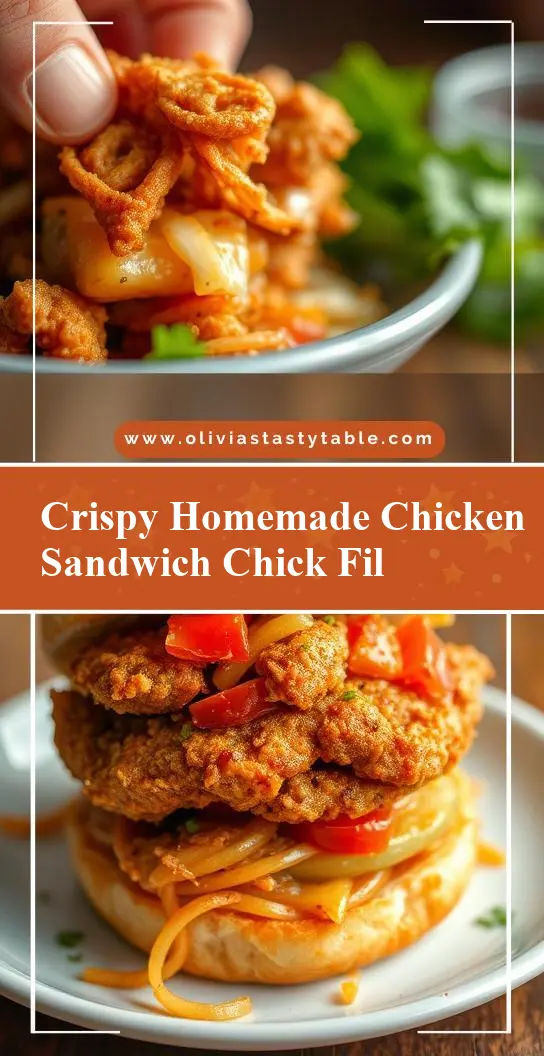
The heart of this recipe lies in its key ingredients: chicken breasts, a special seasoning blend that mimics the Chick-Fil-A flavor, buttermilk for marination, and a breading mixture that includes all-purpose flour, paprika, garlic powder, onion powder, and a pinch of salt and pepper. For those looking for substitutions, almond milk or regular milk with a tablespoon of white vinegar or lemon juice can replace buttermilk, and gluten-free flour can be used for the breading to cater to dietary needs. The buns, lettuce, tomatoes, pickles, and a drizzle of your favorite sauce complete the sandwich, offering plenty of room for personalization.
Instructions
- Step 1: Begin by preparing your ingredients. Cut the chicken breasts into thinner cutlets if they are too thick, and prepare the marinade by mixing the buttermilk with the special seasoning blend.
- Step 2: Marinate the chicken in the buttermilk mixture for at least 2 hours or overnight. Meanwhile, prepare the breading station by mixing the flour, paprika, garlic powder, onion powder, salt, and pepper in a shallow dish.
- Step 3: Remove the chicken from the marinade, allowing any excess to drip off, and then coat the chicken in the breading mixture, pressing gently to ensure the coating adheres evenly. For an extra crispy coating, you can chill the breaded chicken in the refrigerator for 30 minutes before frying.
- Step 4: Fry the breaded chicken cutlets in about 1/2 inch of oil (such as peanut or vegetable oil) heated to 350°F until they are golden brown and cooked through, about 5-6 minutes per side. Drain the chicken on paper towels. Meanwhile, toast the buns on the grill or in a toaster, and prepare the toppings.
Handy Tips
- For a lighter version, consider baking the chicken instead of frying. To do this, preheat your oven to 400°F and bake the breaded chicken cutlets for about 20-25 minutes, or until they reach an internal temperature of 165°F.
- Always use room temperature ingredients when possible, as this helps in even cooking and better texture.
- Don’t overcrowd the pan when frying, as this can lower the oil temperature and result in a less crispy coating. Fry the chicken cutlets one or two at a time, depending on their size and your pan.
Heat Control
Maintaining the right temperature is crucial, especially when frying. The ideal temperature for frying the chicken is between 325°F and 350°F. If the temperature is too high, the exterior will burn before the interior is fully cooked. Conversely, if it’s too low, the chicken will absorb more oil, leading to a greasy sandwich. Use a thermometer to monitor the temperature, and adjust the heat as necessary. The chicken is done when it reaches an internal temperature of 165°F.
Crunch Factor
Achieving the perfect crunch on the chicken is what sets this sandwich apart. The key is in the breading process and the frying technique. Ensuring the chicken is coated evenly and fried at the right temperature helps in achieving a crispy exterior. For an extra crunch, you can also try chilling the breaded chicken cutlets in the refrigerator for 30 minutes before frying to set the coating.
Pro Kitchen Tricks
- Use a cast-iron skillet for frying, as it retains heat well and can achieve a nice crust on the chicken.
- Don’t skip the step of drying the chicken cutlets after marination and before breading, as excess moisture can prevent the breading from adhering properly.
- For cleanup, line your work surface with parchment paper or a silicone mat before breading the chicken to catch any stray crumbs and make the process neater.
Storage Tips
- Leftover chicken can be stored in an airtight container in the refrigerator for up to 3 days. Reheat it in the oven at 300°F for about 10-15 minutes, or until warmed through.
- Consider freezing the breaded but unfried chicken cutlets on a baking sheet, then transferring them to a freezer-safe bag or container for up to 2 months. Fry them frozen, adding a couple of minutes to the frying time.
- Assembled sandwiches are best consumed immediately, but you can store the components (buns, toppings, chicken) separately in the refrigerator for up to a day.
Gift Packaging Ideas
If you’re considering gifting this recipe, perhaps for a potluck or as a care package, you can package the components separately. Place the fried chicken cutlets in airtight containers, pack the buns and toppings in separate bags, and include a small note with assembly instructions. For a more rustic touch, consider wrapping the sandwich in parchment paper and twine, or placing it in a small, decorative basket.
Flavor Variations
- 🌟 Different spices: Experiment with various seasoning blends, such as adding smoked paprika for a smoky flavor or using Italian seasoning for a Mediterranean twist.
- 🌟 Creative toppings: In addition to the classic lettuce, tomato, and pickles, consider adding avocado for creaminess, bacon for smokiness, or a fried egg for richness.
- 🌟 Ingredient swaps: For a vegan version, use a plant-based chicken substitute, and for a gluten-free version, ensure all the ingredients, including the breading and sauces, are gluten-free.
Troubleshooting
- Texture problems: If the breading doesn’t adhere well, check that the chicken was dry before coating, and that the breading mixture wasn’t too fine. If the chicken is too greasy, it might have been fried at too low a temperature.
- Ingredient replacements: Always try to use the closest substitute when replacing ingredients. For example, if you’re out of buttermilk, mixing milk with vinegar or lemon juice can provide a similar acidity.
- Over/undercooking signs: The chicken is undercooked if it doesn’t reach 165°F internally, and it’s overcooked if it becomes dry and tough. Adjust the frying time based on the chicken’s size and the oil’s temperature.
FAQs
- Can I freeze it? Yes, you can freeze the breaded but unfried chicken cutlets for up to 2 months. Fry them frozen, adding a couple of minutes to the frying time.
- Is it gluten-free? The original recipe includes gluten due to the all-purpose flour in the breading. However, you can easily make it gluten-free by substituting the flour with a gluten-free alternative.
- Can I double the recipe? Yes, you can double or even triple the recipe as needed. Just ensure you have enough oil and space in the pan to fry the chicken cutlets without overcrowding.
Conclusion
This Crispy Homemade Chick-Fil-A Chicken Sandwich Recipe is more than just a recipe; it’s an invitation to bring the joy of your favorite fast food into your home, with the freedom to customize and perfect it to your taste. With its accessible ingredients, straightforward preparation, and impressive results, it’s a dish that’s sure to become a staple in your household. Don’t be afraid to experiment with different seasonings, toppings, and ingredients to make it your own, and enjoy the process of creating something delicious from scratch.