Craving a quick seafood fix for dinner? This easy crispy fried shrimp recipe is a weeknight dinner winner with shrimp and simple homemade spices, save for later and cook up a family favorite tonight
Crispy Fried Shrimp Recipe: Quick and Easy Seafood Delight for Dinner High-Protein
Introduction
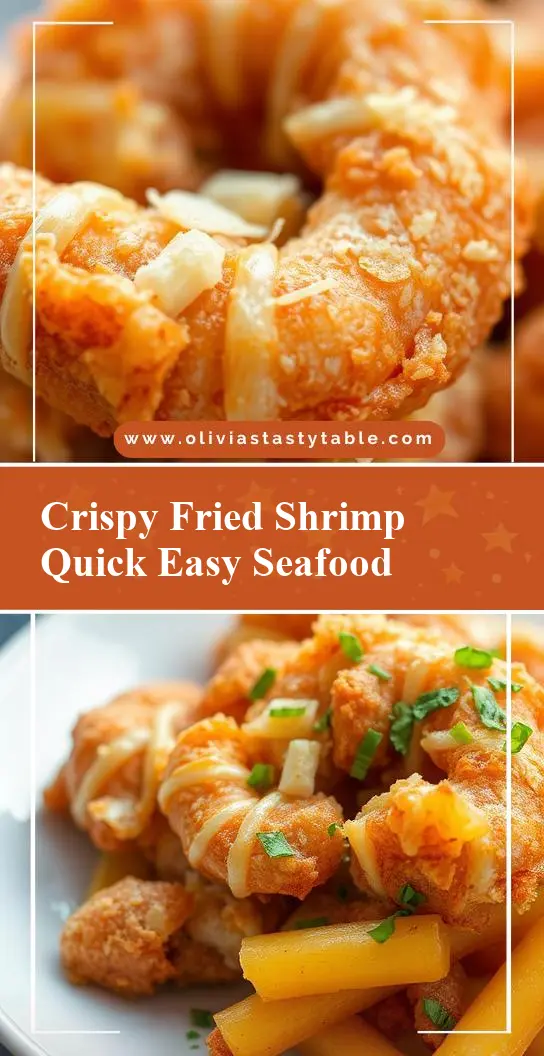
Imagine sinking your teeth into a crispy, golden-brown shrimp that’s bursting with flavor, all while being incredibly easy to make and packed with protein. This crispy fried shrimp recipe is exactly that – a quick, delicious, and impressive seafood delight that can elevate any dinner. Using everyday ingredients and requiring minimal effort, this dish is perfect for a weeknight meal or a special occasion. The combination of succulent shrimp, crunchy exterior, and the freedom to customize with your favorite seasonings makes this recipe a true standout. Whether you’re a seafood lover or just looking for a new protein-packed meal idea, this crispy fried shrimp recipe is sure to become a favorite.
Why This Works
- Flavor balance and ingredient accessibility: This recipe strikes a perfect balance between flavor and simplicity, using ingredients that are readily available in most supermarkets.
- Ease of preparation: The steps are straightforward, and the dish can be prepared and cooked within a short timeframe, making it ideal for busy days.
- Impressive results with minimal effort: Despite its simplicity, the end result is impressive and sure to please even the most discerning palates, making it perfect for entertaining guests.
Key Ingredients
The main ingredients for this crispy fried shrimp recipe include large shrimp, all-purpose flour, panko breadcrumbs, eggs, butter or oil for frying, salt, and your choice of seasonings such as paprika, garlic powder, and dried herbs. Practical substitutions can be made with the seasonings to suit your taste preferences. For example, you can use lemon pepper for a brighter flavor or cayenne pepper for a spicy kick. The panko breadcrumbs are key to achieving the crispy exterior, but you can also experiment with regular breadcrumbs or even crushed crackers for a different texture.
Instructions
- Step 1: Begin by preparing your shrimp. Rinse them under cold water, pat them dry with paper towels, and remove any shells or tails if necessary. In a shallow dish, mix together the flour, a pinch of salt, and any desired dry seasonings.
- Step 2: In another dish, beat the eggs until they’re well mixed. In a third dish, place the panko breadcrumbs. This setup allows for an efficient breading process. Dip each shrimp first into the flour mixture, coating it lightly, then into the eggs, making sure they’re fully moistened, and finally into the panko breadcrumbs, pressing the crumbs gently onto the shrimp to ensure they stick well.
- Step 3: Heat about 1/2 inch of oil or butter in a large skillet over medium-high heat until it reaches the ideal frying temperature. Carefully place the breaded shrimp into the hot oil. Do not overcrowd the skillet; cook the shrimp in batches if necessary. Fry the shrimp for about 2-3 minutes on each side, or until they’re golden brown and cooked through.
- Step 4: Once the shrimp are cooked, remove them from the oil with a slotted spoon and place them on a paper towel-lined plate to drain any excess oil. Serve the crispy fried shrimp hot, garnished with lemon wedges and your choice of dipping sauce, such as tartar sauce or a homemade remoulade.
Handy Tips
- For an extra crispy coating, you can chill the breaded shrimp in the refrigerator for 30 minutes before frying. This helps the breadcrumbs adhere better to the shrimp.
- Always use fresh and high-quality ingredients, especially the shrimp, to ensure the best flavor and texture.
- Be careful not to overcook the shrimp, as they can become tough and rubbery. They should be opaque and firm to the touch when done.
Heat Control
The ideal temperature for frying the shrimp is between 350°F and 375°F. If you have a thermometer, use it to monitor the oil’s temperature. If not, a good rule of thumb is to wait for the oil to shimmer and slightly smoke before adding the shrimp. The frying time will depend on the size of your shrimp and the heat of your oil, but generally, 2-3 minutes per side is a good guideline. Look for a golden brown color and the shrimp to be fully cooked and opaque.
Crunch Factor
The crunch factor in this recipe comes from the panko breadcrumbs, which provide a lighter and crisper coating compared to regular breadcrumbs. To enhance the crunch, make sure the oil is at the right temperature before frying, and don’t overcrowd the skillet, as this can lower the oil’s temperature and result in a less crispy coating. Also, patting the shrimp dry before breading helps the breadcrumbs adhere better, contributing to a crunchier final product.
Pro Kitchen Tricks
- For easier cleanup, line your work surface with parchment paper or a silicone mat before breading the shrimp.
- Use a spider or a slotted spoon to gently place the shrimp into the hot oil and to remove them, reducing the risk of splashing oil.
- Keep the fried shrimp warm in a low-temperature oven (around 200°F) while cooking the remaining batches, to ensure all shrimp are served hot and crispy.
Storage Tips
- The best way to store leftover crispy fried shrimp is in an airtight container in the refrigerator, where they can be kept for up to a day. Reheat them in the oven at 350°F for a few minutes until warmed through.
- For longer storage, you can freeze the breaded but unfried shrimp on a baking sheet, then transfer them to a freezer-safe bag or container for up to 2 months. Fry them frozen, adding a minute or two to the cooking time.
- Use shallow, airtight containers to store leftovers, as this helps maintain the crunchiness of the shrimp.
Gift Packaging Ideas
If you’re considering gifting this dish, perhaps for a party or as part of a meal delivery, you can package the crispy fried shrimp in decorative paper cones or small gift boxes lined with parchment paper. Include a side of homemade dipping sauce in a small jar and garnish with fresh herbs for a more appealing presentation. For a more casual gift, a simple but nicely wrapped container with a handwritten note can also convey thoughtfulness and care.
Flavor Variations
- 🌟 Different spices: Experiment with various spice blends like Cajun seasoning for a spicy kick, Italian seasoning for a Mediterranean twist, or Chinese five-spice for an Asian-inspired flavor.
- 🌟 Creative toppings: Add some grated Parmesan cheese, chopped fresh parsley, or a drizzle of lemon butter on top of the fried shrimp for extra flavor and texture.
- 🌟 Ingredient swaps: Try using different types of protein like scallops, fish pieces, or even chicken tenders with the same breading and frying technique for a variation in texture and flavor.
Troubleshooting
- Texture problems: If your shrimp turn out too greasy, it might be because the oil wasn’t hot enough. If they’re not crispy, the breadcrumbs might not have adhered well, possibly due to excess moisture on the shrimp.
- Ingredient replacements: If you don’t have panko breadcrumbs, you can substitute them with regular breadcrumbs or even crushed crackers, though the crunch might vary.
- Over/undercooking signs: Shrimp that are undercooked will be translucent and soft, while overcooked shrimp will be opaque, firm, and possibly tough. Adjust your cooking time based on the size of your shrimp and the heat of your oil.
FAQs
- Can I freeze it? Yes, you can freeze the breaded shrimp before frying for up to 2 months. Fry them frozen, adjusting the cooking time slightly.
- Is it gluten-free? The recipe can be adapted to be gluten-free by using gluten-free flour and ensuring the panko breadcrumbs or any seasonings used are gluten-free.
- Can I double the recipe? Yes, you can easily double or triple the recipe, just be sure to fry the shrimp in batches to avoid overcrowding the skillet.
Conclusion
This crispy fried shrimp recipe offers a delicious, high-protein meal option that’s both quick to prepare and impressive in its results. With its adaptable seasoning options and straightforward cooking method, it’s perfect for anyone looking to add some variety to their meal routine. Feel free to experiment with different flavors and ingredients to make the dish your own, and don’t hesitate to share your creations with friends and family. Whether you’re a seasoned cook or just starting out, this recipe is sure to become a staple in your kitchen, providing a tasty and satisfying meal every time.