Craving a quick weeknight dinner solution? Try this easy homemade Chicken Kiev with garlic butter, perfect for a family favorite meal, save for later
Chicken Kiev with Garlic Butter
Introduction
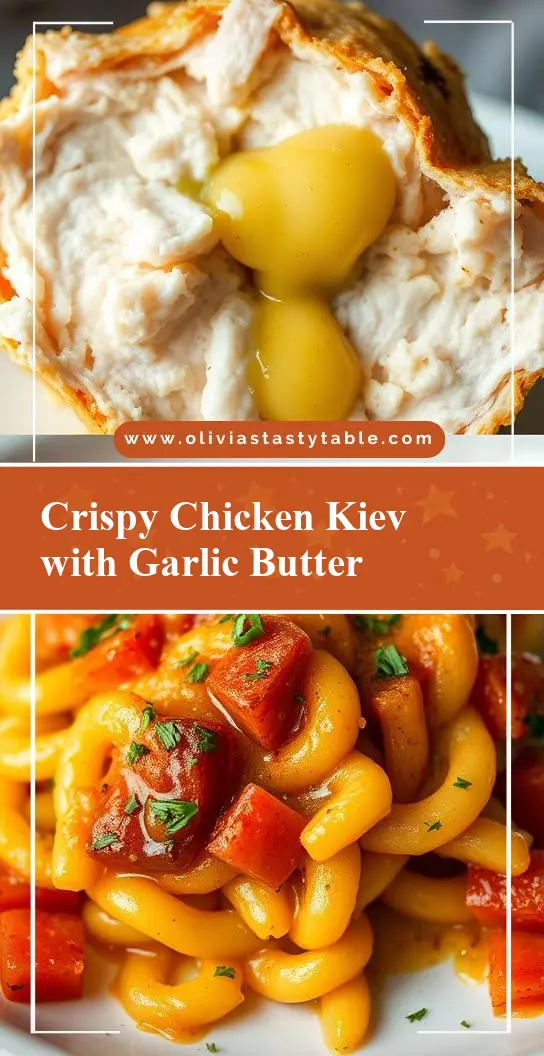
Imagine a dish that combines the tender juiciness of chicken, the richness of garlic butter, and the crispy exterior of a perfectly cooked Kiev. Chicken Kiev with Garlic Butter is not just a meal; it’s an experience that will leave you and your guests in awe. The best part? It’s surprisingly easy to make, requiring only a few everyday ingredients and some basic kitchen skills. This recipe is perfect for those looking to impress without the fuss, using creativity and flavor balance to elevate a classic dish into something truly special.
Why This Works
- Flavor balance and ingredient accessibility: The combination of chicken, garlic butter, and herbs creates a flavor profile that is both familiar and exciting, using ingredients that are readily available in most supermarkets.
- Ease of preparation: Despite its impressive presentation, Chicken Kiev with Garlic Butter is relatively simple to prepare, making it perfect for weeknight dinners or special occasions.
- Impressive results with minimal effort: The dish looks and tastes like it was prepared by a professional chef, but the steps are straightforward, and the ingredients are easy to work with, ensuring that anyone can achieve a restaurant-quality finish at home.
Key Ingredients
The main ingredients for Chicken Kiev with Garlic Butter include boneless, skinless chicken breasts, unsalted butter, garlic, fresh parsley, salt, pepper, and all-purpose flour. For the garlic butter, you will also need lemon juice and a pinch of paprika. Practical substitutions can be made, such as using margarine instead of butter for a lighter version or substituting parsley with dill for a different herbal note. The chicken can be pounded thin to ensure even cooking and to help it cook faster.
Instructions
- Step 1: Begin by prepping your ingredients. Chop the garlic finely and mix it with softened butter, lemon juice, paprika, salt, and pepper until you get a smooth, aromatic paste. Chop the parsley and set it aside for garnish. Pound the chicken breasts to an even thickness to ensure they cook uniformly.
- Step 2: Lay the chicken breasts flat and make a horizontal incision in each to create a pocket. Be careful not to cut all the way through. Stuff each breast with the garlic butter mixture, dividing it evenly between the two chicken breasts. Close the incision and secure the filling with toothpicks if necessary.
- Step 3: Dredge the stuffed chicken breasts in flour, shaking off any excess. Then, dip them in beaten eggs, making sure they are fully coated, and finally, roll them in breadcrumbs to create a crunchy exterior. Place the breaded chicken breasts on a plate or tray and refrigerate for about 30 minutes to set the coating.
- Step 4: Heat about half an inch of oil in a large skillet over medium-high heat. When the oil is hot, add the chicken breasts and fry until they are golden brown on both sides and cooked through. The internal temperature should reach 165°F. Remove the chicken from the oil and place it on a paper towel-lined plate to drain any excess oil. Serve hot, garnished with chopped parsley and your choice of sides, such as mashed potatoes or steamed vegetables.
Handy Tips
- When handling the chicken, make sure to keep it cold to prevent the butter from melting and making the chicken difficult to handle. Also, don’t overfill the chicken with the garlic butter, as this can cause it to leak out during cooking.
- For an extra crispy coating, you can chill the breaded chicken breasts in the refrigerator for 30 minutes before frying. This helps the coating adhere better to the chicken.
- Always use fresh and high-quality ingredients. Fresh parsley and real butter will give your dish a more vibrant flavor and better texture.
Heat Control
Heat control is crucial when making Chicken Kiev with Garlic Butter. The ideal temperature for frying the chicken is between 350°F and 375°F. If the oil is too hot, the exterior will burn before the chicken is fully cooked. If it’s too cold, the chicken will absorb too much oil and become greasy. The cooking time should be about 5-7 minutes per side, depending on the thickness of the chicken breasts. Always check for doneness by cutting into one of the breasts; the juices should run clear, and the internal temperature should be at least 165°F.
Crunch Factor
Achieving the right crunch factor is key to a perfect Chicken Kiev. The breadcrumb coating should be crispy and golden, providing a satisfying texture contrast to the juicy chicken and melted garlic butter inside. To ensure your Chicken Kiev has the right crunch, don’t overcrowd the skillet when frying, as this can lower the oil temperature and result in a soggy coating. Also, pat the chicken dry with a paper towel before breading to help the coating adhere better and fry crisper.
Pro Kitchen Tricks
- Another trick is to not skip the chilling step after breading the chicken. This helps the coating set and adhere to the chicken better, resulting in a crunchier exterior and less mess during frying.
- For easier cleanup, line your work surface with parchment paper or a silicone mat before breading the chicken. This catches any stray breadcrumbs and makes cleaning up a breeze.
Storage Tips
- Leftover Chicken Kiev can be stored in the refrigerator for up to 3 days. It’s best to store it in an airtight container to keep it fresh. For reheating, place the chicken in the oven at 350°F for about 15-20 minutes, or until heated through.
- When reheating frozen Chicken Kiev, make sure it reaches an internal temperature of 165°F to ensure food safety.
Gift Packaging Ideas
While Chicken Kiev with Garlic Butter is typically served hot and fresh, components of the dish can be gifted, such as the garlic butter mixture. Consider packaging the garlic butter in decorative jars or containers and tying them with a ribbon. You could also include a packet of breadcrumbs and a few sprigs of fresh parsley for a complete gift. For a more substantial gift, prepare the chicken up to the breading stage, freeze it, and thaw it when you’re ready to cook. Package the frozen breaded chicken in a gift box with cooking instructions for a unique and thoughtful present.
Flavor Variations
- 🌟 Different spices: Experiment with various spices and herbs in the garlic butter, such as dried thyme, rosemary, or a pinch of cayenne pepper, to give your Chicken Kiev a unique flavor profile.
- 🌟 Creative toppings: Serve your Chicken Kiev with creative toppings like a dollop of sour cream, a sprinkle of chopped fresh dill, or a side of tangy lemon wedges.
- 🌟 Ingredient swaps: For a vegetarian version, consider swapping the chicken with portobello mushrooms or eggplant slices, filling them with the garlic butter mixture and breading them in a similar manner.
Troubleshooting
- Texture problems: If your Chicken Kiev turns out too greasy, it might be because the oil wasn’t hot enough, causing the chicken to absorb more oil than necessary. If it’s too dry, the chicken might have been overcooked.
- Ingredient replacements: If you don’t have garlic, you can substitute it with a similar amount of shallots or onions, though the flavor will be slightly different. For the breadcrumbs, panko breadcrumbs can provide a lighter, crisper coating.
- Over/undercooking signs: Always check the internal temperature of the chicken to ensure it’s cooked through. If the chicken is undercooked, it will feel soft and squishy to the touch, and the juices won’t run clear. Overcooked chicken will be dry and tough.
FAQs
- Can I freeze it? Yes, you can freeze Chicken Kiev before frying. Simply bread the chicken, place it on a baking sheet lined with parchment paper, and freeze. Once frozen, transfer the chicken to a freezer-safe bag or container for up to 3 months.
- Is it gluten-free? The traditional recipe includes breadcrumbs, which contain gluten. However, you can easily make a gluten-free version by substituting the breadcrumbs with gluten-free alternatives like gluten-free panko or crushed gluten-free crackers.
- Can I double the recipe? Yes, you can double or even triple the recipe if you’re serving a larger crowd. Just remember to adjust the cooking time slightly if you’re frying multiple chicken breasts at once, to ensure they all cook evenly and don’t stick together.
Conclusion
Making Chicken Kiev with Garlic Butter is a rewarding culinary experience that combines ease of preparation with impressive results. With its rich flavors and satisfying crunch, this dish is sure to become a favorite. Feel free to experiment with the recipe, trying out different spices, toppings, and ingredient swaps to make it your own. Whether you’re a seasoned chef or a beginner in the kitchen, Chicken Kiev with Garlic Butter is a recipe that will inspire your creativity and delight your palate. So, go ahead, give it a try, and enjoy the process of creating something truly delicious and memorable.