Looking for a sweet Easter treat? This easy homemade Easter Basket Cookie is a family favorite, made with simple ingredients and quick to bake. Save for later and make it a weeknight dinner dessert staple. Pin this now
Easter Basket Cookie
Introduction
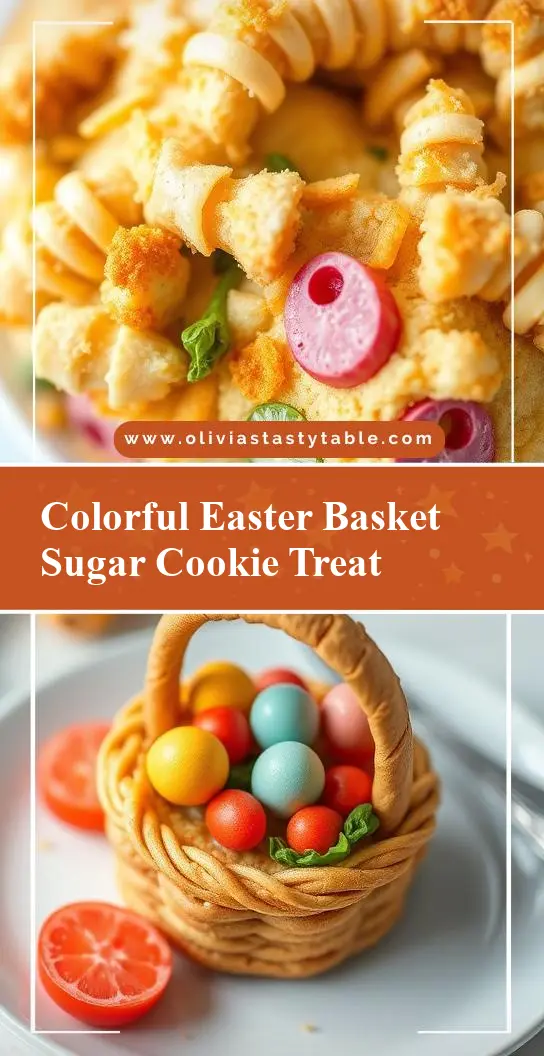
Welcome to the Easter Basket Cookie recipe, a delightful treat that embodies the spirit of Easter with its vibrant colors and adorable presentation. This cookie is not only a feast for the eyes but also a masterpiece of flavors, combining the sweetness of sugar, the richness of butter, and the uniqueness of Easter-themed decorations. What makes this recipe truly special is its ease of preparation, using everyday ingredients that are readily available in most kitchens. Whether you’re a seasoned baker or a beginner, this Easter Basket Cookie is sure to impress your family and friends with its creativity and delicious taste.
Why This Works
- Flavor balance and ingredient accessibility: The combination of ingredients in this recipe provides a perfect balance of flavors, from sweet to slightly savory, ensuring that the cookie is enjoyable for a wide range of palates. Moreover, the ingredients are easily accessible, making this recipe feasible for anyone to try.
- Ease of preparation: The steps involved in making the Easter Basket Cookie are straightforward and simple, requiring minimal effort and time. This makes it an ideal choice for those looking to create a special Easter treat without spending hours in the kitchen.
- Impressive results with minimal effort: Despite the simplicity of the recipe, the end result is visually impressive and delicious, making it perfect for Easter gatherings, gift exchanges, or simply as a fun project to enjoy with family and friends.
Key Ingredients
The main ingredients for the Easter Basket Cookie include all-purpose flour, baking soda, salt, granulated sugar, brown sugar, butter, eggs, vanilla extract, and colorful sprinkles or Easter-themed decorations for the topping. For practical substitutions, you can use margarine instead of butter and adjust the type of sugar to your preference. Additionally, if you’re looking to make the cookie more festive, consider adding a few drops of food coloring to the dough to create a pastel effect that matches the Easter theme.
Instructions
- Step 1: Begin by preheating your oven to 375°F (190°C). Prepare your baking sheets with parchment paper or silicone mats to ensure easy cookie removal.
- Step 2: In a large bowl, whisk together the flour, baking soda, and salt. Set aside. In another bowl, use an electric mixer to cream together the granulated sugar, brown sugar, and butter until light and fluffy. Beat in the eggs one at a time, followed by the vanilla extract.
- Step 3: Gradually mix the dry ingredients into the wet ingredients until a dough forms. If desired, add a few drops of food coloring to tint the dough. Wrap the dough in plastic wrap and refrigerate for at least 30 minutes to allow the flavors to meld and the dough to firm up.
- Step 4: Scoop the dough into balls, about 1 tablespoon each. Place the balls onto the prepared baking sheets, leaving about 2 inches of space between each cookie to allow for even baking. Bake for 10-12 minutes or until the edges are lightly golden. Allow the cookies to cool on the baking sheets for 5 minutes before transferring them to a wire rack to cool completely. Once cooled, decorate the cookies with colorful sprinkles or Easter-themed decorations to resemble Easter baskets.
Handy Tips
- For the best results, ensure that your butter is at room temperature before starting to mix the dough. This will help in achieving a smooth and consistent texture.
- Do not overbake the cookies. They should be lightly golden and still slightly soft to the touch when removed from the oven.
- Experiment with different types of sprinkles or decorations to give your Easter Basket Cookies a unique and personalized touch.
Heat Control
When baking the Easter Basket Cookies, it’s crucial to maintain the correct oven temperature and baking time. The ideal temperature is 375°F (190°C), and the cookies should be baked for 10-12 minutes. Signs of doneness include lightly golden edges and a firm top. It’s also important to keep an eye on the cookies during the last few minutes of baking, as oven temperatures can vary.
Crunch Factor
The Easter Basket Cookies should have a tender center and a lightly crunchy edge. To achieve this texture, avoid overbaking and ensure that the cookies are not too close together on the baking sheet, allowing for even air circulation during baking. If you prefer a chewier cookie, bake for 8-10 minutes, and for a crisper cookie, bake for 12-14 minutes.
Pro Kitchen Tricks
- Use parchment paper or a silicone mat on your baking sheets to prevent the cookies from sticking and to make cleanup easier.
- Chill the dough for at least 30 minutes to allow the flavors to meld together and the butter to firm up, resulting in a better texture and flavor.
- For an extra crispy edge and chewy center, bake the cookies for 2-3 minutes less than the recommended time and then let them cool on the baking sheet for 10 minutes before transferring them to a wire rack.
Storage Tips
- Store the Easter Basket Cookies in an airtight container at room temperature for up to 5 days.
- For longer storage, consider freezing the cookies. Place them in a single layer in a freezer-safe bag or container and store in the freezer for up to 2 months. Thaw at room temperature when ready to serve.
- When storing decorated cookies, place them in a single layer in an airtight container to prevent the decorations from getting damaged.
Gift Packaging Ideas
The Easter Basket Cookies make wonderful gifts, especially when packaged in a thoughtful and visually appealing way. Consider placing a few cookies in a decorative tin or jar, wrapping them in cellophane bags tied with ribbon, or arranging them in a small basket filled with Easter grass. You can also include a personalized note or a small Easter-themed toy to make the gift even more special.
Flavor Variations
- 🌟 Different spices: Add a pinch of cinnamon, nutmeg, or cardamom to the dough for a unique twist on the traditional flavor.
- 🌟 Creative toppings: Experiment with different types of sprinkles, nonpareils, or even chopped nuts to give your Easter Basket Cookies a personalized look.
- 🌟 Ingredient swaps: Replace the granulated sugar with honey or maple syrup for a different flavor profile, or use almond extract instead of vanilla for a nutty taste.
Troubleshooting
- Texture problems: If your cookies turn out too hard, they may have been overbaked. If they’re too soft, they might not have been baked long enough.
- Ingredient replacements: If you’re missing an ingredient, consider substitutions like using margarine instead of butter or replacing eggs with flax eggs for a vegan version.
- Over/undercooking signs: Keep an eye on your cookies during the baking time. If the edges start to brown too quickly, cover the baking sheet with foil to prevent overbrowning.
FAQs
- Can I freeze it? Yes, you can freeze the Easter Basket Cookies for up to 2 months. Simply place them in a single layer in a freezer-safe bag or container and thaw at room temperature when ready to serve.
- Is it gluten-free? The traditional recipe includes all-purpose flour, which contains gluten. However, you can experiment with gluten-free flours to make a gluten-free version of the Easter Basket Cookie.
- Can I double the recipe? Yes, you can easily double or triple the recipe to make more cookies. Just ensure that you have enough baking sheets and space in your oven to accommodate the increased number of cookies.
Conclusion
With its vibrant colors, adorable presentation, and delicious taste, the Easter Basket Cookie is the perfect treat for the Easter season. Whether you’re baking for your family, friends, or planning to give them as gifts, this recipe is sure to bring joy and satisfaction. Don’t hesitate to experiment with different flavors and decorations to make the Easter Basket Cookies truly yours. Happy baking, and from our kitchen to yours, warmest wishes for a happy Easter!