Looking for a delicious homemade treat? This easy banana nut bread with walnuts is a classic family favorite perfect for breakfast or dessert, made with ripe bananas and crunchy walnuts, save for later
Classic Banana Nut Bread with Walnuts – Perfect for Breakfast or Dessert
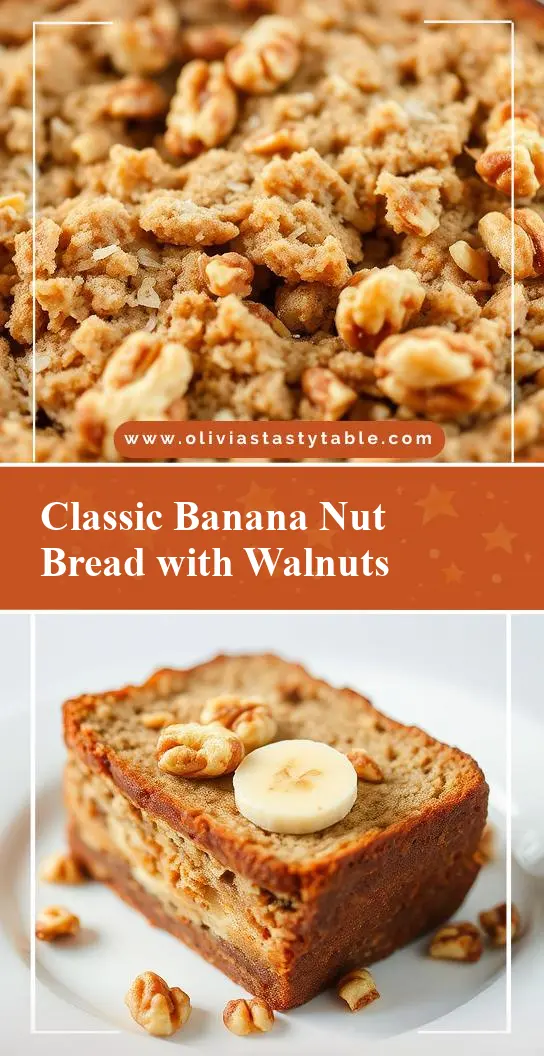
Introduction
Imagine starting your day with a slice of warm, moist banana nut bread, filled with the crunch of walnuts and the sweetness of ripe bananas. This classic recipe is a staple for a reason – it’s incredibly easy to make, requiring just a few everyday ingredients, and it’s versatile enough to be enjoyed for breakfast, as a snack, or even as a dessert. The best part? It’s a great way to use up overripe bananas that might otherwise go to waste. In this article, we’ll dive into the world of banana nut bread, exploring what makes it so special, the key ingredients you’ll need, and some handy tips to ensure your loaf turns out perfectly every time.
Why This Works
- Flavor balance and ingredient accessibility: The combination of sweet bananas, earthy walnuts, and a hint of spice creates a flavor profile that’s both comforting and exciting. Plus, the ingredients are likely already in your pantry, making it a convenient option for a quick bake.
- Ease of preparation: This recipe is a breeze to prepare, requiring minimal effort and no special equipment beyond a mixer and a loaf pan. It’s perfect for beginners or those short on time.
- Impressive results with minimal effort: Despite its simplicity, banana nut bread is a real showstopper. The presentation is beautiful, with the walnuts adding a lovely texture and visual appeal. It’s sure to impress whether you’re serving it to family or friends.
Key Ingredients
The star of the show in this recipe is, of course, the bananas. You’ll want to use overripe bananas for the best flavor – they should be soft and spotty. Alongside the bananas, you’ll need all-purpose flour, granulated sugar, brown sugar, eggs, butter, vanilla extract, baking powder, salt, and chopped walnuts. For substitutions, you can use almond extract instead of vanilla for a different flavor twist, or try using pecans or hazelnuts if you don’t have walnuts on hand. One thing to note is that using very ripe bananas will add natural sweetness, so you may be able to reduce the amount of granulated sugar you use.
Instructions
- Step 1: Begin by preheating your oven to 350°F (180°C). While that’s warming up, prepare your ingredients – peel the bananas and mash them in a bowl, chop the walnuts, and measure out your dry ingredients.
- Step 2: In a large mixing bowl, cream together the butter and sugars until light and fluffy. Beat in the eggs one at a time, followed by the mashed bananas and vanilla extract.
- Step 3: In a separate bowl, whisk together the flour, baking powder, and salt. Gradually add this dry mixture to the wet ingredients, mixing until just combined. Be careful not to overmix. Fold in the chopped walnuts.
- Step 4: Pour the batter into a greased 9×5-inch loaf pan and smooth the top. Bake for about 55-60 minutes, or until a toothpick inserted into the center of the bread comes out clean. Let the bread cool in the pan for 10 minutes before transferring it to a wire rack to cool completely.
Handy Tips
- To ensure your bread is moist, don’t overbake it. A toothpick inserted into the center should come out with a few moist crumbs attached.
- For an extra crunchy top, sprinkle some chopped walnuts on top of the batter before baking.
- If you find your bread is too dense, check that you’re not overmixing the batter. Mix wet and dry ingredients separately and fold them together gently.
Heat Control
When baking the banana nut bread, it’s crucial to maintain the right temperature. Your oven should be at 350°F (180°C) for the entire baking time. As for timing, a 9×5-inch loaf will typically take about 55-60 minutes to bake through. Keep an eye on it after 50 minutes, checking with a toothpick. Signs of doneness include the bread being golden brown on top, sounding hollow when tapped on the bottom, and of course, the toothpick test.
Crunch Factor
The crunchiness in this recipe comes from the walnuts. To enhance this texture, make sure not to overchop the walnuts – you want them to retain some of their chunkiness. Additionally, if you’re looking for an extra crunchy top, you can sprinkle some extra chopped walnuts on top of the loaf before it goes into the oven. This will give you a beautiful textural contrast between the soft bread and the crunchy nuts.
Pro Kitchen Tricks
- To make your banana nut bread even more special, try soaking the walnuts in a liquor of your choice (like bourbon or rum) for a few hours before chopping them. This will add a deep, rich flavor to your bread.
- For easier cleanup, line your loaf pan with parchment paper before adding the batter. This will make removing the bread and cleaning the pan a breeze.
- Consider making muffins instead of a loaf for a fun twist on the recipe. Simply divide the batter evenly among muffin cups and bake for about 20-25 minutes, or until a toothpick comes out clean.
Storage Tips
- The banana nut bread can be stored at room temperature for up to 3 days. Wrap it tightly in plastic wrap or aluminum foil to keep it fresh.
- For longer storage, wrap the bread tightly and freeze it. Frozen bread will keep for up to 3 months. To thaw, leave it at room temperature or wrap it in foil and warm it in the oven at 300°F (150°C) for about 15-20 minutes.
- Reheating tips: Slice the bread and warm it in the microwave for 10-15 seconds per slice, or toast it for a crispy exterior and a soft interior.
Gift Packaging Ideas
Banana nut bread makes a wonderful gift, especially when packaged beautifully. Consider wrapping the cooled loaf in a decorative towel or tea cloth, and then placing it in a gift basket filled with other treats like jams, honey, or chocolates. You could also wrap slices individually in plastic wrap or wax paper and place them in a decorative tin or jar for a more rustic look. Add a ribbon and a gift tag, and you have a thoughtful, homemade present that’s sure to delight.
Flavor Variations
- 🌟 Different spices: Try adding a pinch of cinnamon, nutmeg, or cardamom to the batter for a unique twist on the classic flavor.
- 🌟 Creative toppings: Before baking, top the loaf with a mixture of brown sugar and chopped nuts for a crunchy, caramelized topping.
- 🌟 Ingredient swaps: Use applesauce instead of some of the butter for a moist, low-fat version, or substitute the walnuts with pecans or hazelnuts for a different nutty flavor.
Troubleshooting
- Texture problems: If your bread turns out too dense, it might be due to overmixing the batter. Try mixing the wet and dry ingredients separately and folding them together gently. If it’s too dry, you might have overbaked it – keep an eye on the baking time and check with a toothpick frequently towards the end.
- Ingredient replacements: If you’re allergic to nuts, you can omit the walnuts or substitute them with seeds like sunflower or pumpkin. For egg allergies, flax eggs or mashed banana can work as a replacement in a pinch.
- Over/undercooking signs: An undercooked bread will be soggy and possibly raw in the center, while an overcooked bread will be dry and possibly too dark on the outside. Keep an eye on your bread during the baking time, and don’t hesitate to cover the top with foil if it’s browning too quickly.
FAQs
- Can I freeze it? Yes, the banana nut bread can be frozen for up to 3 months. Wrap it tightly in plastic wrap or aluminum foil and thaw at room temperature or reheat in the oven when you’re ready to serve.
- Is it gluten-free? As written, this recipe includes all-purpose flour and is not gluten-free. However, you can experiment with gluten-free flours like almond flour or coconut flour, keeping in mind that the texture and flavor may be slightly different.
- Can I double the recipe? Yes, you can easily double this recipe if you’re feeding a larger crowd or want to make extra loaves for freezing. Just keep in mind that you may need to adjust the baking time slightly for a larger loaf.
Conclusion
Making classic banana nut bread with walnuts is a simple yet rewarding process that yields a delicious, comforting treat perfect for any time of day. With its rich flavor, beautiful texture, and ease of preparation, it’s no wonder this recipe remains a favorite among bakers of all levels. Whether you’re a seasoned pro or just starting out, we encourage you to give this recipe a try and make it your own. Experiment with different spices, nuts, or toppings to find your perfect combination. And don’t forget to share – whether it’s a slice with a friend, a loaf with a neighbor, or a batch of muffins with your family, the joy of baking is often best enjoyed when shared with others. Happy baking!