Looking for a quick back-to-school treat? Try our easy waffle iron baked apples made with tender apples and a hint of cinnamon for a delicious homemade dessert perfect for weeknights, save for later
Waffle Iron Baked Apples – Easy Back-to-School Treat!
Introduction
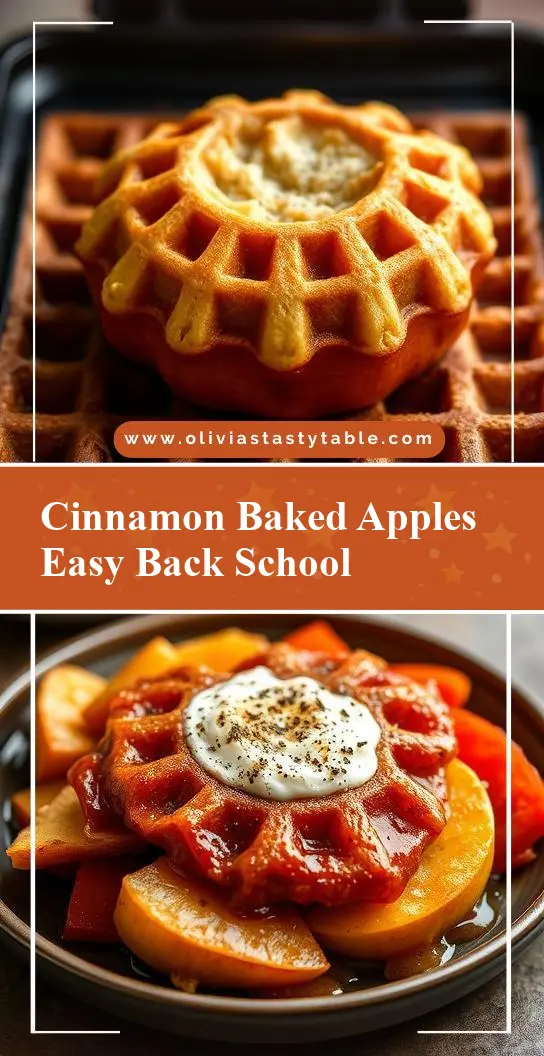
As the back-to-school season approaches, finding easy, delicious, and healthy treats to pack in lunchboxes or serve as an after-school snack can be a challenge. That’s where the ingenious idea of using a waffle iron to bake apples comes in – a game-changer for busy parents and kids alike. This recipe transforms ordinary apples into a crispy, caramelized, and oh-so-satisfying dessert or snack, all with minimal effort and using everyday ingredients. The beauty of this treat lies in its simplicity, flavor, and the endless possibilities for creativity, making it an ideal solution for families on-the-go.
Why This Works
- Flavor balance and ingredient accessibility: The combination of tender apples, sweet cinnamon, and a hint of butter creates a perfect balance of flavors that everyone will love. Plus, the ingredients are readily available in most kitchens.
- Ease of preparation: The preparation time is minimal, requiring just a few minutes to slice the apples, mix the cinnamon and sugar, and butter the waffle iron.
- Impressive results with minimal effort: Despite the simplicity of the recipe, the end result is impressive – crispy on the outside, tender on the inside, and packed with flavor, making it a great option for both everyday snacks and special occasions.
Key Ingredients
The main ingredients for this recipe include apples (any variety, though firmer apples like Granny Smith work best), cinnamon, sugar, and butter. For those looking for substitutions or variations, other spices like nutmeg or allspice can add interesting twists, and using different types of sugar, like brown sugar, can deepen the flavor. Additionally, for a vegan version, vegan butter or a non-dairy spread can be used as a substitute.
Instructions
- Step 1: Begin by preheating your waffle iron according to the manufacturer’s instructions. While it’s heating up, slice the apples into thick wedges, removing any seeds or cores. In a small bowl, mix together the cinnamon and sugar.
- Step 2: Butter the waffle iron generously to prevent the apples from sticking. Place a few apple slices onto the center of the waffle iron, depending on its size. You may need to cook them in batches to avoid overcrowding.
- Step 3: Sprinkle the cinnamon-sugar mixture evenly over the apple slices. Close the waffle iron and cook for about 4-5 minutes, or until the apples are caramelized and slightly tender, with a crispy exterior. The cooking time may vary depending on the apple variety and the heat of your waffle iron.
- Step 4: Once cooked, carefully remove the apple slices from the waffle iron and place them on a serving plate. Serve warm, garnished with additional cinnamon if desired, or let cool completely before packaging for later use.
Handy Tips
- Always preheat the waffle iron before adding the apples to ensure even cooking and to prevent sticking.
- Don’t overcrowd the waffle iron, as this can lead to uneven cooking and a mess. Cook in batches if necessary.
- Experiment with different spice blends or toppings, like a drizzle of honey or a sprinkle of chopped nuts, to find your favorite flavor combinations.
Heat Control
The ideal heat setting for your waffle iron will depend on the model, but generally, a medium to medium-high heat works best for baking apples. Keep an eye on the apples as they cook, and adjust the heat if necessary to prevent burning. The apples are done when they’re tender and caramelized, with a nice crispiness on the outside. This should take about 4-5 minutes, but the exact time can vary based on the apple slices’ thickness and your waffle iron’s performance.
Crunch Factor
Achieving the perfect crunch factor is key to this recipe’s success. The apples should be crispy on the outside and tender on the inside. To ensure this texture, don’t overcook the apples. A slight resistance when inserting a fork or knife indicates they’re ready. Additionally, letting the apples cool for a minute or two after cooking can help retain their crunch.
Pro Kitchen Tricks
- For an extra crispy exterior, sprinkle a small amount of granulated sugar over the apples right before closing the waffle iron. The sugar will caramelize, adding a crunchy, sweet layer.
- Consider using a variety of apple types for a colorful and textured snack. Mixing sweet and tart apples can also enhance the flavor profile.
- To make cleanup easier, wipe down the waffle iron with a damp cloth immediately after use, while it’s still slightly warm. This prevents any stuck-on food from hardening.
Storage Tips
- These baked apples are best served fresh, but they can be stored in an airtight container in the refrigerator for up to 24 hours. Reheat them in the microwave or oven until warmed through.
- For longer storage, consider freezing the cooked apple slices. Place them in a single layer on a baking sheet, freeze until solid, then transfer them to a freezer-safe bag or container for up to 3 months. Reheat frozen apples in the oven or microwave until tender and warmed through.
- When storing, it’s crucial to keep the apples away from strong-smelling foods, as they can absorb odors easily.
Gift Packaging Ideas
These waffle iron baked apples make a wonderful gift, especially when packaged creatively. Consider placing cooled apple slices in decorative jars or containers, topping them with a sprinkle of cinnamon or a drizzle of caramel sauce for added visual appeal. You can also wrap individual apple slices in parchment paper or cellophane bags and tie with a ribbon for a more rustic, homemade look. Adding a gift tag with the recipe or a personal note can make the gift even more special.
Flavor Variations
- 🌟 Different spices: Try using nutmeg, allspice, or cardamom for unique flavor profiles. Each spice pairs well with apples and can add depth to the dish.
- 🌟 Creative toppings: In addition to cinnamon and sugar, consider topping your baked apples with caramel sauce, whipped cream, chopped nuts, or even a sprinkle of sea salt for contrasting flavors and textures.
- 🌟 Ingredient swaps: For a gluten-free version, ensure that any added ingredients, like oats or flour for extra crunch, are gluten-free. You can also experiment with different types of sugar or sweeteners, like honey or maple syrup, for varied flavors.
Troubleshooting
- Texture problems: If your apples turn out too soft, they might have been overcooked. Conversely, undercooked apples will be too crunchy. Adjust the cooking time based on your apple variety and waffle iron’s heat.
- Ingredient replacements: When substituting ingredients, especially spices or sweeteners, start with small amounts and taste as you go. Some spices and sweeteners are more potent than others, and you can always add more but it’s harder to remove the flavor once added.
- Over/undercooking signs: Keep an eye on the color and texture of the apples. They should be caramelized and slightly tender when done. If they’re too pale, they might not be cooked enough, and if they’re too dark, they might be overcooked.
FAQs
- Can I freeze it? Yes, you can freeze the baked apples. First, place them in a single layer on a baking sheet to freeze until solid, then transfer them to a freezer-safe bag or container for storage.
- Is it gluten-free? The basic recipe is gluten-free, but always check the ingredients of any added toppings or mix-ins to ensure they are gluten-free as well.
- Can I double the recipe? Yes, you can easily double or triple the recipe based on your needs. Just be sure to cook the apples in batches if necessary, to avoid overcrowding the waffle iron.
Conclusion
Waffle iron baked apples are a versatile and delicious treat that can elevate your snack game with minimal effort. Whether you’re a busy parent looking for healthy lunchbox ideas, a student seeking a quick energy boost, or simply someone who loves apples and wants to try a new recipe, this dish is sure to please. Don’t be afraid to experiment with different spices, toppings, and ingredients to make the recipe your own. Share your creations with friends and family, and enjoy the process of cooking and exploring new flavors together. Happy cooking!