What’s the perfect dessert to satisfy your sweet tooth? Try these easy cherry cheesecake tacos made with homemade tortillas and fresh cherries for a quick family favorite, save for later
Cherry Cheesecake Tacos: A Sweet Twist on a Classic Dessert!
Introduction
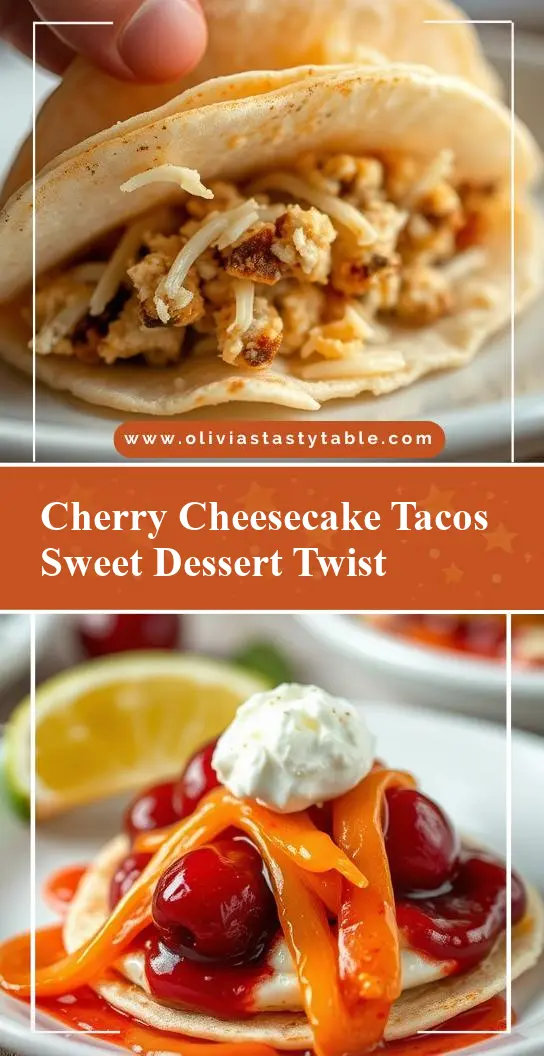
Imagine a dessert that combines the crunch of a taco shell, the creamy richness of cheesecake, and the sweet tartness of cherries. Welcome to the world of Cherry Cheesecake Tacos, a revolutionary dessert that turns the traditional concept of cheesecake on its head. This innovative treat is not only surprisingly easy to make but also offers a flavor combination that will leave your taste buds dancing. By using everyday ingredients in a creative way, you can impress your friends and family with a dessert that’s both unique and delicious. Whether you’re a seasoned baker or a beginner in the kitchen, this recipe is perfect for anyone looking to add a twist to their dessert repertoire.
Why This Works
- Flavor balance and ingredient accessibility: The combination of cheesecake, cherries, and taco shells provides a perfect balance of flavors and textures, making each bite a delight. The ingredients are also readily available, making it easy to whip up this dessert at any time.
- Ease of preparation: Despite its unique presentation, the Cherry Cheesecake Tacos are surprisingly easy to prepare. The cheesecake filling can be made ahead of time, and the taco shells can be store-bought, simplifying the process.
- Impressive results with minimal effort: The presentation of this dessert is sure to impress. The vibrant colors and creative use of taco shells as “tortillas” make for a visually stunning dessert that requires minimal effort to achieve.
Key Ingredients
The main ingredients for this dessert include a graham cracker crust (which can be substituted with any crunchy cookie for a different flavor), a cheesecake filling made with cream cheese, eggs, sugar, and vanilla extract, cherry filling (which can be homemade or store-bought), and taco shells. For the cheesecake filling, you can also use neufchâtel cheese as a lower-fat alternative to cream cheese. The cherry filling can be made with fresh or frozen cherries, and a little bit of sugar and cornstarch to thicken. The taco shells, preferably the kind used for street-style tacos, provide the perfect crunchy base for this dessert.
Instructions
- Step 1: Begin by preparing your cheesecake filling. In a large mixing bowl, beat the cream cheese until it’s smooth, then add the eggs one at a time, followed by the sugar and vanilla extract. Mix well until all the ingredients are fully incorporated.
- Step 2: Prepare your cherry filling. If using fresh cherries, pit them and then cook them down with a little sugar and water until they’re soft and the mixture has thickened. If using frozen cherries, simply thaw them and mix with sugar and cornstarch before cooking.
- Step 3: Assemble your tacos. Spoon a small amount of the cheesecake filling into a taco shell, followed by a spoonful of the cherry filling. You can also add additional toppings such as whipped cream or sprinkles to make it more festive.
- Step 4: Finish with the final touches. Place your Cherry Cheesecake Tacos on a serving platter or individual plates. If desired, drizzle with a little honey or sprinkle with powdered sugar for extra sweetness and presentation.
Handy Tips
- To prevent the taco shells from becoming soggy, fill them just before serving. You can also toast the shells lightly in the oven for a few minutes to crisp them up before filling.
- For a lighter cheesecake, use less sugar or substitute some of the sugar with honey or maple syrup. Also, consider using a water bath when baking cheesecakes to prevent cracking.
- Experiment with different types of fruit fillings, such as raspberry or blueberry, to create different flavor variations.
Heat Control
If you decide to bake your cheesecake filling instead of using it raw, make sure to bake it in a water bath at 350°F (175°C) for about 20-25 minutes, or until the edges are set and the center is just slightly jiggly. For the cherry filling, cook it over medium heat, stirring constantly, until the cherries have broken down and the mixture has thickened, which should take about 10-15 minutes.
Crunch Factor
The crunch factor in this dessert comes from the taco shells. To ensure they remain crunchy, fill them just before serving, and consider toasting them lightly in the oven for a few minutes before filling. You can also sprinkle some toasted nuts or cookie crumbs on top of the cheesecake filling for added crunch.
Pro Kitchen Tricks
- Use high-quality ingredients, especially for the cheesecake and cherry fillings, as they will greatly impact the flavor of your dessert.
- Don’t overmix the cheesecake batter, as this can lead to a dense cheesecake. Stop mixing once all the ingredients are just combined.
- For easier cleanup, line your baking sheets with parchment paper before toasting the taco shells or baking the cheesecake.
Storage Tips
- Store any leftover cheesecake filling in an airtight container in the refrigerator for up to 3 days. The cherry filling can also be stored in the fridge for up to a week.
- Assemble the tacos just before serving to prevent the taco shells from becoming soggy.
- Consider freezing the cheesecake filling for up to 2 months. Simply thaw it overnight in the fridge before using.
Gift Packaging Ideas
If you’re planning to give these Cherry Cheesecake Tacos as a gift, consider packaging them in cute taco holders or small baskets lined with colorful napkins. You can also include a side of additional toppings, such as whipped cream, nuts, or sprinkles, in small jars or bags. Finish the gift with a ribbon and a card, and you have a thoughtful and unique dessert gift.
Flavor Variations
- 🌟 Different spices: Add a pinch of cinnamon or nutmeg to the cheesecake filling for a warm, spicy flavor.
- 🌟 Creative toppings: Offer a variety of toppings, such as caramel sauce, chopped nuts, or shaved chocolate, to let everyone customize their own taco.
- 🌟 Ingredient swaps: Substitute the cherry filling with another fruit, such as strawberries or raspberries, for a different flavor profile.
Troubleshooting
- Texture problems: If your cheesecake filling is too dense, it may be due to overmixing. Try mixing the ingredients just until they’re combined for a lighter texture.
- Ingredient replacements: If you can’t find taco shells, consider using ice cream cones or waffle cones as a substitute.
- Over/undercooking signs: For the cherry filling, it’s done when the cherries have broken down and the mixture has thickened. For baked cheesecakes, check for doneness by gently shaking the pan; the cheesecake should be set with just a slight jiggle in the center.
FAQs
- Can I freeze it? Yes, you can freeze the cheesecake filling for up to 2 months. Simply thaw it overnight in the fridge before using.
- Is it gluten-free? Depending on the type of taco shells used, this dessert can be gluten-free. Make sure to choose gluten-free taco shells or substitute with gluten-free alternatives.
- Can I double the recipe? Yes, you can easily double or triple this recipe to serve a larger crowd. Just remember to adjust the cooking time if you’re baking the cheesecake filling.
Conclusion
In conclusion, the Cherry Cheesecake Tacos offer a fun and creative twist on traditional desserts. With their unique combination of flavors and textures, they’re sure to be a hit at any gathering. Don’t be afraid to experiment with different fillings and toppings to create your own unique variations. Whether you’re a dessert novice or a seasoned baker, this recipe is a must-try for anyone looking to add some excitement to their dessert repertoire. So go ahead, get creative, and enjoy the delightful world of Cherry Cheesecake Tacos!