Craving a sweet treat that’s easy to make and a family favorite? Try these irresistible homemade Twix cookies made with caramel, cookie base, and chocolate for a quick dessert fix, save for later
Irresistible Homemade Twix Cookies
Introduction
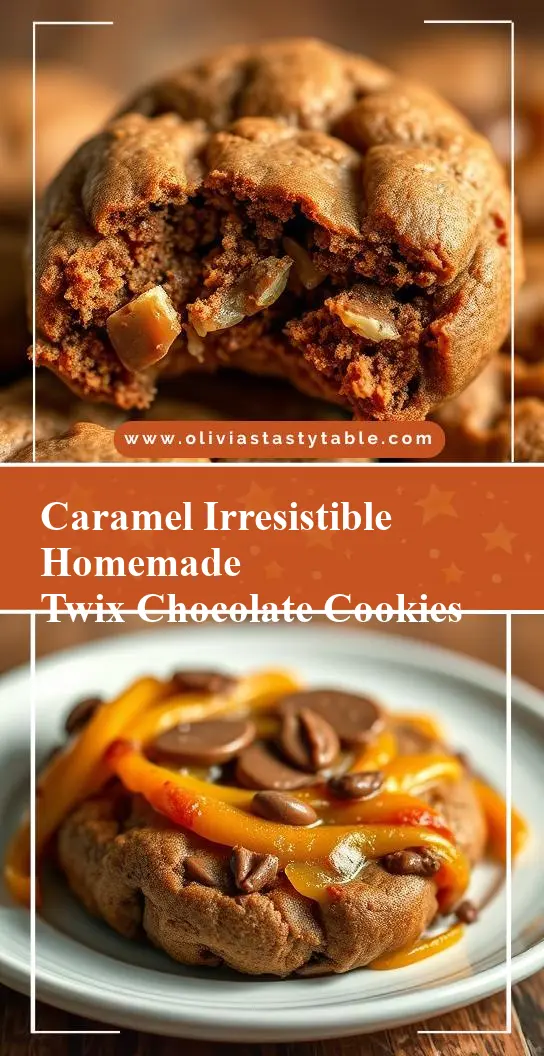
Imagine sinking your teeth into a crunchy, caramel-filled, and chocolate-dipped cookie that tastes exactly like a Twix bar, but made entirely from scratch in the comfort of your own kitchen. These Irresistible Homemade Twix Cookies are a game-changer for anyone with a sweet tooth and a passion for baking. By using everyday ingredients and a few clever tricks, you can create a dessert that not only tastes amazing but also looks impressive. The best part? It’s easier than you think! With a short list of ingredients and straightforward instructions, you can indulge in the rich flavors of a Twix bar in cookie form, perfect for satisfying your cravings, impressing friends, or making a special treat for the family.
Why This Works
- Flavor balance and ingredient accessibility: The combination of a buttery shortbread base, gooey caramel, and rich chocolate creates a perfectly balanced flavor profile that’s hard to resist. Plus, all the ingredients are easily found in most supermarkets.
- Ease of preparation: Despite the impressive outcome, these cookies are surprisingly easy to make. The process involves simple steps like baking a shortbread crust, melting caramel, and dipping in chocolate, making it accessible to bakers of all skill levels.
- Impressive results with minimal effort: The layering of textures and flavors in these cookies creates a sophisticated dessert that looks and tastes like it was bought from a professional bakery, all achievable with minimal fuss and effort.
Key Ingredients
To make these Irresistible Homemade Twix Cookies, you’ll need a few key ingredients. For the shortbread base, you’ll need all-purpose flour, confectioners’ sugar, unsalted butter, and a pinch of salt. For the caramel layer, heavy cream, unsalted butter, granulated sugar, and a teaspoon of sea salt are essential. Finally, for the chocolate coating, you’ll need good-quality milk or dark chocolate chips. Practical substitutions can be made, such as using brown sugar instead of granulated for a deeper caramel flavor or opting for gluten-free flour for those with dietary restrictions.
Instructions
- Step 1: Begin by preheating your oven to 300°F (150°C). Line a baking sheet with parchment paper. In a medium bowl, whisk together the flour, confectioners’ sugar, and salt. Add the unsalted butter and use a pastry blender or your fingertips to work it into the flour mixture until it resembles coarse crumbs. Press this mixture into a lined or greased 8-inch square baking pan. Bake for about 20 minutes, or until the edges are lightly golden. Let it cool completely.
- Step 2: To make the caramel, combine the heavy cream, butter, granulated sugar, and sea salt in a small saucepan. Place it over medium heat and cook, stirring occasionally, until the sugar has dissolved. Bring the mixture to a boil, then reduce the heat to medium-low and simmer for about 10-12 minutes, or until the caramel turns a deep amber color. Pour the caramel over the cooled shortbread base and let it set at room temperature or sped up in the refrigerator.
- Step 3: Once the caramel is set, melt the chocolate chips in a double boiler or in the microwave in 30-second increments, stirring between each interval until smooth. Cut the caramel-covered shortbread into bars or cookies of your desired shape. Dip each cookie into the melted chocolate, using a fork to fully coat it, then tap off any excess chocolate by gently tapping the fork against the side of the bowl.
- Step 4: Place the chocolate-covered cookies on a piece of parchment paper or a silicone mat. If desired, sprinkle with sea salt or chopped nuts before the chocolate hardens. Let the chocolate set at room temperature or chill in the refrigerator for about 10 minutes to speed up the process.
Handy Tips
- For a smoother caramel, avoid stirring the mixture too much, as this can cause it to crystallize. If you notice it starting to crystallize, remove it from the heat immediately and whisk vigorously until it smoothes out.
- When melting chocolate, it’s crucial not to overheat it, as this can cause the chocolate to seize up and become grainy. Heating it in short intervals and stirring between each heating helps to melt the chocolate evenly.
- Experiment with different types of chocolate for the coating, such as white chocolate or a mix of milk and dark chocolate, to find your favorite flavor combination.
Heat Control
Heat control is crucial in two stages of making these cookies: baking the shortbread and making the caramel. For the shortbread, ensure your oven is at the correct temperature, as this will affect how the shortbread bakes. For the caramel, medium heat is key. If the heat is too high, the caramel can burn; too low, and it won’t reach the desired color and consistency. Ideally, you want to reach a deep amber color, which signals that the caramel is ready.
Crunch Factor
The crunch factor in these cookies comes from the shortbread base and the texture of the chocolate once it’s set. To achieve a perfectly crunchy shortbread, don’t overbake it. A lightly golden edge is the perfect indicator that it’s done. For the chocolate, letting it set at room temperature will give it a nice snap when broken, while chilling it in the refrigerator will speed up the process but might make the chocolate slightly more brittle.
Pro Kitchen Tricks
- To ensure the caramel layer sets evenly and doesn’t become too runny, it’s essential to not overcook the shortbread base, as this can cause it to become too crumbly and difficult for the caramel to adhere to properly.
- Using high-quality chocolate for the coating can make a significant difference in the taste and texture of the final product. Look for chocolate with a high cocoa butter content for the best flavor.
- For an extra crunch, consider sprinkling chopped nuts or sea salt over the chocolate before it sets. This adds a delightful textural element to the cookies.
Storage Tips
- These cookies are best stored in an airtight container in the refrigerator to keep the caramel and chocolate fresh. They can be kept at room temperature for up to 3 days but are most delicious when chilled.
- If you plan to make these cookies ahead of time, consider freezing them after the caramel has set but before coating them in chocolate. Simply thaw and proceed with the chocolate coating when you’re ready.
- For gifting, place the cookies in a single layer in a gift tin or box, separating layers with parchment paper to prevent sticking. You can also wrap each cookie individually in plastic wrap or cellophane bags for a more personalized touch.
Gift Packaging Ideas
These Irresistible Homemade Twix Cookies make perfect gifts for friends, family, or coworkers. Consider packaging them in decorative jars, tin containers, or gift boxes lined with tissue paper. Adding a ribbon or a gift tag with a personal message can make the gift even more special. For a more rustic look, you can wrap the cookies in brown paper bags and tie them with twine, adding a handwritten note or a sprinkle of decorative candies on top.
Flavor Variations
- 🌟 Different spices: Add a pinch of cinnamon, nutmeg, or cayenne pepper to the shortbread dough for a unique twist.
- 🌟 Creative toppings: Before the chocolate sets, sprinkle chopped nuts, shredded coconut, or even crushed candy pieces over the top for added texture and flavor.
- 🌟 Ingredient swaps: Use gluten-free flour for the shortbread base or substitute the heavy cream in the caramel with a non-dairy alternative for a vegan version.
Troubleshooting
- Texture problems: If your shortbread turns out too crumbly, it might be overbaked. If the caramel is too runny, it might not have been cooked to the right temperature.
- Ingredient replacements: Always consider the flavor and texture profile when substituting ingredients. For example, using brown sugar instead of granulated sugar will give a deeper flavor but can affect the texture of the caramel.
- Over/undercooking signs: Keep an eye on the shortbread while it’s baking, as it can quickly go from perfectly baked to overcooked. For the caramel, the deep amber color is your cue that it’s ready.
FAQs
- Can I freeze it? Yes, these cookies can be frozen at various stages of preparation. After the caramel has set is a good point to freeze them, then thaw and coat in chocolate when you’re ready.
- Is it gluten-free? The original recipe includes gluten due to the all-purpose flour. However, you can easily make a gluten-free version by substituting the flour with a gluten-free alternative.
- Can I double the recipe? Absolutely! Simply double all the ingredients and follow the instructions as usual. Keep in mind that you might need to adjust the baking time slightly for the shortbread base.
Conclusion
Making Irresistible Homemade Twix Cookies is a fun and rewarding baking project that yields delicious results with minimal effort. By following these steps and tips, you can create a dessert that’s sure to impress anyone with a sweet tooth. Don’t be afraid to experiment with different flavors and toppings to make the recipe your own, and enjoy the process of creating something truly special from scratch. Whether you’re a seasoned baker or just starting out, these cookies are a great way to indulge in the magic of homemade treats and share that joy with others.