Craving something easy for weeknight dinner? These homemade garlic bread rolls are a quick family favorite made with simple ingredients and baked to perfection. Save for later and enjoy!
Garlic Bread Rolls
Introduction
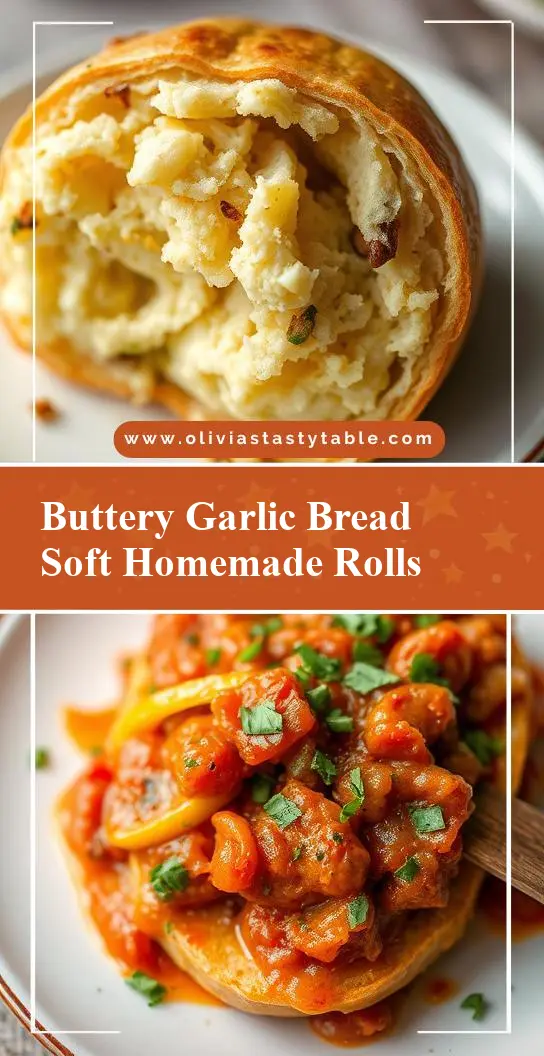
Imagine a dish that combines the comfort of freshly baked bread with the aromatic allure of garlic, all wrapped up in a neat, bite-sized package. Garlic bread rolls are a culinary delight that achieve just that, using everyday ingredients to create a treat that’s both easy to make and bursting with flavor. Whether you’re looking for a simple snack, a side dish to accompany your favorite meals, or a creative addition to your next dinner party, garlic bread rolls are an excellent choice. They offer a perfect blend of ease, flavor, and creativity, making them an ideal recipe for anyone looking to impress without spending hours in the kitchen.
Why This Works
- Flavor balance and ingredient accessibility: The recipe strikes a perfect balance between the richness of butter, the pungency of garlic, and the softness of bread, using ingredients that are easily found in most kitchens.
- Ease of preparation: Despite the impressive results, garlic bread rolls require minimal effort to prepare. The dough can be made from scratch with simple ingredients, and the garlic butter is a breeze to mix together.
- Impressive results with minimal effort: What makes garlic bread rolls truly special is how they can elevate any meal with their presence. They’re perfect for special occasions or everyday dining, offering a professional finish with homemade charm.
Key Ingredients
The main ingredients for garlic bread rolls include warm water, active dry yeast, sugar, all-purpose flour, salt, butter, garlic cloves, and sometimes grated cheese for an extra layer of flavor. For practical substitutions, you can use instant yeast if active dry yeast is not available, just be sure to adjust the amount according to the package instructions. Additionally, for those looking for a dairy-free option, vegan butter can be used as a substitute for regular butter. The beauty of this recipe lies in its flexibility and the ability to adapt it to suit various tastes and dietary needs.
Instructions
- Step 1: Begin by activating the yeast in warm water mixed with a pinch of sugar. Let it sit for about 5-10 minutes until it becomes frothy. Meanwhile, chop the garlic cloves finely and mix them with softened butter until well combined.
- Step 2: In a large mixing bowl, combine flour, salt, and the yeast mixture. Mix until a dough forms, then knead for about 10 minutes until the dough becomes smooth and elastic. Place the dough in a greased bowl, cover it, and let it rise in a warm place for about an hour, or until it has doubled in size.
- Step 3: Once the dough has risen, punch it down and divide it into equal portions, depending on how large you want your rolls to be. Roll each portion into a ball and then flatten it slightly into a disk shape. Place a spoonful of the garlic butter mixture in the center of each disk, then fold the dough over the filling and seal the edges tightly. Place the rolls on a baking sheet lined with parchment paper, leaving some space between each roll for expansion.
- Step 4: Let the rolls rise for another 30 minutes, then bake them in a preheated oven at 375°F (190°C) for about 15-20 minutes, or until they’re golden brown. Remove them from the oven and let them cool for a few minutes before serving.
Handy Tips
- Always check the expiration date of your yeast to ensure it’s active. If you’re unsure, you can test it by mixing it with warm water and sugar and waiting for it to froth.
- Don’t overmix the dough, as this can lead to tough bread. Mix the ingredients just until they come together, then knead the dough for the recommended time.
- For an extra crispy crust, brush the rolls with a little bit of egg wash (beaten egg mixed with a tablespoon of water) before baking.
Heat Control
When baking the garlic bread rolls, it’s crucial to have your oven at the right temperature. An oven that’s too hot can burn the rolls before they’re fully cooked, while an oven that’s too cool can result in rolls that are dense and undercooked. Ideally, you want to bake them at 375°F (190°C) for about 15-20 minutes. You can check for doneness by looking for a golden brown color and a soft, airy texture inside.
Crunch Factor
The crunch factor in garlic bread rolls comes from the crispy crust that forms during baking, contrasting beautifully with the soft interior. To achieve this, make sure your oven is at the correct temperature, and consider brushing the rolls with egg wash before baking for an extra crispy finish. Additionally, baking the rolls for the right amount of time is key; overbaking can make them too hard, while underbaking can leave them soft and soggy.
Pro Kitchen Tricks
- For a quicker rise, place the dough in a warm, draft-free place. You can also use your oven on the lowest temperature setting with the door slightly ajar to create a warm environment.
- To ensure the garlic butter is evenly distributed, you can mix it with a bit of grated cheese for extra flavor and then spread it on the dough before rolling it up.
- Consider using a stand mixer with a dough hook attachment for kneading the dough, especially if you’re making a large batch. This can significantly reduce the kneading time and effort.
Storage Tips
- For leftover garlic bread rolls, store them in an airtight container at room temperature for up to 2 days. You can also freeze them for up to 2 months; simply thaw and reheat in the oven or microwave when needed.
- When reheating, wrap the rolls in foil and heat them in the oven at 350°F (175°C) for about 5-10 minutes, or until warmed through.
- For the best results, use airtight containers or freezer bags to prevent moisture from affecting the texture of the rolls.
Gift Packaging Ideas
Garlic bread rolls make a wonderful gift, especially when packaged thoughtfully. Consider placing freshly baked rolls in a decorative basket or tin, wrapped in a paper bag and tied with a ribbon, or even in a mason jar with a cute label. For a more substantial gift, you could pair the rolls with a jar of homemade jam, a block of cheese, or a bottle of wine, creating a lovely gift basket that’s perfect for any occasion.
Flavor Variations
- 🌟 Different spices: Add a pinch of dried herbs like thyme or oregano to the garlic butter for a Mediterranean twist, or use red pepper flakes for a spicy kick.
- 🌟 Creative toppings: Before baking, sprinkle the rolls with grated cheese, chopped fresh herbs, or even crushed nuts for added texture and flavor.
- 🌟 Ingredient swaps: For a gluten-free version, you can substitute the all-purpose flour with a gluten-free flour mix. Just be sure to adjust the liquid content and resting time as gluten-free dough can behave differently.
Troubleshooting
- Texture problems: If your rolls turn out too dense, it might be because the dough was overmixed or didn’t rise long enough. If they’re too dry, it could be due to overbaking or using too much flour.
- Ingredient replacements: Always read the labels and instructions when substituting ingredients, especially when it comes to yeast and gluten-free products, as they can have specific usage guidelines.
- Over/undercooking signs: Keep an eye on your rolls while they’re baking. If they’re getting too brown, cover them with foil to prevent burning. If they’re not browning enough, you might need to increase the oven temperature slightly.
FAQs
- Can I freeze it? Yes, you can freeze garlic bread rolls for up to 2 months. Simply place them in a freezer-safe bag or container and thaw when needed.
- Is it gluten-free? The original recipe is not gluten-free, but you can make it gluten-free by substituting the all-purpose flour with a gluten-free flour mix and adjusting the recipe accordingly.
- Can I double the recipe? Yes, you can easily double or triple the recipe if you’re making it for a larger crowd. Just be sure to adjust the baking time slightly if you’re making a large batch.
Conclusion
Garlic bread rolls are a delicious and versatile treat that can be enjoyed in many different ways. With their soft, airy interior and crispy, garlic-infused crust, they’re sure to become a favorite in your household. Whether you’re a seasoned baker or just starting out, this recipe is easy to follow and offers plenty of room for creativity and experimentation. So go ahead, give it a try, and don’t be afraid to share your own tips and variations in the comments! With a little practice, you’ll be whipping up perfect garlic bread rolls like a pro, and they’re sure to impress anyone who tries them.