Craving a quick weeknight dinner solution? Try these easy mini baked chicken tacos made with shredded chicken and baked to perfection in just 20 minutes, perfect for a homemade family favorite, save for later
20 Minute Mini Baked Chicken Tacos
Introduction
Imagine a dish that combines the vibrant flavors of Mexico with the convenience of a quick weeknight dinner. Look no further than these 20 Minute Mini Baked Chicken Tacos, a recipe designed to delight your taste buds and simplify your cooking routine. With everyday ingredients and a straightforward preparation process, this dish is perfect for anyone looking to spice up their mealtime without sacrificing precious time. The beauty of this recipe lies in its balance of flavors, textures, and the creativity it allows, making it an ideal choice for both beginners and seasoned cooks alike.
Why This Works
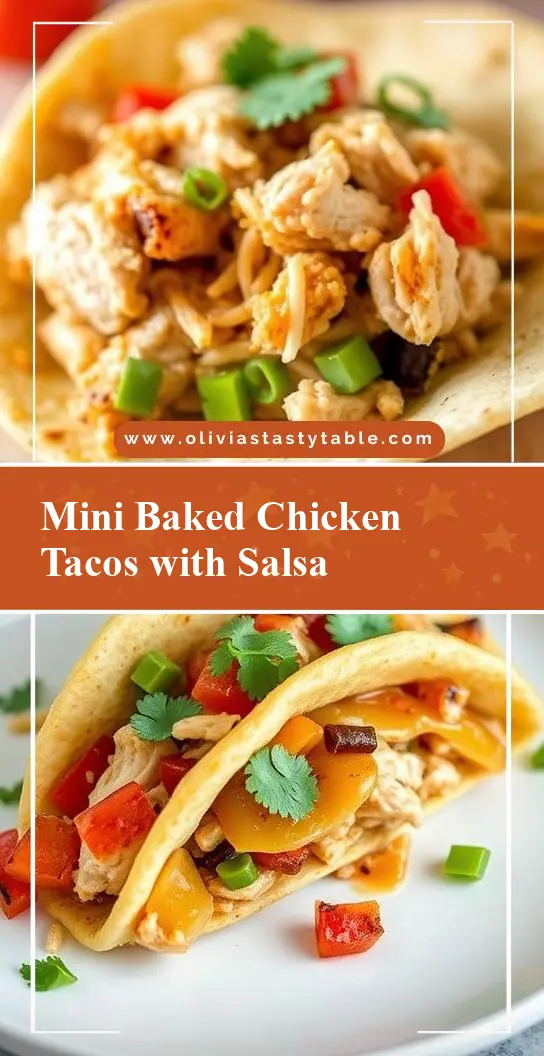
- Flavor balance and ingredient accessibility: The combination of chicken, taco seasoning, and the crunch of fresh vegetables creates a harmonious flavor profile that is both familiar and exciting. Moreover, the ingredients are easily found in most supermarkets, making this dish highly accessible.
- Ease of preparation: The simplicity of the recipe is one of its strongest points. With a preparation time of just a few minutes, anyone can have a delicious meal ready in no time. The steps are straightforward, and the baking process allows for minimal supervision, making it perfect for busy days.
- Impressive results with minimal effort: Despite the quick preparation and cooking time, the presentation and taste of these mini tacos are sure to impress. They’re perfect for a family dinner, a gathering with friends, or even as a fun project to do with kids.
Key Ingredients
The foundation of these 20 Minute Mini Baked Chicken Tacos includes boneless, skinless chicken breasts, taco seasoning, olive oil, mini taco shells, diced tomatoes, shredded lettuce, diced avocado, sour cream, and shredded cheese. For those looking for substitutions or variations, chicken can be replaced with ground beef or turkey for a different twist, and vegetarian options like beans or roasted vegetables can also be used. The taco seasoning can be homemade or store-bought, and feel free to customize the toppings to your liking, making this recipe highly adaptable to dietary preferences and ingredient availability.
Instructions
- Step 1: Begin by preheating your oven to 400°F (200°C). While the oven is warming up, prepare your ingredients. Chop the chicken into small, bite-sized pieces and season with taco seasoning. Slice the bell peppers and onions into thin strips.
- Step 2: In a large skillet, heat a couple of tablespoons of olive oil over medium-high heat. Add the chicken to the skillet and cook until browned on all sides and cooked through, about 5-7 minutes. Remove the chicken from the skillet and set aside. Then, add the sliced bell peppers and onions to the skillet and sauté until they start to soften.
- Step 3: Add the cooked chicken back into the skillet with the peppers and onions. Stir in a can of diced tomatoes (drained) and any additional taco seasoning you prefer. Let this mixture simmer for a few minutes to allow the flavors to meld together.
- Step 4: Arrange the mini taco shells on a baking sheet. Spoon the chicken and vegetable mixture into each shell, followed by any desired toppings such as shredded cheese, diced avocado, sour cream, and shredded lettuce. Bake in the preheated oven for about 10 minutes, or until the cheese is melted and the shells are crispy. Serve immediately and enjoy!
Handy Tips
- For an extra crispy shell, bake the mini tacos for an additional 2-3 minutes. Keep an eye on them to prevent burning.
- Customize your toppings bar with items like diced tomatoes, shredded lettuce, sour cream, salsa, and avocado to let everyone create their perfect taco.
- Consider using leftover chicken or preparing the chicken mixture ahead of time to make the recipe even quicker on busy days.
Heat Control
The ideal temperature for baking the mini tacos is 400°F (200°C), and the cooking time is approximately 10 minutes. It’s essential to keep an eye on them to ensure the cheese is melted, and the shells are not too brown. For the skillet, medium-high heat is recommended for cooking the chicken and vegetables. Always check the chicken’s doneness by ensuring it reaches an internal temperature of 165°F (74°C) to guarantee food safety.
Crunch Factor
Achieving the right crunch in your mini tacos is key to their appeal. The baking process helps to crisp up the taco shells nicely. Additionally, topping your tacos with fresh, crunchy vegetables like lettuce, diced tomatoes, and a sprinkle of crispy tortilla strips (if desired) can add texture and freshness. For an extra crunchy element, consider adding some toasted pumpkin seeds or crispy fried onions on top.
Pro Kitchen Tricks
- Use a baking sheet lined with parchment paper for easy cleanup and to prevent the taco shells from sticking.
- Prepare a topping bar with all the fixings to make the meal interactive and fun for everyone.
- For a shortcut, use pre-cooked chicken or store-bought taco seasoning to speed up the preparation process.
Storage Tips
- Leftover mini tacos can be stored in an airtight container in the refrigerator for up to 2 days. Reheat them in the oven or microwave until warmed through.
- Consider freezing the cooked chicken mixture for up to 3 months and assemble the tacos when you’re ready for a quick meal.
- Always use shallow, airtight containers to store leftovers to prevent moisture from accumulating and making the taco shells soggy.
Gift Packaging Ideas
If you’re considering gifting these delicious mini tacos, a fun and creative way to package them could be in small, decorative cardboard boxes or bags with a clear plastic window to showcase the tacos. Include a small note with heating instructions and suggestions for additional toppings. For a more personal touch, add a packet of homemade taco seasoning or a small jar of salsa.
Flavor Variations
- 🌟 Different spices: Experiment with various spice blends like cumin, chili powder, or smoked paprika to give your tacos a unique flavor.
- 🌟 Creative toppings: Try unusual toppings such as grilled pineapple, pickled onions, or a fried egg to add a surprising twist to your tacos.
- 🌟 Ingredient swaps: Replace chicken with steak, carnitas, or roasted sweet potatoes for a vegetarian option, offering a variety of textures and flavors.
Troubleshooting
- Texture problems: If your taco shells become too soggy, try baking them for a few minutes longer. For dry chicken, ensure you don’t overcook it, and marinate it beforehand if possible.
- Ingredient replacements: If you’re missing a specific ingredient, don’t hesitate to substitute with something similar. For example, use ground turkey instead of chicken or replace sour cream with Greek yogurt.
- Over/undercooking signs: Always check the chicken’s internal temperature to avoid undercooking. For overcooking, watch the taco shells’ color and the cheese’s melting point to prevent burning.
FAQs
- Can I freeze it? Yes, you can freeze the cooked chicken mixture for later use. Simply thaw and assemble the tacos when you’re ready.
- Is it gluten-free? Depending on the taco seasoning and the type of taco shells used, this recipe can be gluten-free. Always check the ingredient labels to ensure they meet your dietary requirements.
- Can I double the recipe? Absolutely, this recipe can be easily doubled or tripled to feed a larger crowd. Just ensure you have enough baking sheets and adjust the cooking time slightly if necessary.
Conclusion
In conclusion, the 20 Minute Mini Baked Chicken Tacos are a versatile, quick, and delicious meal solution perfect for any day of the week. With its simple preparation, customizable toppings, and fast baking time, this recipe is sure to become a family favorite. Don’t be afraid to experiment with different flavors and ingredients to make it your own, and enjoy the process of creating a fun and interactive meal with your loved ones. Whether you’re a seasoned cook or just starting out, this recipe is a great addition to any meal repertoire, offering a blend of convenience, taste, and creativity that’s hard to resist.