Need a weeknight dinner solution? Try this easy sticky honey garlic chicken recipe, made with simple homemade ingredients, perfect for a quick family favorite meal, save for later
Sticky Honey Garlic Chicken – Quick & Delicious Weeknight Dinner
Introduction
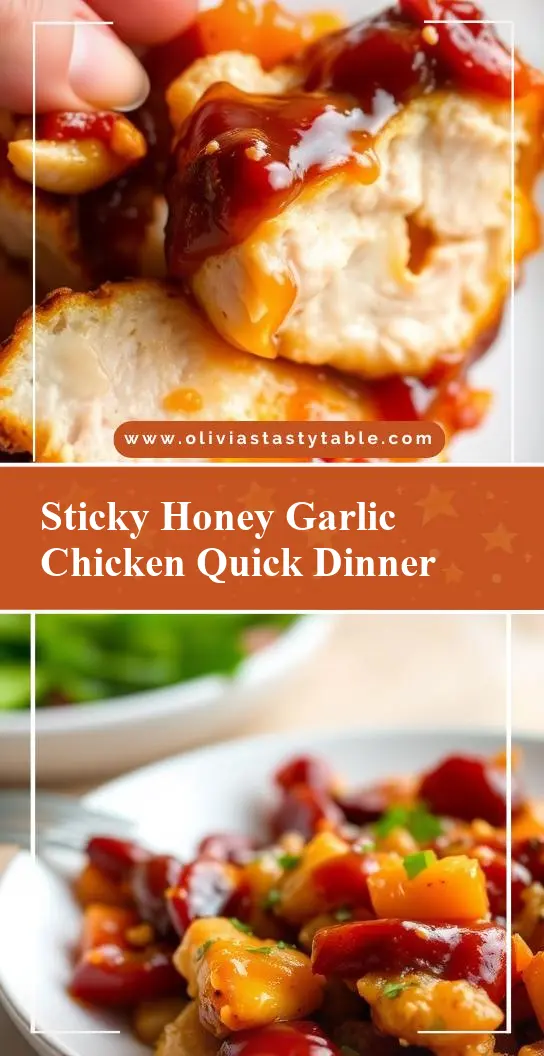
Imagine a dish that combines the sweetness of honey, the pungency of garlic, and the savory flavor of chicken, all in one quick and delicious weeknight dinner. This Sticky Honey Garlic Chicken recipe is a game-changer for anyone looking to elevate their mealtime experience without spending hours in the kitchen. Using everyday ingredients and requiring minimal effort, this recipe is perfect for busy individuals and families alike. The best part? It’s incredibly easy to make and is sure to become a favorite in your household.
Why This Works
- Flavor balance and ingredient accessibility: The combination of honey, garlic, and soy sauce creates a harmonious balance of sweet, savory, and umami flavors that will leave you wanting more. Plus, the ingredients are easily found in most supermarkets, making it a convenient option for a weeknight dinner.
- Ease of preparation: This recipe requires minimal prep work and can be cooked in under 30 minutes, making it perfect for those with busy schedules. Simply marinate the chicken, cook it in a pan, and serve with your favorite sides.
- Impressive results with minimal effort: Despite its simplicity, this recipe yields impressive results that are sure to impress your family and friends. The sticky honey garlic sauce is a showstopper, and the tender and juicy chicken is cooked to perfection.
Key Ingredients
The key ingredients in this recipe include chicken breasts, honey, garlic, soy sauce, olive oil, and bell peppers. You can substitute the chicken breasts with thighs or a combination of both, depending on your preference. For a gluten-free option, use gluten-free soy sauce or tamari. If you don’t have bell peppers, you can use other colorful peppers or even carrots and snap peas. The honey can be replaced with maple syrup or agave nectar for a slightly different flavor profile.
Instructions
- Step 1: Begin by preparing the marinade. In a small bowl, whisk together honey, garlic, soy sauce, and olive oil. Place the chicken breasts in a large ziplock bag or a shallow dish, and pour the marinade over them. Seal the bag or cover the dish with plastic wrap, and refrigerate for at least 30 minutes or up to 2 hours.
- Step 2: Heat a large skillet or wok over medium-high heat. Remove the chicken from the marinade, letting any excess liquid drip off. Cook the chicken for 5-6 minutes per side, or until it reaches an internal temperature of 165°F. Transfer the chicken to a plate and cover with foil to keep warm.
- Step 3: In the same skillet, add the sliced bell peppers and cook for 3-4 minutes, or until they start to soften. Pour in the remaining marinade and bring to a simmer. Scrape up any browned bits from the bottom of the pan, and cook for an additional 2-3 minutes, or until the sauce has thickened and the peppers are tender.
- Step 4: Return the chicken to the skillet and toss to coat with the sticky honey garlic sauce. Serve immediately, garnished with sliced green onions and sesame seeds if desired.
Handy Tips
- Use high-quality ingredients: Fresh garlic and real honey make a big difference in the flavor of this dish. Avoid using pre-minced garlic or artificial honey substitutes.
- Don’t overcook the chicken: Cook the chicken until it reaches an internal temperature of 165°F, but avoid overcooking it. This will ensure that the chicken stays juicy and tender.
- Customize to your taste: Feel free to add your favorite spices or herbs to the marinade, such as red pepper flakes or chopped cilantro. You can also serve the chicken with your favorite sides, such as steamed vegetables or roasted potatoes.
Heat Control
When cooking the chicken and the sauce, it’s essential to control the heat to achieve the perfect level of doneness. For the chicken, cook it over medium-high heat until it reaches an internal temperature of 165°F. For the sauce, simmer it over medium heat until it thickens and the peppers are tender. Avoid burning the sauce or the chicken by stirring frequently and adjusting the heat as needed.
Crunch Factor
The crunch factor in this dish comes from the toasted sesame seeds and the crispy bell peppers. To achieve the perfect crunch, cook the bell peppers until they start to soften, then add the sesame seeds and cook for an additional minute. This will give the dish a nice texture contrast and add depth to the flavors.
Pro Kitchen Tricks
- Use a cast-iron skillet: A cast-iron skillet is ideal for cooking the chicken and the sauce, as it retains heat well and can achieve a nice crust on the chicken.
- Don’t overcrowd the pan: Cook the chicken and the peppers in batches if necessary, to avoid overcrowding the pan. This will ensure that each piece of chicken and each pepper has enough room to cook evenly.
- Let it rest: After cooking the chicken, let it rest for a few minutes before slicing and serving. This will allow the juices to redistribute, making the chicken even more tender and juicy.
Storage Tips
- Refrigerate leftovers: Cool the chicken and the sauce to room temperature, then refrigerate them in an airtight container for up to 3 days.
- Reheat safely: Reheat the chicken and the sauce to an internal temperature of 165°F, using a food thermometer to ensure food safety.
- Freeze for later: Freeze the cooked chicken and sauce in an airtight container or freezer bag for up to 2 months. Thaw and reheat as needed.
Gift Packaging Ideas
This dish is perfect for gifting to friends and family, especially during the holidays. Consider packaging the chicken and sauce in a decorative jar or container, garnished with fresh herbs and a ribbon. You can also include a side of steamed vegetables or roasted potatoes, packaged in a separate container. Add a personalized note or card, and you have a thoughtful and delicious gift.
Flavor Variations
- 🌟 Different spices: Add a pinch of red pepper flakes for a spicy kick, or use smoked paprika for a smoky flavor.
- 🌟 Creative toppings: Top the chicken with toasted chopped nuts, diced onions, or shredded coconut for added texture and flavor.
- 🌟 Ingredient swaps: Use chicken thighs instead of breasts, or substitute the bell peppers with other colorful peppers or carrots and snap peas.
Troubleshooting
- Texture problems: If the chicken is too dry, try marinating it for a longer time or adding more sauce. If the sauce is too thick, add a little water or broth to thin it out.
- Ingredient replacements: If you don’t have soy sauce, use tamari or gluten-free soy sauce instead. If you don’t have honey, use maple syrup or agave nectar as a substitute.
- Over/undercooking signs: Check the chicken for doneness by cutting into it; if it’s pink, it’s not cooked enough. If the sauce is too dark, it may be burning; stir frequently and adjust the heat as needed.
FAQs
- Can I freeze it? Yes, you can freeze the cooked chicken and sauce for up to 2 months. Thaw and reheat as needed.
- Is it gluten-free? Yes, this recipe is gluten-free if you use gluten-free soy sauce or tamari. Be sure to check the labels of your ingredients to ensure they are gluten-free.
- Can I double the recipe? Yes, you can double the recipe if you need to feed a larger crowd. Simply multiply the ingredients and adjust the cooking time as needed.
Conclusion
This Sticky Honey Garlic Chicken recipe is a quick and delicious weeknight dinner solution that’s perfect for busy individuals and families. With its flavorful marinade, tender chicken, and crunchy bell peppers, this dish is sure to become a favorite in your household. Don’t be afraid to experiment with different spices and ingredients to make it your own, and enjoy the process of cooking and sharing a delicious meal with your loved ones.