Looking for a quick dessert fix? Try these easy peanut butter blossom cookies with melted chocolate paw prints, made with simple homemade ingredients, perfect for a weeknight treat, save for later
Easy Peanut Butter Blossom Cookies with Chocolate Paw Prints
Introduction
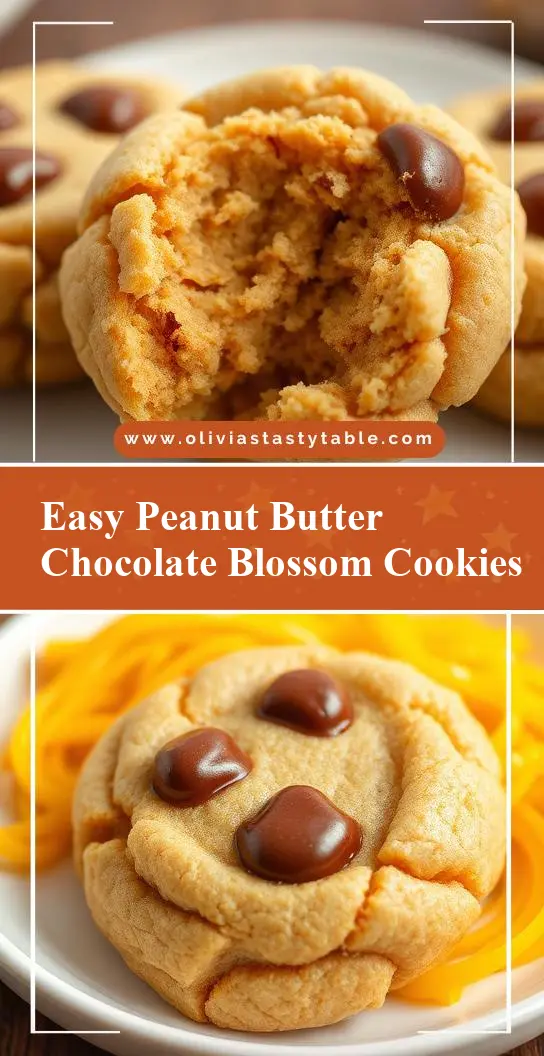
Imagine sinking your teeth into a soft, chewy peanut butter cookie, only to be surprised by the richness of chocolate and the delightful crunch of a peanut butter cup, all while being adorable with chocolate paw prints on top. These Easy Peanut Butter Blossom Cookies with Chocolate Paw Prints are not just a treat for the taste buds, but also a feast for the eyes. Using everyday ingredients and requiring minimal effort, this recipe is perfect for anyone looking to impress without the fuss. Whether you’re a seasoned baker or a beginner, these cookies are sure to become a favorite, combining the classic flavors of peanut butter and chocolate in a unique and visually appealing way.
Why This Works
- Flavor balance and ingredient accessibility: The combination of peanut butter and chocolate is a timeless classic, and using peanut butter cups and chocolate chips makes the ingredients easily accessible and the flavor balance perfect.
- Ease of preparation: The dough is simple to prepare, and the process of making these cookies is straightforward, making them ideal for a quick baking session.
- Impressive results with minimal effort: Despite the simplicity of the recipe, the end result is impressive, especially with the addition of chocolate paw prints, making these cookies perfect for gift-giving or special occasions.
Key Ingredients
The main ingredients for these Easy Peanut Butter Blossom Cookies with Chocolate Paw Prints include creamy peanut butter, sugar, eggs, flour, baking soda, salt, peanut butter cups, and chocolate chips or chocolate melts for the paw prints. For those looking for substitutions, almond butter or cashew butter can be used in place of peanut butter for a different flavor profile. Additionally, using dark or white chocolate chips can offer a variation in flavor and appearance.
Instructions
- Step 1: Begin by preheating your oven to 375°F (190°C). Line a baking sheet with parchment paper or a silicone mat. In a large bowl, whisk together the flour, baking soda, and salt. Set aside.
- Step 2: In another large bowl, use an electric mixer to cream together the peanut butter and sugar until smooth and creamy. Beat in the eggs one at a time, ensuring each egg is fully incorporated before adding the next.
- Step 3: Gradually mix in the flour mixture until a dough forms. Wrap the dough in plastic wrap and refrigerate for at least 30 minutes to allow the flavors to meld and the dough to firm up.
- Step 4: Scoop the dough into balls, about 1 tablespoon each. Place the balls onto the prepared baking sheet, leaving about 2 inches of space between each cookie. Bake for 10-12 minutes, or until the edges are lightly browned. Remove from the oven and immediately press a peanut butter cup into the center of each cookie. Allow the cookies to cool on the baking sheet for 5 minutes before transferring them to a wire rack to cool completely.
- Step 5: For the chocolate paw prints, melt the chocolate chips or chocolate melts in a double boiler or in the microwave in 30-second increments, stirring between each interval until smooth. Use a spoon or a piping bag to create paw print designs on top of the cooled cookies.
Handy Tips
- Ensure your peanut butter is at room temperature for easier mixing. If using natural peanut butter, stir well before using as it can separate.
- Don’t overbake the cookies, as they can quickly become too hard. They should be lightly browned and still slightly soft to the touch.
- For the chocolate paw prints, work quickly as the chocolate can set fast. If the chocolate becomes too thick, you can always reheat it slightly.
Heat Control
When baking these cookies, it’s crucial to keep an eye on the temperature and timing. The ideal baking temperature is 375°F (190°C), and the cookies should bake for 10-12 minutes. Signs of doneness include lightly browned edges and a firmness to the touch. Remember, the cookies will continue to cook a bit after being removed from the oven, so it’s better to err on the side of underbaking than overbaking.
Crunch Factor
The crunch factor in these cookies comes from the peanut butter cups and the potential crunch of the peanut butter dough itself if baked to a perfect doneness. The outside should be lightly crisp, giving way to a chewy interior. If you prefer a crisper cookie, you can bake them for an additional minute or two, keeping a close eye to avoid overbaking.
Pro Kitchen Tricks
- Chill the dough: Chilling the dough not only helps the flavors to meld together but also makes the dough easier to handle and scoop.
- Use quality chocolate: The better the quality of your chocolate, the richer and deeper the flavor will be in your cookies.
- Clean as you go: To avoid a big cleanup at the end, wash your utensils and bowls as you finish using them. This makes the baking process more enjoyable and less daunting.
Storage Tips
- Store the cookies in an airtight container at room temperature for up to 5 days. If you live in a hot or humid climate, consider storing them in the refrigerator to keep them fresh for longer.
- For longer storage, cookies can be frozen for up to 2 months. Simply place them in a single layer in a freezer-safe bag or container and thaw at room temperature when ready to eat.
- Reheating tips: If you find your cookies have become too soft, you can refresh them by baking them in a preheated oven at 300°F (150°C) for a few minutes. Keep an eye on them to avoid overbaking.
Gift Packaging Ideas
These cookies are perfect for gift-giving, especially with the adorable chocolate paw prints on top. Consider packaging them in decorative jars, gift tins, or even cellophane bags tied with a ribbon. You can also add a personal touch by including a handmade card or a packet of hot cocoa mix for a cozy treat. For a more rustic look, use brown paper bags or wrap the cookies individually in parchment paper and tie with twine.
Flavor Variations
- 🌟 Different spices: Add a pinch of cinnamon, nutmeg, or sea salt to the dough for an extra depth of flavor.
- 🌟 Creative toppings: Instead of peanut butter cups, try using other types of candies, nuts, or even dried fruits to create different flavor combinations.
- 🌟 Ingredient swaps: Use almond or cashew butter for a different nutty flavor, or swap the sugar for honey or maple syrup for a distinct sweetness.
Troubleshooting
- Texture problems: If your cookies turn out too hard, they were likely overbaked. If they’re too soft, they might have been underbaked or the dough was too warm.
- Ingredient replacements: Always substitute ingredients with caution, as this can affect the final texture and flavor of the cookies. Some substitutions, like using margarine instead of butter, can significantly alter the taste.
- Over/undercooking signs: Keep an eye on your cookies while they bake. If the edges are more browned than lightly golden, they’re overbaked. If they’re pale and soft to the touch, they might need a few more minutes in the oven.
FAQs
- Can I freeze it? Yes, these cookies can be frozen for up to 2 months. Simply thaw at room temperature when ready to eat.
- Is it gluten-free? The recipe as stated is not gluten-free due to the use of wheat flour. However, you can experiment with gluten-free flours to make a gluten-free version.
- Can I double the recipe? Yes, you can easily double or even triple this recipe if you’re baking for a large group. Just ensure you have enough baking sheets and space in your oven.
Conclusion
These Easy Peanut Butter Blossom Cookies with Chocolate Paw Prints are a delightful treat that combines the best of peanut butter and chocolate in a fun and visually appealing way. With their ease of preparation, impressive results, and the potential for creativity with different toppings and flavor variations, they’re perfect for any occasion, from casual gatherings to special events. So, go ahead, get baking, and enjoy the joy of sharing these delicious cookies with your loved ones. Remember, the key to a great bake is not just in the ingredients, but in the love and care you put into making it. Happy baking!