Craving something sweet and indulgent? Try these easy chocolate peanut butter bars made with rich peanut butter and melted chocolate for a quick homemade dessert perfect for weeknights, save for later
Easy Chocolate Peanut Butter Bars Recipe for Dessert
Introduction
Imagine a dessert so divine, it combines the richness of chocolate and the creaminess of peanut butter into one irresistible treat. Welcome to the world of Easy Chocolate Peanut Butter Bars, where simplicity meets decadence. This recipe is a game-changer for anyone with a sweet tooth, requiring minimal effort but yielding impressive results. With everyday ingredients and a straightforward process, you’ll be amazed at how easily you can create a dessert that’s both indulgent and elegant. Whether you’re a seasoned baker or a beginner in the kitchen, this recipe is perfect for satisfying your cravings and impressing your friends and family.
Why This Works
- Flavor balance and ingredient accessibility: The combination of chocolate and peanut butter is a classic for a reason. These ingredients are not only delicious but also readily available, making this recipe accessible to everyone.
- Ease of preparation: The simplicity of this recipe lies in its no-bake, mix-and-layer approach. You don’t need to be a skilled baker to achieve perfection.
- Impressive results with minimal effort: Despite its ease, the end result is a beautifully layered dessert that looks and tastes like it was made in a professional bakery.
Key Ingredients
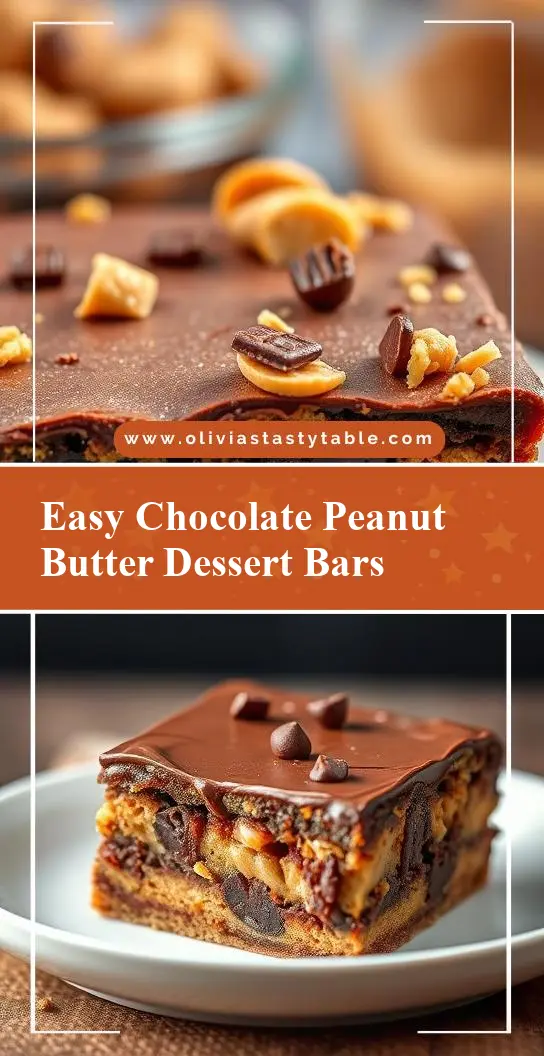
The magic of these bars comes from a few key ingredients: a base of graham cracker crumbs for crunch, a creamy peanut butter mixture for the middle layer, and a rich chocolate topping to finish it off. For the peanut butter layer, you’ll need creamy peanut butter, confectioners’ sugar, and melted butter. The chocolate layer requires melted chocolate and a touch of shortening to ensure a smooth finish. Practical substitutions can be made, such as using almond butter instead of peanut butter for a different flavor profile or opting for dark chocolate for a deeper taste.
Instructions
- Step 1: Begin by preparing your base. Mix graham cracker crumbs with sugar and melted butter until well combined. Press this mixture into a lined or greased baking dish to create the foundation of your bars.
- Step 2: For the peanut butter layer, mix peanut butter, confectioners’ sugar, and melted butter in a bowl until smooth. Spread this mixture evenly over the graham cracker base.
- Step 3: Melt your chocolate with a touch of shortening in a double boiler or in the microwave in short intervals, stirring between each interval until smooth. Pour the melted chocolate over the peanut butter layer, spreading it to cover the entire surface.
- Step 4: Refrigerate the bars until the chocolate is set. Cut into bars and serve. You can garnish with peanuts, sea salt, or additional chocolate shavings for extra flair.
Handy Tips
- Use high-quality chocolate for the best flavor. Dark, milk, or white chocolate can be used depending on your preference.
- Don’t overmix the peanut butter layer, as it can become too stiff. Stop mixing once the ingredients are just combined.
- For a crunchy topping, sprinkle chopped nuts over the melted chocolate before it sets.
Heat Control
When melting chocolate, it’s crucial to avoid overheating, which can cause the chocolate to seize up or become grainy. If using a microwave, heat in short intervals (10-15 seconds) and stir well between each heating. If using a double boiler, ensure the water doesn’t boil but simmers gently, and remove the chocolate from the heat once melted and smooth.
Crunch Factor
The crunch in these bars comes from the graham cracker base and any additional toppings like nuts. To maintain the crunch, avoid overbaking the graham cracker crust if you choose to bake it lightly to set. For the chocolate top, letting it set at room temperature or speeding up the process in the refrigerator will help maintain a smooth, snappy texture when broken.
Pro Kitchen Tricks
- Line your baking dish with parchment paper for easy removal of the bars once set.
- Use a sharp knife to cut the bars. If the chocolate is too hard, let it sit at room temperature for a few minutes to soften slightly.
- Experiment with different types of chocolate or add-ins like dried cranberries or coconut flakes to give your bars a unique twist.
Storage Tips
- Store the bars in an airtight container in the refrigerator for up to a week.
- For longer storage, these bars can be frozen. Cut them first, then place in a single layer in a freezer-safe container or bag. Thaw at room temperature or in the refrigerator when you’re ready to serve.
- Consider storing them in a cool, dry place if you plan to serve within a day or two, but refrigeration is recommended to maintain freshness.
Gift Packaging Ideas
These bars are perfect for gifting, especially during holidays or as a thoughtful gesture. Package them in decorative tins, wrap individually in plastic wrap or aluminum foil and place in a gift box, or create a gift basket filled with these bars and other sweet treats. Adding a ribbon or a handwritten note can make the gift even more special.
Flavor Variations
- 🌟 Different spices: Add a pinch of salt or a teaspoon of cinnamon to the peanut butter mixture for added depth.
- 🌟 Creative toppings: Sprinkle sea salt, chopped nuts, or shredded coconut over the melted chocolate for texture and visual appeal.
- 🌟 Ingredient swaps: Use almond butter or cashew butter for a different nutty flavor, or substitute the graham cracker crumbs with crushed cookies for a cookie crust.
Troubleshooting
- Texture problems: If the peanut butter layer is too stiff, it may be overmixed. Try adding a little more melted butter to loosen it. If the chocolate is too hard, it may have been overheated; try tempering it or using a higher quality chocolate.
- Ingredient replacements: Always consider the flavor and texture you’re replacing when substituting ingredients. For example, using natural peanut butter may result in a slightly different consistency than creamy peanut butter.
- Over/undercooking signs: Since this is a no-bake recipe, you won’t have to worry about overcooking. However, ensure the chocolate is set before cutting into the bars to avoid a messy presentation.
FAQs
- Can I freeze it? Yes, these bars can be frozen for up to 3 months. Cut them first, then freeze in a single layer in a freezer-safe container or bag.
- Is it gluten-free? Depending on the brand of graham crackers used, these bars may not be gluten-free. Look for gluten-free alternatives to make this dessert accessible to those with gluten intolerance.
- Can I double the recipe? Absolutely. Simply multiply all the ingredients by two and adjust the size of your baking dish accordingly. Keep in mind that larger bars may take a bit longer for the chocolate to set.
Conclusion
With the Easy Chocolate Peanut Butter Bars recipe, you’re not just making a dessert; you’re creating an experience. The combination of creamy peanut butter, crunchy graham cracker crust, and rich chocolate is a match made in heaven. Whether you’re a chocolate and peanut butter fanatic or just looking for a simple yet impressive dessert, this recipe has you covered. Feel free to experiment with different flavors and toppings to make it your own, and don’t hesitate to share your creations with friends and family. Happy baking, and remember, the most important ingredient in any recipe is love!