Craving a cool summer treat? This easy chocolate ice cream cake recipe is a homemade favorite made with rich chocolate and creamy ice cream, perfect for weeknight desserts, save for later
Easy Chocolate Ice Cream Cake Recipe for Summer Desserts
Introduction
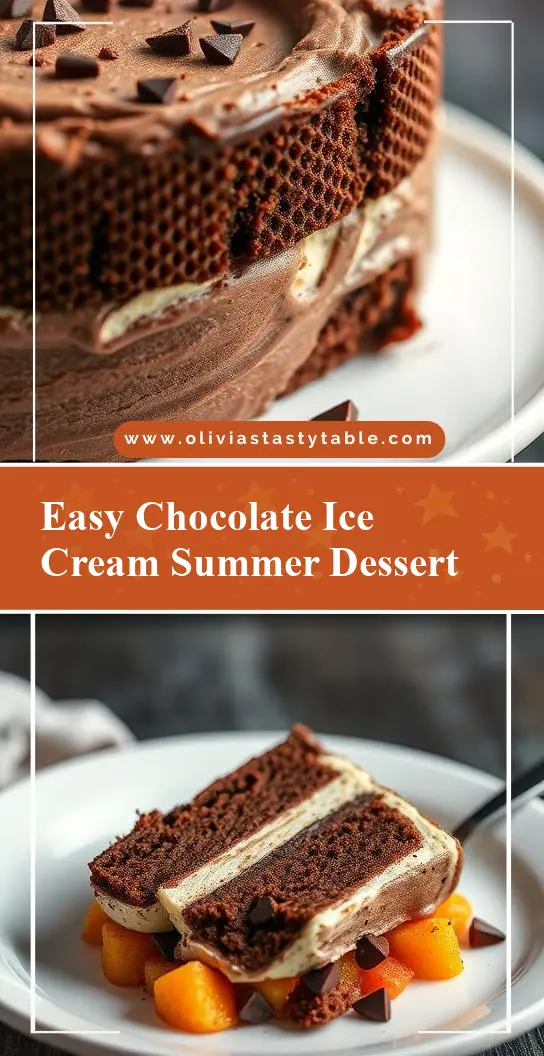
As the summer sun beats down, there’s no better way to cool off than with a decadent and refreshing dessert. This easy chocolate ice cream cake recipe is the perfect treat for warm weather gatherings, potlucks, or simply a sweet indulgence at home. What makes this recipe truly special is its ease of preparation, using everyday ingredients that you likely have on hand, and the freedom to get creative with toppings and mix-ins. Whether you’re a seasoned baker or a beginner in the kitchen, this recipe is sure to impress with its rich, velvety chocolate flavor and creamy texture.
Why This Works
- Flavor balance and ingredient accessibility: This recipe strikes the perfect balance between deep, dark chocolate and sweet, creamy ice cream, all made with ingredients you can easily find at your local grocery store.
- Ease of preparation: With just a few simple steps, you can have this stunning dessert ready to go, making it perfect for last-minute gatherings or spontaneous treats.
- Impressive results with minimal effort: Despite its simplicity, this cake presents beautifully and tastes like a professional dessert, sure to wow your friends and family.
Key Ingredients
The main ingredients for this easy chocolate ice cream cake include a store-bought or homemade chocolate cake mix, your favorite brand of chocolate ice cream, a can of whipped cream, and any desired toppings such as chocolate chips, nuts, or fresh fruit. For the cake, you’ll also need eggs, oil, and water as per the mix instructions. Feel free to substitute the cake mix with a homemade recipe if you prefer, and don’t hesitate to get creative with your ice cream flavor and toppings to make the dessert truly yours.
Instructions
- Step 1: Begin by preparing your cake according to the package instructions or your homemade recipe. Typically, this involves mixing the cake mix with eggs, oil, and water, then pouring the batter into a greased and floured pan. Bake as directed, usually around 30-40 minutes, or until a toothpick inserted into the center comes out clean. Let the cake cool completely.
- Step 2: Once your cake is cool, it’s time to assemble the dessert. Scoop your chocolate ice cream into a large bowl and let it sit at room temperature for about 10-15 minutes to soften. This will make it easier to spread over the cake.
- Step 3: Place your cooled cake on a serving plate or cake stand. Spread the softened ice cream evenly over the top of the cake. You can use a spatula or spoon to create a decorative edge or pattern with the ice cream.
- Step 4: Finish your dessert with a dollop of whipped cream and any desired toppings. This could be as simple as sprinkling a few chocolate chips on top or as elaborate as creating a pattern with sliced fruit and nuts. Chill the cake in the freezer for at least 30 minutes to set before serving.
Handy Tips
- To ensure your cake and ice cream adhere well, you can drizzle a small amount of chocolate syrup or melted chocolate over the cake before topping with ice cream.
- For a more intense chocolate experience, use a dark or bittersweet chocolate cake mix and pair with a deep, rich chocolate ice cream.
- Consider using a variety of mix-ins like nuts, candy pieces, or cookie crumbs in your ice cream for added texture and flavor.
Heat Control
When baking the cake, it’s crucial to follow the temperature and timing instructions provided with the mix or your recipe. Typically, cakes are baked at 350°F (175°C). Keep an eye on your cake as it bakes, and check for doneness by inserting a toothpick into the center. If the toothpick comes out clean or with a few moist crumbs, the cake is ready. Avoid overbaking, as this can lead to a dry cake.
Crunch Factor
The texture of your dessert can be tailored to your liking with the addition of crunchy elements. Nuts, chocolate chips, or even crushed cookies can add a delightful contrast to the smooth ice cream and moist cake. If you prefer a crunchier topping, consider sprinkling your chosen ingredient over the whipped cream just before serving to prevent it from getting soggy.
Pro Kitchen Tricks
- To make your cake more stable and easier to serve, especially if you’re using a lot of toppings, consider inserting a wooden dowel or plastic cake support into the center of the cake before freezing.
- For a professional-looking finish, use a piping bag to decorate the whipped cream on top of the cake. You can create borders, patterns, or even write messages with the whipped cream.
- Keep your ice cream from becoming too hard or icy by not over-freezing it. If you’re preparing the dessert ahead of time, consider assembling it just before serving or keeping the components separate until then.
Storage Tips
- Store any leftover cake in an airtight container in the freezer to keep it fresh. It’s best consumed within a few days for optimal flavor and texture.
- When reheating or serving, remove the cake from the freezer and let it sit at room temperature for about 10-15 minutes to soften slightly. This makes it easier to slice and serve.
- Consider using a vacuum sealer or wrapping the cake tightly in plastic wrap and then aluminum foil to prevent freezer burn and maintain freshness.
Gift Packaging Ideas
If you’re looking to give this dessert as a gift, consider packaging it in a decorative tin or box. You can wrap the cake in plastic wrap or aluminum foil and then place it in the tin. Add a personal touch with a handwritten note or a small bouquet of flowers on top. For a more rustic look, use a wooden crate or a wicker basket lined with a colorful towel or paper.
Flavor Variations
- 🌟 Different spices: Try adding a pinch of cinnamon, nutmeg, or cayenne pepper to your cake mix or ice cream for a unique twist.
- 🌟 Creative toppings: Experiment with various nuts, dried fruits, or even candy pieces to find your favorite combination.
- 🌟 Ingredient swaps: Substitute your chocolate cake with a vanilla or red velvet cake for a different flavor profile, or use different flavors of ice cream like strawberry or cookie dough.
Troubleshooting
- Texture problems: If your cake turns out too dry, it may have been overbaked. For ice cream that’s too hard, try letting it sit at room temperature for a few minutes before serving.
- Ingredient replacements: If you’re missing an ingredient, consider what you have on hand that could serve as a substitute. For example, you could use melted butter instead of oil in the cake mix.
- Over/undercooking signs: Keep an eye on your cake while it bakes, and check it frequently towards the end of the baking time. Ice cream that’s too soft may have been left at room temperature for too long.
FAQs
- Can I freeze it? Yes, this dessert can be frozen. In fact, it’s best served frozen. Simply place it in an airtight container or wrap it tightly in plastic wrap and aluminum foil.
- Is it gluten-free? Depending on the cake mix you use, this dessert can be gluten-free. Look for gluten-free cake mixes or consider making your own gluten-free cake from scratch.
- Can I double the recipe? Absolutely! Simply double all the ingredients and adjust the baking time as needed. Keep in mind that a larger cake may take longer to bake through.
Conclusion
This easy chocolate ice cream cake recipe is a game-changer for summer desserts. It’s simple, yet impressive; customizable, yet always delicious. Whether you’re a fan of classic chocolate or like to mix things up with different flavors and toppings, this dessert is sure to become a favorite. Don’t be afraid to experiment and make it your own, and don’t hesitate to share your creations with friends and family. Happy baking, and enjoy the sweet taste of summer!