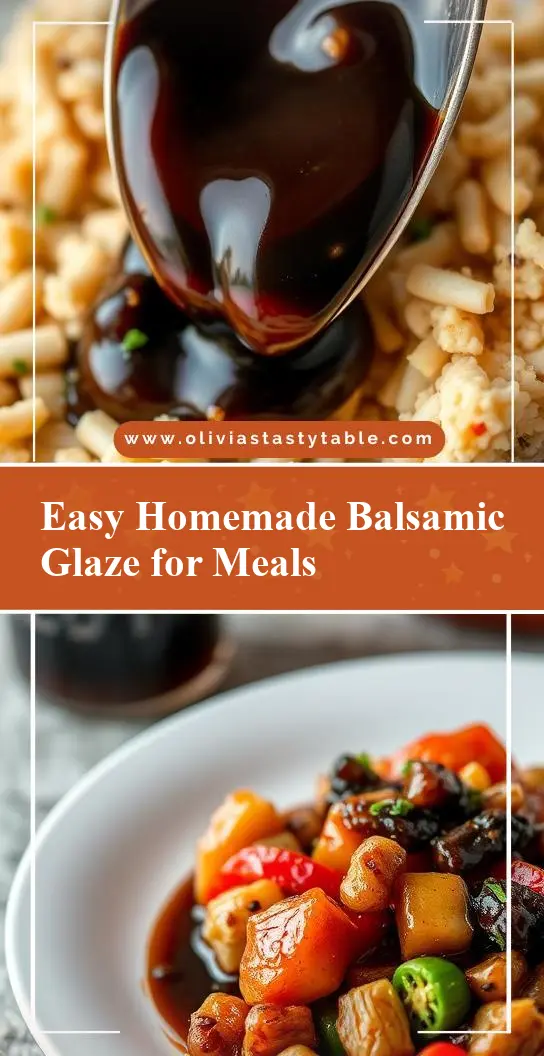
Want to elevate your weeknight dinner with a simple twist? Try this easy homemade balsamic glaze recipe made with fresh basil and balsamic vinegar for a quick family favorite, save for later
Easy Homemade Balsamic Glaze Recipe for Every Meal
Introduction
Imagine elevating every dish from a simple salad to a gourmet meal with a rich, velvety, and intensely flavorful condiment made from just a few everyday ingredients. Welcome to the world of homemade balsamic glaze, where the ease of preparation meets the depth of flavor, allowing you to unleash your creativity in the kitchen. This article will guide you through making your own balsamic glaze, perfect for drizzling over meats, cheeses, vegetables, and even using as a dipping sauce. The best part? It’s incredibly easy to make and requires minimal supervision, making it a perfect addition to any meal without adding extra stress to your cooking routine.
Why This Works
- Flavor balance and ingredient accessibility: The beauty of balsamic glaze lies in its simplicity. Made primarily from balsamic vinegar and sometimes a sweetener like honey or sugar, it’s a condiment that’s both accessible and impressive.
- Ease of preparation: The process is straightforward and requires minimal equipment, making it perfect for cooks of all levels.
- Impressive results with minimal effort: Despite its simplicity, the end result is a sophisticated condiment that can elevate any dish, making it perfect for special occasions or everyday meals alike.
Key Ingredients
The core of a good balsamic glaze is quality balsamic vinegar. Look for a vinegar that is aged, as it will have a deeper, richer flavor. You’ll also need a sweetener; honey and sugar are common choices, but feel free to experiment with maple syrup or other sweeteners to find the flavor you like best. Sometimes, a little bit of olive oil can enhance the texture and prevent the glaze from becoming too thick. Practical substitutions can include using different types of vinegar, like apple cider vinegar, for a slightly different flavor profile, though keep in mind the flavor will be quite different from traditional balsamic glaze.
Instructions
- Step 1: Begin by measuring out your balsamic vinegar and sweetener. A good starting point is 1 cup of balsamic vinegar to 1/2 cup of sweetener, but you can adjust the ratio to your taste.
- Step 2: In a small saucepan, combine the balsamic vinegar and your chosen sweetener. Place the saucepan over medium heat and stir until the sweetener is dissolved.
- Step 3: Bring the mixture to a simmer and let it cook, uncovered, until it has thickened and reduced significantly. This should take about 20-30 minutes, depending on your heat and the desired consistency. You’re aiming for a glaze that coats the back of a spoon.
- Step 4: Remove the glaze from the heat and let it cool slightly. If it becomes too thick, you can thin it out with a little water. Transfer the glaze to an airtight container and store it in the refrigerator for up to 2 weeks.
Handy Tips
- Always taste as you go and adjust the sweetness and consistency to your liking. Remember, it’s easier to add more sweetener than it is to remove excess.
- Keep an eye on the glaze as it reduces, as it can quickly go from perfect to burnt.
- Experiment with spices and herbs to create different flavor profiles. A pinch of salt or a few grinds of black pepper can enhance the flavor significantly.
Heat Control
When cooking your balsamic glaze, it’s crucial to maintain a steady simmer. If the heat is too high, the glaze can burn or become too thick too quickly. Ideally, you want to see a gentle bubble formation across the surface of the glaze. Timing is also key; the glaze is ready when it has reduced by about half and coats the back of a spoon evenly. This should take approximately 20-30 minutes, but keep an eye on it, as the exact time can vary based on your stove and the size of your saucepan.
Crunch Factor
Balsamic glaze is all about smooth, velvety texture. To achieve this, make sure you’re stirring occasionally as it reduces, and don’t overcook it. If you find your glaze has become too thick, you can always thin it out with a bit of water or additional balsamic vinegar. The goal is a glaze that’s thick enough to cling to your food but still pours smoothly from a spoon.
Pro Kitchen Tricks
- For an extra glossy glaze, add a tablespoon of olive oil towards the end of the cooking time. This will not only enhance the texture but also add a subtle richness to the flavor.
- Consider making your glaze in bulk and storing it in ice cube trays. Once frozen, transfer the cubes to a freezer bag for easy access. This way, you can have balsamic glaze on hand at all times without the hassle of constant cooking.
- To clean your saucepan easily, fill it with water and bring to a boil. The residue should lift off easily, saving you scrubbing time.
Storage Tips
- Store your balsamic glaze in an airtight container in the refrigerator. It will keep for up to 2 weeks.
- For longer storage, consider freezing the glaze in ice cube trays and then transferring the frozen cubes to a freezer bag or airtight container. Frozen glaze will keep for up to 6 months.
- When reheating frozen glaze, simply thaw it overnight in the fridge or reheat it gently in a saucepan over low heat, whisking occasionally.
Gift Packaging Ideas
Balsamic glaze makes a wonderful gift, especially when packaged in decorative jars or bottles. Consider adding a ribbon around the neck of the jar and including a gift tag with suggestions for use, such as drizzling over salads, cheeses, or as a marinade for meats. For a more substantial gift, pair the glaze with a baguette, a block of parmesan cheese, and some fresh fruit for a gourmet gift basket.
Flavor Variations
- 🌟 Different spices: Add a pinch of red pepper flakes for a spicy kick or some dried basil for an herby note.
- 🌟 Creative toppings: Use your balsamic glaze as a base and mix in some chopped nuts, dried cranberries, or grated ginger for unique flavor combinations.
- 🌟 Ingredient swaps: Experiment with different types of vinegar, like apple cider or white wine vinegar, for a completely different flavor profile.
Troubleshooting
- Texture problems: If your glaze becomes too thick, thin it out with water. If it’s too thin, reduce it a bit longer or add a small amount of cornstarch mixed with water to thicken.
- Ingredient replacements: While balsamic vinegar is essential for traditional balsamic glaze, you can experiment with other vinegars for different flavors. However, keep in mind the result will not be traditional balsamic glaze.
- Over/undercooking signs: If the glaze is undercooked, it will be too runny. If overcooked, it will be too thick and possibly burnt. Aim for a consistency that coats the back of a spoon evenly.
FAQs
- Can I freeze it? Yes, balsamic glaze can be frozen for up to 6 months. It’s best to freeze it in ice cube trays and then transfer the frozen cubes to a freezer bag or airtight container.
- Is it gluten-free? Yes, traditional balsamic glaze made with balsamic vinegar and a sweetener is gluten-free. However, always check the ingredients of your specific vinegar and sweetener to ensure they are gluten-free.
- Can I double the recipe? Absolutely. Simply double all the ingredients and proceed with the recipe. Keep in mind that larger batches may take longer to reduce.
Conclusion
Making your own balsamic glaze at home is a simple yet impressive feat that can elevate your cooking to the next level. With its rich, tangy flavor and velvety texture, it’s the perfect condiment to have on hand for any meal. Don’t be afraid to experiment with different flavors and ingredients to make the glaze your own, and enjoy the process of creating something truly special from just a few everyday ingredients. Whether you’re a seasoned chef or a beginner in the kitchen, homemade balsamic glaze is sure to become a staple in your culinary repertoire.