What’s your favorite fall dessert? Try this easy homemade cheesecake stuffed apples recipe, perfect for a quick weeknight dinner treat, featuring tender apples and creamy cheesecake filling, Save for later
Cheesecake Stuffed Apples: Irresistible Fall Dessert Recipe
Introduction
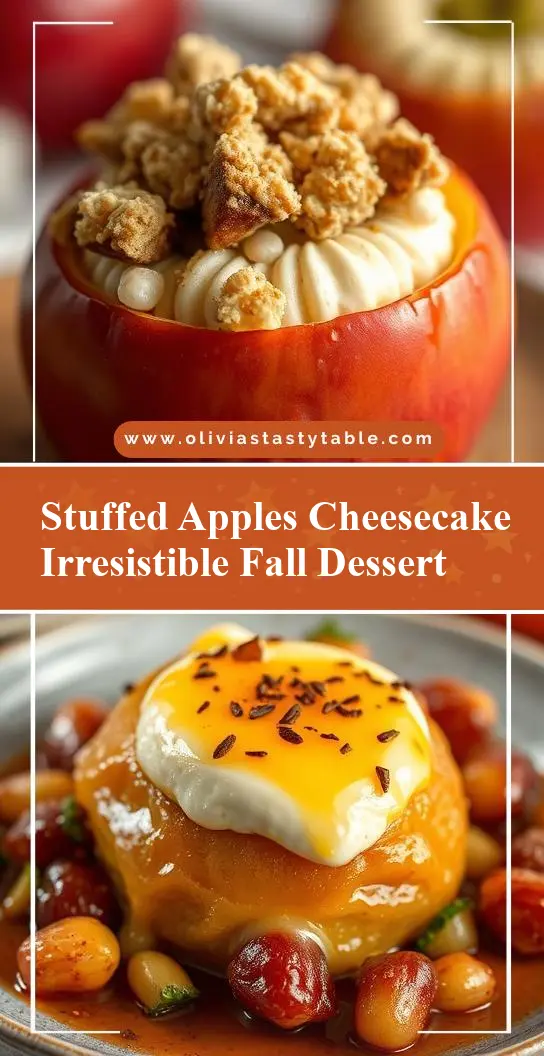
As the leaves change and the air grows crisp, our taste buds yearn for the warm, comforting flavors of fall. One dessert that embodies the essence of this season is the cheesecake stuffed apple. This ingenious treat combines the tender sweetness of baked apples with the creamy richness of cheesecake, all wrapped up in a beautifully presented package. The best part? It’s astonishingly easy to make, requiring just a few everyday ingredients and some simple steps. Whether you’re a seasoned baker or a culinary newbie, this recipe is sure to delight both you and your guests with its perfect balance of flavors and textures.
Why This Works
- Flavor balance and ingredient accessibility: The combination of sweet apples, tangy cheesecake, and a hint of cinnamon creates a flavor profile that’s both comforting and exciting. Moreover, the ingredients are readily available in most supermarkets, making this dessert accessible to everyone.
- Ease of preparation: Despite its impressive appearance, the cheesecake stuffed apple is surprisingly simple to prepare. The steps are straightforward, and the ingredients require minimal processing, making it a great option for a quick yet impressive dessert.
- Impressive results with minimal effort: The presentation of this dessert is part of its charm. The apples, filled with a generous helping of cheesecake and baked to perfection, look almost too good to eat. This makes it an ideal choice for dinner parties or special occasions where you want to wow your guests without spending hours in the kitchen.
Key Ingredients
The success of this recipe hinges on a few key ingredients: crisp, sweet apples; a creamy, well-balanced cheesecake filling; and a hint of spice to tie everything together. For the apples, choose a variety that holds its shape well when baked, such as Granny Smith or Honeycrisp. The cheesecake filling is made with cream cheese, sugar, eggs, and vanilla, which can be found in most supermarkets. If you’re looking for substitutions, consider using different types of sugar for varying flavors or substituting the eggs with flax eggs for a vegan version. Cinnamon or nutmeg add a warm, aromatic spice that complements the apples and cheesecake beautifully.
Instructions
- Step 1: Begin by preheating your oven to 375°F (190°C). While the oven is warming up, prepare your apples by cutting them in half lengthwise and scooping out the cores to create a hollow that can be filled with the cheesecake mixture. Be careful not to cut too close to the edges, as the apples need to hold their shape.
- Step 2: Prepare the cheesecake filling. In a medium bowl, beat the cream cheese until it’s smooth, then add the sugar, eggs, and vanilla extract, mixing until well combined. The mixture should be creamy and free of lumps. If you find it too thick, you can thin it out with a little milk or cream.
- Step 3: Fill each apple half with the cheesecake mixture, dividing it evenly among the apples. You can fill them as full as possible, but be careful not to overfill, as the cheesecake will expand a bit during baking. Sprinkle the tops with cinnamon or nutmeg for added flavor and visual appeal.
- Step 4: Place the stuffed apples in a baking dish and add a little water to the bottom to prevent the apples from drying out. Bake for about 25 minutes, or until the apples are tender and the cheesecake is set. The apples should be easily pierced with a fork, and the cheesecake should be lightly puffed and firm to the touch. Remove from the oven and let cool for a few minutes before serving. You can serve them warm, topped with a caramel sauce or whipped cream for an extra-special treat.
Handy Tips
- Use the right apples: The type of apple you choose can make a big difference in how well this dessert turns out. Look for apples that are firm and sweet, as they will hold their shape better when baked.
- Don’t overmix the cheesecake: Mixing the cheesecake ingredients too much can result in a dense, tough filling. Stop mixing as soon as the ingredients are combined, and avoid over-beating the eggs.
- Let it cool: While it’s tempting to dig in as soon as the apples are out of the oven, letting them cool for a few minutes can make a big difference in the texture and flavor. The cheesecake will set, and the apples will retain more of their texture.
Heat Control
The ideal temperature for baking the cheesecake stuffed apples is 375°F (190°C), and the baking time is approximately 25 minutes. It’s essential to keep an eye on them, as the baking time can vary depending on the size of the apples and your oven’s performance. The apples are done when they’re tender and easily pierced with a fork, and the cheesecake is set and lightly puffed.
Crunch Factor
The texture of this dessert is part of its appeal, with the tender apples providing a nice contrast to the creamy cheesecake. To achieve the perfect texture, make sure not to overbake the apples, as this can make them too soft and mushy. A light crunch from the apple skin and a creamy cheesecake filling are what you’re aiming for. If you want to add an extra crunch, consider topping the apples with chopped nuts or a streusel topping before baking.
Pro Kitchen Tricks
- Use high-quality ingredients: The flavor and texture of your cheesecake stuffed apples will only be as good as the ingredients you use. Choose the best apples you can find, and use real cream cheese and vanilla for the best flavor.
- Don’t skip the water: Adding a little water to the baking dish might seem like an unnecessary step, but it helps keep the apples moist and prevents them from drying out during baking.
- Experiment with flavors: While the classic combination of apples, cheesecake, and cinnamon is hard to beat, don’t be afraid to try out new flavors. Consider adding a hint of nutmeg, cardamom, or lemon zest to the cheesecake filling for a unique twist.
Storage Tips
- Leftover storage: If you have any leftover cheesecake stuffed apples, you can store them in the refrigerator for up to 3 days. Let them cool completely before covering and refrigerating.
- Reheating: To reheat, simply place the apples in the oven at 300°F (150°C) for about 10 minutes, or until warmed through. You can also reheat them in the microwave, but be careful not to overheat, as this can make the apples too soft.
- Shelf life: The cheesecake stuffed apples are best consumed fresh, but they can be stored for a short period. If you’re planning to make them ahead, consider preparing the cheesecake filling and storing it in the fridge until you’re ready to assemble and bake the apples.
Gift Packaging Ideas
If you’re looking for a unique and thoughtful gift, consider packaging the cheesecake stuffed apples in a beautiful basket or container. You can wrap each apple individually in plastic wrap or aluminum foil and place them in a gift basket lined with parchment paper or a decorative towel. Add a few garnishes like fresh herbs, a sprinkle of cinnamon, or a drizzle of caramel sauce to make it look extra special. This is a great idea for holidays, birthdays, or as a thank-you gift for friends and family.
Flavor Variations
- 🌟 Different spices: Try adding a pinch of nutmeg, cardamom, or ginger to the cheesecake filling for a unique flavor twist.
- 🌟 Creative toppings: Consider topping your cheesecake stuffed apples with caramel sauce, whipped cream, chopped nuts, or even a sprinkle of cinnamon or cocoa powder.
- 🌟 Ingredient swaps: For a gluten-free version, use gluten-free flour to dust the apples. You can also substitute the sugar with honey or maple syrup for a different flavor profile.
Troubleshooting
- Texture problems: If your cheesecake filling turns out too dense, it might be because you overmixed the ingredients. Try to mix just until the ingredients are combined, and avoid over-beating the eggs.
- Ingredient replacements: If you’re missing an ingredient, don’t be afraid to get creative. For example, you can substitute the cream cheese with mascarpone or ricotta for a different flavor.
- Over/undercooking signs: Keep an eye on your apples while they’re baking, as the cooking time can vary. If the apples are too soft or the cheesecake is too runny, they might be undercooked. On the other hand, if the apples are too dry or the cheesecake is too puffed, they might be overcooked.
FAQs
- Can I freeze it? Yes, you can freeze the cheesecake stuffed apples, but it’s best to freeze them before baking. Simply prepare the apples and cheesecake filling, fill the apples, and place them on a baking sheet lined with parchment paper. Freeze until solid, then transfer to a freezer-safe bag or container for up to 2 months. Bake frozen apples at 375°F (190°C) for about 35-40 minutes, or until the apples are tender and the cheesecake is set.
- Is it gluten-free? The cheesecake stuffed apples can be made gluten-free by using gluten-free flour to dust the apples and ensuring that the cheesecake ingredients are gluten-free. However, if you’re using a store-bought cheesecake mix, make sure to check the ingredients list for gluten.
- Can I double the recipe? Yes, you can easily double or triple the recipe if you’re serving a larger crowd. Just keep in mind that you might need to adjust the baking time slightly, as more apples will be in the oven at once.
Conclusion
The cheesecake stuffed apples are a true showstopper, perfect for fall gatherings, holiday meals, or simply as a special treat any time of the year. With their elegant presentation and irresistible flavor combination, they’re sure to impress your friends and family. Don’t be afraid to experiment with different flavors and toppings to make the recipe your own, and enjoy the process of creating something truly special. Whether you’re a seasoned baker or just starting out, this recipe is a great way to get into the kitchen and start cooking, and we hope you have as much fun making and enjoying it as we do!