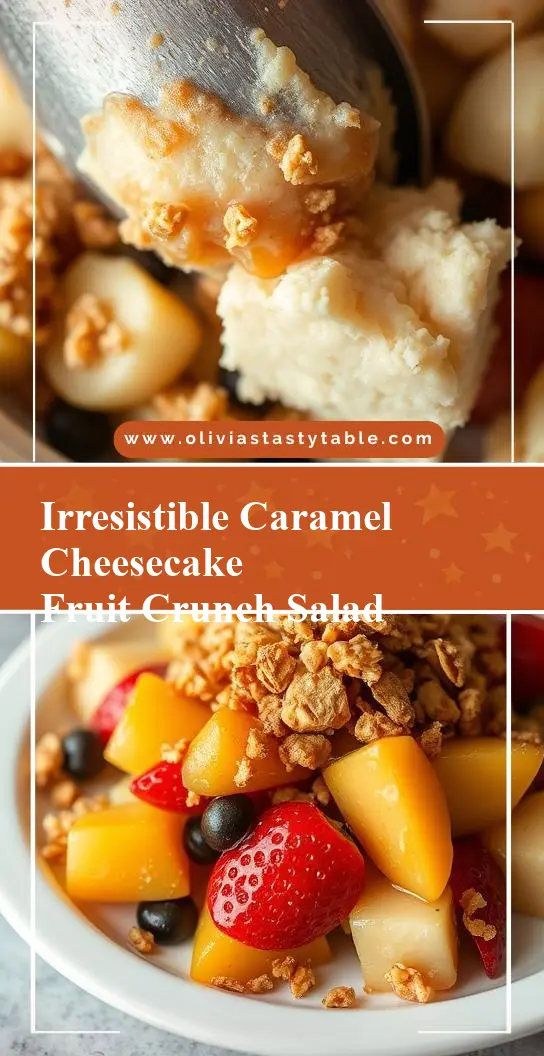
Looking for a quick and easy dessert to impress your family? This homemade caramel crunch cheesecake fruit salad is a perfect weeknight treat made with fresh fruit and a creamy cheesecake topping, save for later and enjoy!
Irresistible Caramel Crunch Cheesecake Fruit Salad Recipe!
Introduction
This Irresistible Caramel Crunch Cheesecake Fruit Salad Recipe is a game-changer for anyone looking to impress with a dessert that’s both easy to make and packed with flavor. Using everyday ingredients, you can create a masterpiece that combines the creaminess of cheesecake, the crunch of caramel, and the freshness of fruit. The best part? It’s incredibly simple to prepare, making it perfect for both beginners and seasoned bakers looking for a creative dessert to serve at their next gathering.
Why This Works
- Flavor balance and ingredient accessibility: This recipe strikes a perfect balance between sweet and tangy, using ingredients that are readily available in most grocery stores.
- Ease of preparation: Despite its impressive appearance, this dessert requires minimal cooking and can be prepared in under 30 minutes, making it ideal for last-minute gatherings or weeknight treats.
- Impressive results with minimal effort: The combination of textures and flavors creates a visually stunning and delicious dessert that’s sure to impress your guests without requiring hours of preparation.
Key Ingredients
The main ingredients for this Irresistible Caramel Crunch Cheesecake Fruit Salad include a store-bought or homemade cheesecake, a variety of fresh fruits such as strawberries, blueberries, and grapes, caramel sauce, and crushed nuts or cookies for the crunch factor. For the cheesecake, you can use a pre-made mix or make your own using cream cheese, eggs, sugar, and vanilla extract. Feel free to customize the fruit selection based on your preferences and what’s in season. Practical substitutions for caramel sauce include dulce de leche or a homemade caramel made from heavy cream and sugar.
Instructions
- Step 1: Begin by preparing your cheesecake according to the package instructions or your homemade recipe. Allow it to cool completely. Meanwhile, wash and chop your selection of fresh fruits into bite-sized pieces.
- Step 2: In a large bowl, mix together the cooled cheesecake (crumbled into smaller pieces), chopped fresh fruits, and a drizzle of caramel sauce. The amount of caramel can be adjusted to your taste, but start with a small amount to avoid overpowering the other flavors.
- Step 3: To add the crunch factor, sprinkle crushed nuts or cookies over the top of the cheesecake and fruit mixture. You can also use this step to add any additional toppings you like, such as whipped cream or extra caramel sauce.
- Step 4: Final touches involve plating. You can serve the salad in individual cups or glasses for a more elegant presentation or in a large serving dish for a casual gathering. Garnish with additional fresh fruit or a sprinkle of cinnamon to complete the look.
Handy Tips
- When choosing your fruits, consider a mix of textures and flavors to keep the salad interesting. Berries add natural sweetness, while citrus fruits like oranges or grapefruits can provide a nice tartness.
- Avoid overmixing the cheesecake and fruit to prevent the cheesecake from becoming too crumbly or the fruit from getting mushy.
- For an extra crunchy topping, try baking your crushed nuts or cookies in the oven for a few minutes until lightly toasted. Keep an eye on them to prevent burning.
Heat Control
If you’re making your own caramel sauce from scratch, it’s crucial to control the heat to achieve the perfect caramelization. Start with medium heat and gradually reduce it as the mixture turns golden brown. Remove from heat immediately to prevent burning. For toasted nuts or cookies, bake in a preheated oven at 350°F (175°C) for about 5-7 minutes, or until lightly browned.
Crunch Factor
Achieving the right crunch factor can elevate your dessert from good to great. This can be done by using a variety of elements such as toasted nuts, crushed cookies, or even candy pieces like peanut butter cups or chocolate chips. The key is to not overdo it; a light sprinkle can add texture without overwhelming the other flavors and textures in the salad.
Pro Kitchen Tricks
- Use high-quality ingredients: While it might be tempting to use cheaper alternatives, especially for the caramel sauce or nuts, remember that the quality of your ingredients directly impacts the flavor and texture of your final product.
- Layer flavors: Don’t be afraid to add a pinch of salt or a squeeze of fresh lime juice to balance out the sweetness and enhance the flavors of your fruits and cheesecake.
- Prepare ahead: Components of this dessert, like the cheesecake and caramel sauce, can be made ahead of time. This not only saves time but also allows the flavors to meld together beautifully.
Storage Tips
- Leftover storage: Store any leftovers in an airtight container in the refrigerator. It’s best consumed within a day or two to maintain freshness and texture.
- Reheating tips: If you’ve made components like the caramel sauce ahead of time, you can gently reheat it in the microwave or on the stovetop until warm and smooth.
- Shelf life: The shelf life of this dessert is relatively short due to the fresh fruits and cheesecake. However, individual components like the caramel sauce can be stored for up to a week in the fridge.
- Best containers: Glass or plastic containers with tight-fitting lids are ideal for storing leftovers. For gift-giving, consider decorative jars or containers that can be sealed tightly.
Gift Packaging Ideas
This dessert makes for a wonderful gift, especially when packaged in an attractive and sturdy container. Consider using a large glass jar and layering the cheesecake, fruits, and caramel sauce to create a visually appealing effect. Top with a decorative lid or a bow, and include a personalized note for a thoughtful touch. For individual servings, small mason jars or parfait glasses can be used, sealed with a ribbon or a gift tag.
Flavor Variations
- 🌟 Different spices: Add a pinch of cinnamon, nutmeg, or cardamom to the cheesecake or caramel sauce for a unique twist.
- 🌟 Creative toppings: Experiment with different nuts, seeds, or even candy pieces to change up the crunch factor and flavor profile.
- 🌟 Ingredient swaps: Replace traditional cheesecake with a dairy-free alternative or use different types of milk to cater to various dietary needs and preferences.
Troubleshooting
- Texture problems: If your cheesecake turns out too dense, it might be due to overmixing. For a too-runny caramel sauce, try cooking it a bit longer or adding a small amount of heavy cream to adjust the consistency.
- Ingredient replacements: Always consider the flavor and texture profile when substituting ingredients. For example, swapping heavy cream with a non-dairy milk might affect the richness of your caramel sauce.
- Over/undercooking signs: Keep an eye on your caramel sauce and toasted nuts to prevent burning. Undercooked caramel might not set properly, while overcooked can become too dark and bitter.
FAQs
- Can I freeze it? Yes, you can freeze the cheesecake component of this dessert for up to 2 months. However, it’s best to assemble the salad just before serving to maintain the freshness of the fruits and the crunch of the toppings.
- Is it gluten-free? Depending on the ingredients used for the cheesecake and any additional toppings, this dessert can be adapted to be gluten-free. Ensure that all the components, including the caramel sauce and any cookies used for crunch, are gluten-free.
- Can I double the recipe? Absolutely! This recipe can be easily doubled or tripled for larger gatherings. Just be sure to adjust the cooking time if you’re making a larger cheesecake and keep an eye on the caramel sauce to prevent burning.
Conclusion
This Irresistible Caramel Crunch Cheesecake Fruit Salad Recipe is a versatile and delicious dessert that’s perfect for any occasion. With its balance of creamy cheesecake, sweet caramel, and fresh fruits, topped with a satisfying crunch, it’s sure to be a hit. Don’t be afraid to experiment with different flavors and toppings to make it your own, and enjoy the process of creating something truly special. Whether you’re a seasoned baker or just starting out, this recipe is a great way to explore your creativity in the kitchen and share a little joy with those around you.