Craving a sweet treat that’s easy to make and fun to eat? Try these quick homemade Butterfinger balls made with creamy peanut butter and crunchy candy pieces, perfect for a weeknight dessert – Save for later
Irresistible Butterfinger Balls Recipe
Introduction
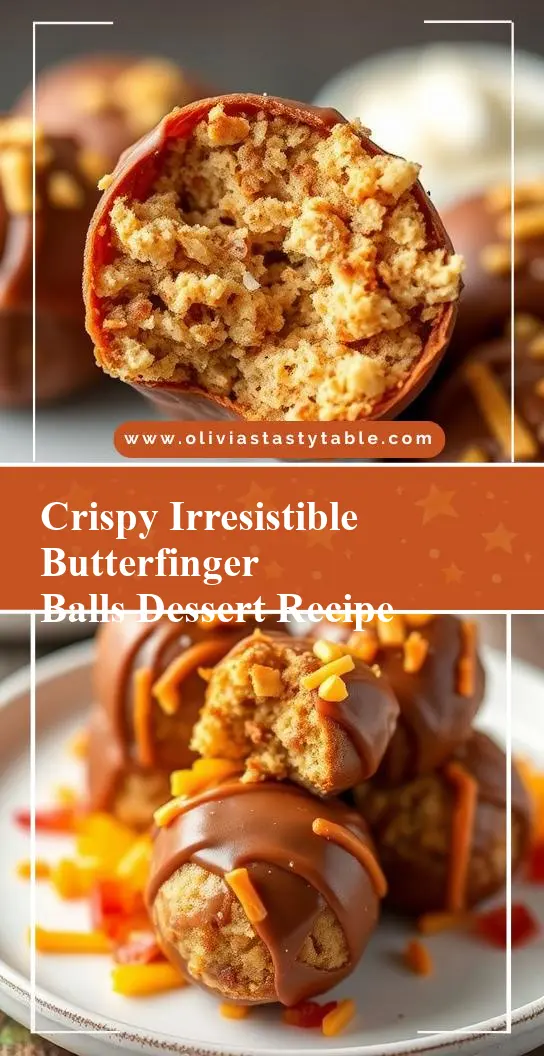
Imagine indulging in a delightful treat that combines the richness of peanut butter, the crunch of Butterfinger candy bars, and the simplicity of a no-bake recipe. Welcome to the Irresistible Butterfinger Balls Recipe, where creativity meets ease and flavor knows no bounds. This recipe is perfect for those looking to impress with minimal effort, using everyday ingredients that are easily accessible. Whether you’re a fan of peanut butter, a lover of all things crunchy, or just someone who appreciates the joy of a simple yet impressive dessert, this recipe is for you. So, let’s dive into the world of Butterfinger balls and discover why they’re a must-try for any dessert enthusiast.
Why This Works
- Flavor balance and ingredient accessibility: The combination of creamy peanut butter, sweet powdered sugar, and crunchy Butterfinger pieces creates a flavor balance that is both unique and irresistible. Plus, all the ingredients are easily found in most grocery stores, making this recipe accessible to anyone.
- Ease of preparation: This no-bake recipe requires minimal preparation time and effort. Simply mix, shape, and chill – it’s that easy. The lack of cooking involved makes it perfect for hot summer days or for those who are not comfortable with baking.
- Impressive results with minimal effort: Despite the simplicity of the recipe, the end result is impressive. The Butterfinger balls are perfect for parties, gift exchanges, or as a special treat for the family. They look and taste like they were made in a professional bakery, but the secret is, they’re incredibly easy to make.
Key Ingredients
The main ingredients in this recipe include creamy peanut butter, powdered sugar, graham cracker crumbs, and crushed Butterfinger candy bars. The peanut butter provides the base flavor and creaminess, while the powdered sugar adds sweetness without making the balls too sticky. The graham cracker crumbs help bind the mixture together and add a nice texture, and the crushed Butterfinger bars are the star of the show, providing a delicious crunch and flavor. For those looking for substitutions, almond butter or cashew butter can be used instead of peanut butter for a different flavor profile, and other types of candy bars can be crushed and used in place of Butterfinger for a unique twist.
Instructions
- Step 1: Begin by preparing your ingredients. In a large mixing bowl, combine 2 cups of creamy peanut butter and 1 cup of powdered sugar. Mix until smooth and creamy. Add 1/2 cup of graham cracker crumbs and mix until well combined.
- Step 2: Crush 1 cup of Butterfinger candy bars into small pieces and add them to the peanut butter mixture. Mix until the Butterfinger pieces are evenly distributed throughout the mixture.
- Step 3: Use your hands to shape the mixture into small balls, about 1 inch in diameter. You should end up with around 20-25 balls, depending on the size. Place the balls onto a baking sheet lined with parchment paper.
- Step 4: Chill the Butterfinger balls in the refrigerator for at least 30 minutes to set. Once set, you can serve them as is or melt some chocolate to dip the tops of the balls for an extra special treat. Melted chocolate adds an extra layer of flavor and makes the balls look even more appealing.
Handy Tips
- Make sure to crush the Butterfinger bars into small pieces so they distribute evenly throughout the mixture. This will ensure every bite has a good balance of flavors and textures.
- If the mixture is too sticky, you can add a bit more powdered sugar. If it’s too dry, you can add a bit more peanut butter. The key is to find a balance where the mixture is easy to shape into balls.
- Experiment with different types of candy bars or add-ins, like M&M’s or chopped nuts, to create unique flavor variations.
Heat Control
Since this is a no-bake recipe, there’s no need to worry about heat control. However, if you decide to melt chocolate to dip the tops of the Butterfinger balls, make sure to do so in a double boiler or in the microwave in short increments, stirring between each heating. This will prevent the chocolate from burning or seizing up.
Crunch Factor
The crunch factor in this recipe comes from the crushed Butterfinger candy bars. To achieve the perfect crunch, make sure not to overmix the peanut butter mixture once the Butterfinger pieces are added. This will help keep the crunchy texture intact. Additionally, chilling the balls in the refrigerator will help the flavors meld together and the textures to set, ensuring a delightful crunch in every bite.
Pro Kitchen Tricks
- To make the Butterfinger balls more uniform in size, use a small cookie scoop to portion out the mixture before shaping it into balls.
- For an extra crunchy exterior, you can roll the shaped balls in additional crushed Butterfinger pieces or chopped nuts before chilling them.
- Consider making these balls in advance and freezing them. They freeze well and can be thawed at room temperature when you’re ready to serve them.
Storage Tips
- Store the Butterfinger balls in an airtight container in the refrigerator for up to 5 days. This will keep them fresh and prevent them from drying out.
- For longer storage, consider freezing the balls. Place them in a single layer in a freezer-safe bag or container and store in the freezer for up to 2 months. Thaw at room temperature when ready to serve.
- When storing, make sure the balls are not touching each other to prevent them from sticking together. If you need to layer them, place parchment paper between the layers.
Gift Packaging Ideas
These Butterfinger balls make perfect gifts for friends, family, or coworkers. Consider packaging them in decorative tins, jars, or gift boxes. You can also wrap them individually in cellophane bags and tie with a ribbon for a more personalized touch. Adding a gift tag with the ingredients used (in case of food allergies) and a personal message can make the gift even more special.
Flavor Variations
- 🌟 Different spices: Add a pinch of salt or a teaspoon of vanilla extract to the peanut butter mixture for a unique flavor twist.
- 🌟 Creative toppings: Instead of using melted chocolate, try using caramel sauce, peanut butter sauce, or even Nutella for dipping the tops of the balls.
- 🌟 Ingredient swaps: Use different types of nut butter, like almond or cashew butter, or try using peanut butter chips instead of creamy peanut butter for a chunkier texture.
Troubleshooting
- Texture problems: If the mixture is too sticky, add more powdered sugar. If it’s too dry, add more peanut butter. The right consistency should be easy to shape into balls.
- Ingredient replacements: If you can’t find Butterfinger bars, you can substitute them with other crunchy candy bars or even cookies like peanut butter cookies, crushed into small pieces.
- Over/undercooking signs: Since this is a no-bake recipe, you don’t have to worry about overcooking. However, make sure to chill the balls long enough for them to set properly. If they’re too soft, they might fall apart when handled.
FAQs
- Can I freeze it? Yes, the Butterfinger balls can be frozen for up to 2 months. Simply place them in a single layer in a freezer-safe bag or container and thaw at room temperature when ready to serve.
- Is it gluten-free? The gluten content depends on the ingredients used. Traditional peanut butter and powdered sugar are gluten-free, but some brands of graham cracker crumbs and Butterfinger bars may contain gluten. Make sure to check the ingredient labels if you’re making this recipe for someone with gluten intolerance.
- Can I double the recipe? Yes, you can easily double or triple this recipe if you’re making it for a large group. Just keep in mind that you’ll need to adjust the chilling time slightly if you’re making a larger batch.
Conclusion
In conclusion, the Irresistible Butterfinger Balls Recipe is a must-try for anyone looking for a delicious, easy, and impressive dessert. With its perfect balance of flavors and textures, this no-bake treat is sure to become a favorite. Don’t be afraid to experiment with different ingredients and flavor variations to make the recipe your own. Share your creations with friends and family, and enjoy the joy of giving a homemade gift that’s as delicious as it is thoughtful. Happy baking, and remember, the most important ingredient in any recipe is love.