Looking for a quick weeknight dinner solution? Try our easy homemade crunchy baked fish sticks recipe made with tender fish and a crispy breading, perfect for a family favorite meal, save for later
Crunchy Baked Fish Sticks Recipe
Introduction
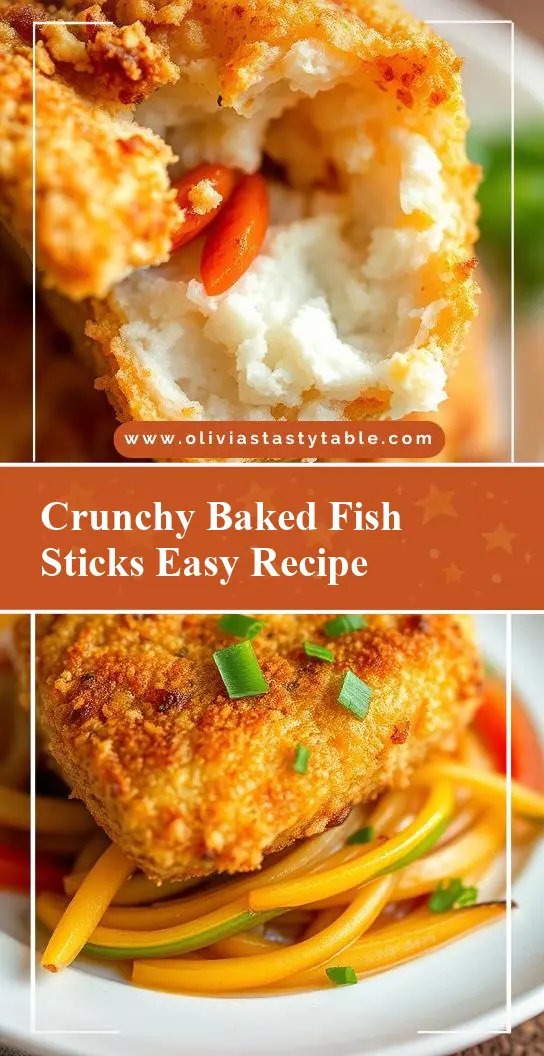
Are you ready to indulge in a dish that’s both crispy on the outside and tender on the inside, all without the hassle of deep-frying? Look no further than our Crunchy Baked Fish Sticks Recipe! This easy-to-make, flavorful dish is perfect for a quick weeknight dinner or a fun weekend meal with the family. Using everyday ingredients and a few clever tricks, you’ll be amazed at how easily you can create restaurant-quality fish sticks in the comfort of your own home. The best part? It’s incredibly versatile, allowing you to experiment with different seasonings and dips to suit any taste.
Why This Works
- Flavor balance and ingredient accessibility: Our recipe combines common pantry staples with fresh fish, ensuring that every bite is packed with flavor without breaking the bank or requiring a special trip to the store.
- Ease of preparation: With simple steps and minimal prep time, this recipe is perfect for busy households or those new to cooking. It’s hard to go wrong with such straightforward instructions!
- Impressive results with minimal effort: Who says you need to spend hours in the kitchen to impress your family or friends? Our Crunchy Baked Fish Sticks are sure to be a hit, and the best part is, they require less than 30 minutes of your time from start to finish.
Key Ingredients
To make our Crunchy Baked Fish Sticks, you’ll need a few key ingredients. First, you’ll need some fresh fish – cod or tilapia work well for this recipe. Next, gather your breading station essentials: all-purpose flour, eggs, and panko breadcrumbs. Don’t forget some olive oil for brushing and your choice of seasonings – we recommend paprika, garlic powder, and a pinch of salt and pepper for added depth. For an extra crunchy coating, consider adding some grated Parmesan cheese to your breadcrumbs. Practical substitutions include using gluten-free flour for the coating or swapping out the fish for shrimp or chicken for a different twist.
Instructions
- Step 1: Begin by preheating your oven to 400°F (200°C). While that’s warming up, prepare your fish by cutting it into stick shapes. You should end up with around 12-15 sticks depending on the size of your fish.
- Step 2: Set up your breading station. In one shallow dish, mix together your flour and a pinch of salt and pepper. In another, beat your eggs until they’re well combined. And in a third, mix your panko breadcrumbs with any desired seasonings and the grated Parmesan cheese if using.
- Step 3: Dip each fish stick into the flour mixture, coating lightly, then into the eggs, making sure they’re fully covered, and finally into the breadcrumb mixture, pressing the crumbs onto the fish to ensure they stick. Place the coated fish sticks on a baking sheet lined with parchment paper. Brush the tops with a little olive oil to help them brown in the oven.
- Step 4: Bake the fish sticks in the preheated oven for about 12-15 minutes, or until they’re golden brown and cooked through. You might need to flip them halfway through the cooking time to ensure even browning. Once done, remove them from the oven and let them cool for a minute or two on the baking sheet before serving.
Handy Tips
- Avoid overcrowding your baking sheet, as this can prevent the fish sticks from cooking evenly. If necessary, cook them in batches to ensure each stick has enough room.
- For an extra crispy coating, try chilling the coated fish sticks in the refrigerator for 30 minutes before baking. This will help the breadcrumbs adhere better and crunch up nicely in the oven.
- Experiment with different seasonings in your breadcrumb mixture to give your fish sticks a unique flavor. Lemon zest, dried herbs, or a sprinkle of cayenne pepper can all add interesting twists.
Heat Control
The ideal temperature for baking your fish sticks is 400°F (200°C), and you’re aiming for a cooking time of about 12-15 minutes, depending on the thickness of your fish and your personal preference for doneness. The fish sticks are done when they’re golden brown on the outside and flake easily with a fork. Keep an eye on them during the last few minutes of cooking, as the baking time can vary.
Crunch Factor
Achieving the perfect crunch on your baked fish sticks is all about the coating and the cooking method. By using panko breadcrumbs, which are lighter and crisper than regular breadcrumbs, and baking the fish sticks in the oven, you get a deliciously crunchy exterior without the need for deep-frying. For an even crunchier coating, don’t be afraid to experiment with adding other crunchy elements to your breadcrumb mixture, like chopped nuts or seeds.
Pro Kitchen Tricks
- To make cleanup easier, line your baking sheet with parchment paper before adding the fish sticks. This way, any stray breadcrumbs or fish bits can be simply thrown away, leaving your baking sheet spotless.
- For a shortcut, consider using pre-cut fish sticks or tenders from your grocery store. These can save you time on preparation and still yield delicious results with our recipe.
- Don’t overbread your fish sticks. A light coating is enough to provide flavor and crunch without overpowering the delicate taste of the fish. Too much breading can also make the sticks cook unevenly.
Storage Tips
- If you have leftovers, store them in an airtight container in the refrigerator for up to a day. For longer storage, consider freezing the baked fish sticks on a baking sheet and then transferring them to a freezer-safe bag or container for up to 2 months. Simply bake them in the oven at 350°F (180°C) for a few minutes to reheat.
- When reheating, be careful not to overcook the fish sticks, as this can make them dry and tough. A quick bake in the oven or a minute in the microwave should be enough to warm them through without compromising their texture.
Gift Packaging Ideas
While fish sticks are typically a meal rather than a gift, if you’re looking to share your creations with friends or family, consider packaging them in cute paper cones or boxes with a side of homemade tartar sauce or a fresh salad. This can make for a fun and unique gift basket, especially for seafood lovers. Simply wrap the cooled fish sticks in parchment paper, place them in your chosen container, and add your desired accompaniments.
Flavor Variations
- 🌟 Different spices: Try adding a pinch of cumin for a Mexican twist, some smoked paprika for a smoky flavor, or a bit of lemon zest for a bright, citrusy taste.
- 🌟 Creative toppings: Serve your fish sticks with a variety of dips like marinara sauce, ranch dressing, or a homemade aioli for added flavor.
- 🌟 Ingredient swaps: Experiment with different types of fish or even use shrimp or chicken for a change of pace. You can also swap out the panko breadcrumbs for gluten-free breadcrumbs or crushed crackers for a different texture.
Troubleshooting
- Texture problems: If your fish sticks turn out too dry, it might be because they were overcooked. Try reducing the baking time or temperature. If they’re not crunchy enough, ensure your breadcrumb mixture is fresh and not too fine, and consider baking them for an extra minute or two.
- Ingredient replacements: If you don’t have panko breadcrumbs, regular breadcrumbs can be used as a substitute, though they might not yield the same level of crunch. Similarly, if you’re out of eggs, a flax egg or a mixture of water and flour can work as a binder in a pinch.
- Over/undercooking signs: Fish sticks are done when they’re golden brown and flake easily with a fork. If they’re still pale and soft, they need more time. If they’re dark brown and hard, they’ve been overcooked.
FAQs
- Can I freeze it? Yes, you can freeze the fish sticks after baking. Simply place them on a baking sheet, freeze until solid, and then transfer them to a freezer-safe bag or container for storage.
- Is it gluten-free? This recipe can be made gluten-free by substituting the all-purpose flour with a gluten-free flour blend and ensuring the breadcrumbs used are gluten-free.
- Can I double the recipe? Absolutely! Just keep in mind that you might need to cook the fish sticks in batches to prevent overcrowding the baking sheet.
Conclusion
With our Crunchy Baked Fish Sticks Recipe, you’re not just making a meal – you’re creating an experience. Whether you’re a busy parent looking for a quick dinner solution, a health enthusiast seeking a guilt-free version of a favorite comfort food, or an adventurous cook eager to try new flavors, this recipe has something for everyone. So go ahead, get creative with your seasonings, experiment with different dips, and most importantly, enjoy the process and the delicious results. Happy cooking, and don’t forget to share your creations and tag us in your culinary adventures!