Want a quick weeknight dinner favorite that’s easy to make and delicious? Try this crispy air fryer pepperoni roll recipe! Made with simple ingredients and a homemade touch, save for later and make it tonight!
Crispy Air Fryer Pepperoni Roll Recipe
Introduction
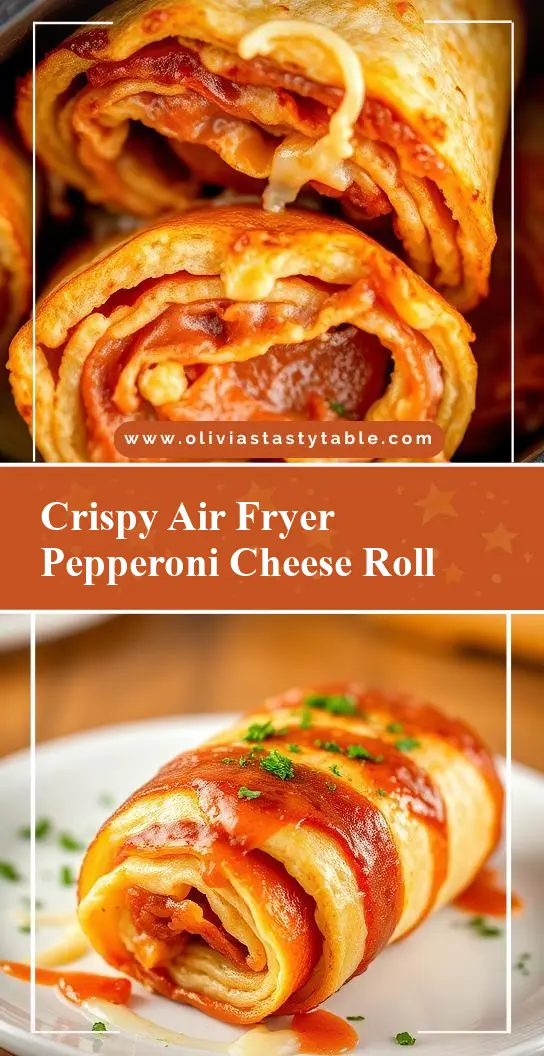
Imagine a crispy, savory, and indulgent snack that combines the best of Italian flavors with the ease of air fryer cooking. Welcome to the Crispy Air Fryer Pepperoni Roll Recipe, where creativity meets simplicity, and everyday ingredients transform into a mouthwatering treat. This recipe is perfect for those who love the combination of melted cheese, savory pepperoni, and soft bread, all wrapped up in a crispy package that’s hard to resist. Whether you’re a fan of Italian cuisine, a lover of snacks, or just someone looking to spice up your meal routine, this recipe is sure to delight.
Why This Works
- Flavor balance and ingredient accessibility: This recipe strikes a perfect balance between the richness of cheese, the spiciness of pepperoni, and the softness of the dough, making it accessible and enjoyable for a wide range of tastes.
- Ease of preparation: With the air fryer doing most of the work, this recipe requires minimal effort, making it perfect for busy days or when you need a quick snack.
- Impressive results with minimal effort: Despite its simplicity, the Crispy Air Fryer Pepperoni Roll Recipe yields impressive results, with a crispy exterior giving way to a soft, cheesy interior, sure to impress both family and friends.
Key Ingredients
The magic of this recipe lies in its simple yet effective combination of ingredients. You’ll need a package of pizza dough (homemade or store-bought, whichever suits your preference), a generous helping of pepperoni slices, a blend of mozzarella and parmesan cheese for the perfect melt, and some olive oil to brush the dough before cooking. For those looking for practical substitutions, consider using different types of cheese or adding some diced vegetables like bell peppers or onions to the roll for extra flavor and nutrition.
Instructions
- Step 1: Begin by preheating your air fryer to 375°F (190°C). While the air fryer is heating up, roll out the pizza dough to a large rectangle, about 1/4 inch thick. This will be the base of your pepperoni roll.
- Step 2: Spread a mixture of mozzarella and parmesan cheese evenly over the dough, leaving a small border around the edges. This cheese blend will provide a rich, creamy flavor to your roll. Next, arrange the pepperoni slices on top of the cheese, making sure to cover the entire surface.
- Step 3: Starting from one of the long edges, begin rolling the dough into a tight log. Cut the log into 8 equal pieces. Each piece will be a pepperoni roll. Brush the tops of the rolls with olive oil to enhance browning during cooking.
- Step 4: Place the rolls in the air fryer basket, leaving some space between each roll to allow for even cooking. Cook the rolls in the air fryer for about 10-12 minutes, or until they’re golden brown and crispy on the outside. Serve hot and enjoy the ooey-gooey cheese and the savory flavor of pepperoni.
Handy Tips
- For an extra crispy exterior, you can spray the rolls with a little cooking spray before cooking. Also, consider adding some dried herbs like oregano or basil to the cheese for an extra depth of flavor.
- Avoid overloading the air fryer basket, as this can prevent the rolls from cooking evenly. It’s better to cook them in batches if necessary.
- If you’re looking for a lighter version, you can use less cheese or opt for a lighter cheese option. Additionally, using whole-wheat pizza dough can add more fiber to your snack.
Heat Control
The ideal temperature for cooking the pepperoni rolls is 375°F (190°C), and the cooking time is approximately 10-12 minutes. It’s crucial to keep an eye on the rolls during the last few minutes of cooking, as the cooking time may vary depending on the size of your rolls and the specific model of your air fryer. The rolls are done when they’re golden brown and crispy on the outside, and the cheese is melted and gooey on the inside.
Crunch Factor
Achieving the perfect crunch on your pepperoni rolls is key to their appeal. The air fryer does an excellent job of crisping the exterior of the dough while keeping the inside soft and cheesy. To enhance the crunch, ensure that the rolls are not overcrowded in the air fryer basket, allowing hot air to circulate around each roll evenly. Additionally, brushing the tops with olive oil before cooking helps in achieving a golden, crispy crust.
Pro Kitchen Tricks
- For a professional finish, consider sprinkling some grated parmesan cheese on top of the rolls before serving. This adds an extra layer of flavor and presents beautifully.
- To make the recipe more engaging for kids, you can let them help with the assembly of the rolls or with brushing the olive oil on top. This can be a fun kitchen activity that teaches them about measurements and following instructions.
- For cleanup, make sure to wipe down the air fryer basket and pan after use. A mixture of soap and warm water is usually sufficient for cleaning any residue left by the cheese and pepperoni.
Storage Tips
- Leftover pepperoni rolls can be stored in an airtight container in the refrigerator for up to 3 days. To reheat, simply place them back in the air fryer at 300°F (150°C) for a few minutes until warmed through.
- For longer storage, the rolls can be frozen before cooking. Simply assemble the rolls, place them on a baking sheet lined with parchment paper, and put the sheet in the freezer. Once frozen, transfer the rolls to a freezer-safe bag or container for storage. Cook frozen rolls in the air fryer at 375°F (190°C) for about 12-15 minutes, or until crispy and golden.
Gift Packaging Ideas
If you’re considering gifting these delicious pepperoni rolls, presentation is key. You can package them in decorative tin containers or gourmet food baskets. Wrap each roll individually in parchment paper or aluminum foil and place them in the container. Add a personal touch with a handwritten note or a packet of marinara sauce for dipping. This makes for a thoughtful and unique gift, especially for snack enthusiasts or those who love Italian cuisine.
Flavor Variations
- 🌟 Different spices: Consider adding some red pepper flakes for an extra kick of heat or some dried oregano for an herby flavor.
- 🌟 Creative toppings: Before cooking, you can sprinkle some chopped fresh parsley or basil on top of the rolls for a fresh twist.
- 🌟 Ingredient swaps: For a vegetarian version, you can replace the pepperoni with sliced mushrooms or bell peppers. Experimenting with different types of cheese, like provolone or gouda, can also yield interesting flavor profiles.
Troubleshooting
- Texture problems: If your rolls turn out too dense, it might be because the dough was overworked. Try to handle the dough gently and minimally when assembling the rolls.
- Ingredient replacements: If you don’t have mozzarella, you can use other melting cheeses like cheddar or Monterey Jack as a substitute.
- Over/undercooking signs: Keep an eye on the rolls during cooking. If they’re not browning, they might need a bit more time. If they’re getting too dark, cover the top with foil to prevent burning.
FAQs
- Can I freeze it? Yes, you can freeze the pepperoni rolls before or after cooking. Freezing before cooking allows you to store them for longer and cook them fresh when needed. Freezing after cooking is great for reheating a quick snack later.
- Is it gluten-free? The traditional recipe uses wheat-based pizza dough, which contains gluten. However, you can easily make this recipe gluten-free by using gluten-free pizza dough.
- Can I double the recipe? Absolutely! Simply double all the ingredients and cook the rolls in batches if necessary, to ensure they have enough room to cook evenly in the air fryer.
Conclusion
The Crispy Air Fryer Pepperoni Roll Recipe is a versatile, easy, and delicious addition to any meal or snack routine. With its perfect balance of flavors, ease of preparation, and impressive results, it’s a recipe that’s sure to become a favorite. Whether you’re cooking for yourself, your family, or a crowd, this recipe can be easily adapted to suit your needs. So go ahead, get creative with your ingredients, and enjoy the process of making something truly special. Happy cooking, and don’t forget to share your creations and the joy of cooking with those around you!