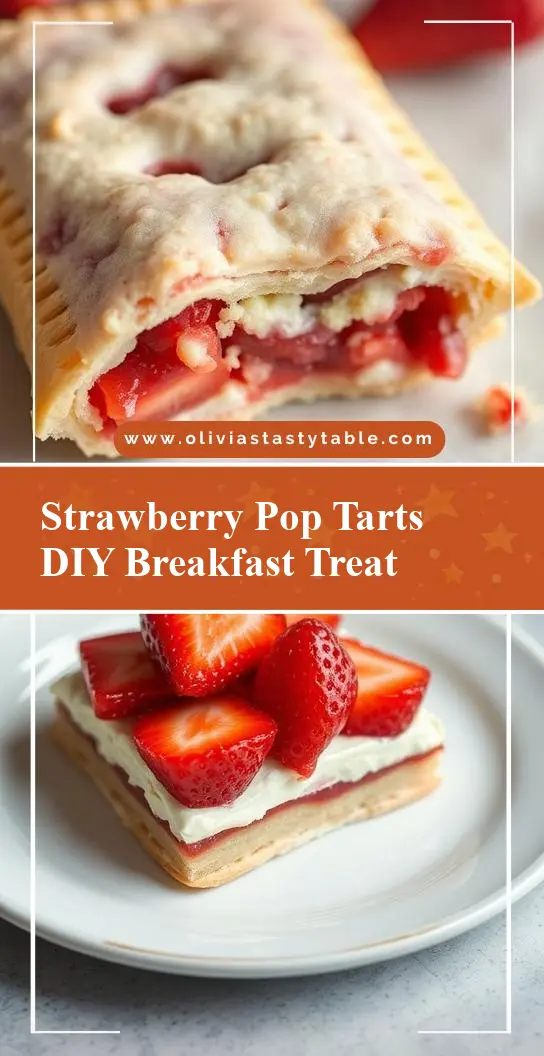
Need a quick breakfast idea for busy mornings? Try these easy homemade strawberry pop tarts made with fresh strawberries and flaky crust, perfect for a family favorite weeknight breakfast, save for later
Back‑to‑School Strawberry Pop Tarts | DIY Breakfast Treat
Introduction
As the summer months come to a close and the new school year begins, finding a quick, delicious, and fun breakfast option can be a challenge. That’s where these homemade Back-to-School Strawberry Pop Tarts come in – a creative twist on a classic favorite that’s perfect for busy mornings. Made with everyday ingredients and requiring minimal effort, these DIY treats are not only a great way to start the day but also a wonderful project to share with your kids. The combination of flaky pastry, sweet strawberry filling, and the excitement of creating something from scratch makes this recipe a winner for both kids and adults alike.
Why This Works
- Flavor balance and ingredient accessibility: The simplicity of the ingredients, combined with the well-balanced flavors, makes this recipe accessible and enjoyable for everyone.
- Ease of preparation: Despite being homemade, these pop tarts are surprisingly easy to make, requiring less than an hour from start to finish.
- Impressive results with minimal effort: The end result looks and tastes like a professional bakery item, making it perfect for special occasions or everyday breakfasts without the need for extensive culinary skills.
Key Ingredients
The main ingredients for these Strawberry Pop Tarts include homemade or store-bought puff pastry, strawberry jam or homemade strawberry filling, and a bit of sugar for decorating. For the pastry, you can either make your own puff pastry from scratch or use a high-quality store-bought version to save time. The strawberry filling can be as simple as using a good quality strawberry jam or as involved as making your own filling from fresh strawberries, sugar, and lemon juice. Practical substitutions can include using different types of jam or preserves for the filling or sprinkling the tops with various colors of sugar for a personalized touch.
Instructions
- Step 1: Begin by preheating your oven to 400°F (200°C). Roll out the puff pastry on a floured surface to a thickness of about 1/8 inch. Cut out rectangles of pastry, approximately 4 inches by 6 inches in size. You should be able to get about 8 rectangles, depending on the size of your pastry sheet.
- Step 2: Spoon a small amount of strawberry jam onto one half of each rectangle, leaving a 1/2 inch border around the edges. Be careful not to overfill, as the jam will spread during baking.
- Step 3: Fold the other half of the pastry rectangle over the filling, pressing the edges to seal. Use a fork to crimp the edges and create a decorative border. Cut a small slit in the top of each tart to allow steam to escape during baking.
- Step 4: Place the pop tarts on a baking sheet lined with parchment paper, leaving about 1 inch of space between each tart. Brush the tops with a little bit of milk or beaten egg for a golden glaze. Sprinkle with granulated sugar for extra sweetness and decoration. Bake for 20-25 minutes, or until the pastry is golden brown.
Handy Tips
- Make sure to keep your puff pastry cold, as this will help it to hold its shape and bake up flaky. If using homemade pastry, consider making it a day in advance to allow the gluten to relax, making it easier to roll out.
- Avoid overfilling the pop tarts, as this can lead to them bursting open during baking. Start with a small amount of filling and adjust to taste for subsequent batches.
- For an extra crispy pastry, bake the pop tarts for an additional 2-3 minutes. However, keep a close eye on them to prevent burning.
Heat Control
Baking these pop tarts at the right temperature is crucial for achieving the perfect flaky pastry and cooked filling. The ideal temperature is 400°F (200°C), and they should be baked for 20-25 minutes. Signs of doneness include a golden brown color on the pastry and the filling being warm and slightly puffed. It’s also important to rotate the baking sheet halfway through the baking time to ensure even cooking.
Crunch Factor
The desired texture for these pop tarts is a flaky, tender pastry on the outside and a soft, slightly gooey filling on the inside. To achieve this, it’s essential to not overwork the pastry dough and to bake the tarts until they’re golden but still delicate. The crunch factor comes from the sugar sprinkle on top, which adds a satisfying textural element to each bite.
Pro Kitchen Tricks
- Use high-quality ingredients: While it might be tempting to use cheaper alternatives, especially for the pastry and filling, investing in good quality ingredients will significantly impact the final taste and texture of your pop tarts.
- Don’t overbake: It’s better to err on the side of underbaking slightly, as the pop tarts will continue to cook a bit after being removed from the oven. Overbaking can lead to a dry, hard pastry that’s less enjoyable to eat.
- Clean as you go: To make cleanup easier, try to wash utensils and bowls as you use them, especially when working with sticky ingredients like jam or egg wash.
Storage Tips
- These pop tarts are best served fresh but can be stored in an airtight container at room temperature for up to 2 days. For longer storage, consider freezing them before baking and then baking frozen pop tarts for an additional 5-10 minutes.
- For reheating, place a pop tart in the microwave for 10-15 seconds or until warmed through. Be cautious not to overheat, as this can cause the pastry to become soggy.
- When storing, it’s a good idea to place a piece of parchment paper between each pop tart to prevent them from sticking together.
Gift Packaging Ideas
If you’re considering gifting these homemade pop tarts, they can be beautifully packaged in a variety of ways. Place them in a decorative tin or jar, separated by layers of parchment paper, and tie with a ribbon. Alternatively, wrap each pop tart individually in plastic wrap or aluminum foil and place them in a paper bag with a personalized note. For a more rustic look, use brown paper bags and twine. Whatever method you choose, the homemade touch and thoughtfulness are sure to be appreciated.
Flavor Variations
- 🌟 Different spices: Consider adding a pinch of cinnamon or nutmeg to the strawberry filling for a unique twist.
- 🌟 Creative toppings: Instead of granulated sugar, try using colored sugar, sprinkles, or even chopped nuts for a different look and added texture.
- 🌟 Ingredient swaps: For a different flavor profile, substitute the strawberry jam with another type of jam or preserve, such as blueberry, raspberry, or apricot.
Troubleshooting
- Texture problems: If your pastry turns out too dense, it might be due to overworking the dough. Try to handle the pastry as little as possible and keep it cold.
- Ingredient replacements: If you don’t have puff pastry, you can make a simpler pastry dough using flour, butter, and water, although it won’t have the same flaky texture.
- Over/undercooking signs: Keep an eye on your pop tarts while they’re baking. If they’re not golden after 20 minutes, give them a few more minutes. If they start to brown too quickly, cover the tops with foil to prevent burning.
FAQs
- Can I freeze it? Yes, these pop tarts can be frozen before baking. Simply place them on a baking sheet, freeze until solid, and then transfer them to a freezer-safe bag or container for up to 3 months. Bake frozen pop tarts for an additional 5-10 minutes.
- Is it gluten-free? Unfortunately, traditional puff pastry contains gluten. However, there are gluten-free puff pastry options available in most supermarkets, or you can make your own gluten-free pastry dough as a substitute.
- Can I double the recipe? Yes, this recipe can easily be doubled or tripled to make more pop tarts. Just be sure to have enough baking sheets and parchment paper on hand.
Conclusion
Making your own Back-to-School Strawberry Pop Tarts is a fun and rewarding project that’s perfect for the new school year. With its combination of easy preparation, delicious flavors, and the joy of creating something from scratch, this recipe is sure to become a family favorite. Don’t be afraid to experiment with different fillings and toppings to make the recipe your own, and consider involving your kids in the process for a fun and educational kitchen activity. Whether you’re a seasoned baker or just starting out, these homemade pop tarts are a great way to start the day off right.