Are you ready for a decadent dessert? This easy homemade coconut cream pie is a family favorite made with toasted coconut and creamy filling, perfect for a weeknight dinner treat, save for later
Grandma’s Coconut Cream Pie (So Easy and Dreamy!)
Introduction
Imagine a dessert so divine, it transports you back to a time when life was simpler, and the only thing that mattered was the love and warmth shared around the dinner table. Grandma’s Coconut Cream Pie is more than just a dessert; it’s an experience that combines the richness of coconut, the flakiness of a perfectly baked crust, and the sweetness of cream, all in one delightful package. What makes this pie truly special is its ease of preparation, using everyday ingredients that are readily available in most kitchens. Whether you’re a seasoned baker or a beginner in the culinary world, this recipe promises to deliver a dreamy, creamy pie that will impress your family and friends without requiring you to spend hours in the kitchen.
Why This Works
- Flavor balance and ingredient accessibility: The combination of coconut, vanilla, and a hint of lime creates a balanced and refreshing flavor profile that appeals to a wide range of tastes. Moreover, the ingredients are easily accessible, making this pie a practical choice for any occasion.
- Ease of preparation: Despite its impressive presentation and complex flavors, Grandma’s Coconut Cream Pie is surprisingly easy to prepare. The steps are straightforward, and each component can be made ahead of time, making it a stress-free option for entertaining.
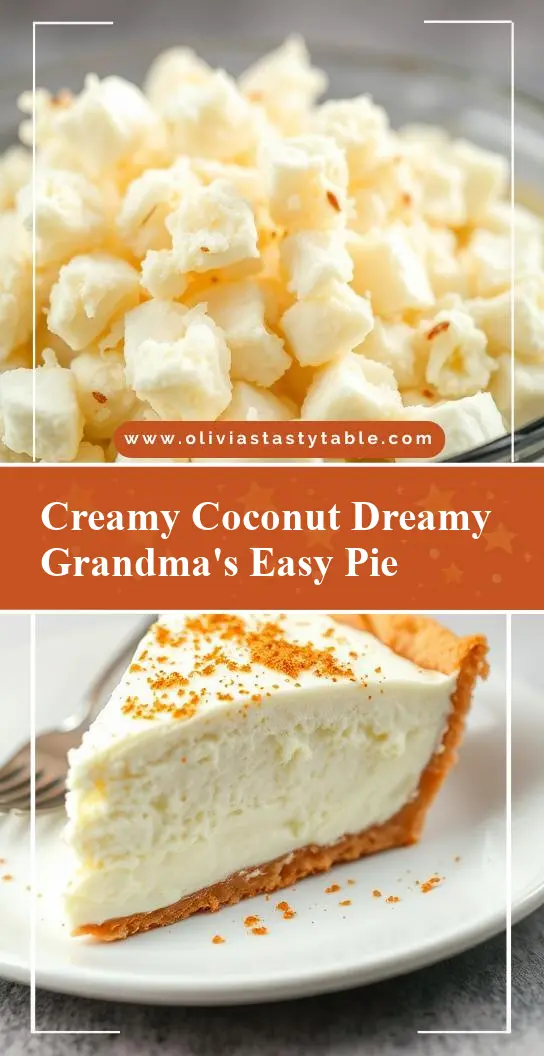
- Impressive results with minimal effort: The pie’s layers, from the crispy coconut crust to the silky coconut cream filling, topped with toasted coconut flakes and a sprinkle of lime zest, create a visually stunning dessert that looks like it came from a professional bakery, all with minimal fuss.
Key Ingredients
The magic of Grandma’s Coconut Cream Pie lies in its carefully selected ingredients. The crust is made with a mixture of all-purpose flour, unsweetened shredded coconut, and a touch of sugar, providing a delightful crunch. The filling consists of sweetened condensed milk, heavy cream, large egg yolks, unsweetened shredded coconut, vanilla extract, and a squeeze of fresh lime juice, all combined to create a rich, creamy, and balanced coconut cream. For those looking for substitutions, almond milk can replace heavy cream for a lighter version, and lime zest can be used in place of lime juice for a more subtle citrus flavor.
Instructions
- Step 1: Begin by preheating your oven to 350°F (175°C). Prepare the crust by mixing the flour, unsweetened shredded coconut, and sugar in a bowl. Add cold butter and use a pastry blender or your fingers to work it into the dry ingredients until the mixture resembles coarse crumbs. Press this mixture into a 9-inch pie dish and bake for 18-20 minutes, or until lightly golden. Allow the crust to cool completely.
- Step 2: Cook the filling by combining the sweetened condensed milk, heavy cream, egg yolks, unsweetened shredded coconut, vanilla extract, and lime juice in a saucepan. Cook over medium heat, stirring constantly, until the mixture thickens and coats the back of a spoon, about 10-12 minutes. Remove from heat and let cool to room temperature.
- Step 3: Layer the flavors by pouring the cooled coconut cream filling into the baked and cooled pie crust. Refrigerate for at least 2 hours or overnight to allow the filling to set.
- Step 4: For the final touches, top the pie with whipped cream and sprinkle with toasted coconut flakes and a pinch of lime zest. This step adds texture and a pop of color, making the pie perfect for serving.
Handy Tips
- Avoid overbaking the crust, as it can become too dark and bitter. Keep an eye on it during the last few minutes of baking.
- For a lighter coconut flavor, you can reduce the amount of unsweetened shredded coconut in both the crust and the filling.
- Always use room temperature ingredients when making the filling to ensure it mixes smoothly and evenly.
Heat Control
When cooking the coconut cream filling, it’s crucial to maintain medium heat and stir constantly to prevent the eggs from scrambling and the mixture from burning. The ideal temperature for cooking the filling is between 170°F and 180°F (77°C to 82°C). The filling is done when it has thickened and can coat the back of a spoon without dripping off immediately.
Crunch Factor
The crunch factor in Grandma’s Coconut Cream Pie comes from the toasted coconut flakes sprinkled on top and the crispy coconut crust. To achieve the perfect crunch, bake the crust until it’s lightly golden and toast the coconut flakes in a 350°F oven for 5-7 minutes, or until fragrant and lightly browned, stirring frequently to prevent burning.
Pro Kitchen Tricks
- To ensure the pie crust doesn’t shrink during baking, chill it in the freezer for 10 minutes before baking.
- For an extra creamy filling, cook the coconut cream mixture to a slightly thicker consistency than desired, as it will set further in the refrigerator.
- Use high-quality ingredients, especially the vanilla and coconut, as they greatly impact the flavor of the pie.
Storage Tips
- The pie can be stored in the refrigerator for up to 3 days. It’s best to cover it with plastic wrap or aluminum foil to prevent drying out.
- For longer storage, the baked pie crust and the coconut cream filling can be made ahead and frozen separately for up to 2 months. Thaw overnight in the refrigerator before assembling and serving.
- When reheating, remove the pie from the refrigerator about 30 minutes before serving to allow it to come to room temperature.
Gift Packaging Ideas
Grandma’s Coconut Cream Pie makes a wonderful gift, especially for special occasions like birthdays or holidays. Consider packaging it in a decorative pie box or wrapping it in colorful plastic wrap and tying it with a ribbon. Adding a sprinkle of toasted coconut flakes on top and a handwritten note with the recipe or a personal message can make the gift even more thoughtful and memorable.
Flavor Variations
- 🌟 Different spices: Introduce a pinch of cinnamon, nutmeg, or cardamom to the filling for a unique twist on the classic coconut flavor.
- 🌟 Creative toppings: Experiment with different toppings like caramelized bananas, toasted pecans, or a sprinkle of sea salt to add texture and flavor contrast.
- 🌟 Ingredient swaps: Replace the heavy cream with coconut cream for an even more intense coconut flavor, or use almond extract instead of vanilla for a nutty twist.
Troubleshooting
- Texture problems: If the filling is too runny, it may not have been cooked long enough. If it’s too thick, a little heavy cream can be added to thin it out.
- Ingredient replacements: Always replace ingredients with similar alternatives to maintain the balance of flavors. For example, if using a different type of milk, ensure it’s unsweetened and unflavored to avoid altering the pie’s taste.
- Over/undercooking signs: The crust is overcooked if it’s too dark or smells burnt. The filling is undercooked if it doesn’t coat the back of a spoon or seems too liquidy.
FAQs
- Can I freeze it? Yes, both the baked pie crust and the coconut cream filling can be frozen separately for up to 2 months. Thaw overnight in the refrigerator before assembling.
- Is it gluten-free? The pie crust contains all-purpose flour, making it not gluten-free. However, you can replace the flour with a gluten-free flour mix to accommodate gluten-free diets.
- Can I double the recipe? Yes, you can double the recipe to make two pies. Just ensure you have enough pie dishes and adjust the baking time slightly for the crust.
Conclusion
Grandma’s Coconut Cream Pie is a testament to the power of traditional recipes in bringing people together. With its ease of preparation, accessible ingredients, and the potential for creative variations, this pie is sure to become a staple in your household. Whether you’re making it for a family dinner, a potluck, or as a special gift, the love and care that goes into each step of its preparation are sure to be felt by all who taste it. So, go ahead, give this recipe a try, and experience the joy of sharing a delicious, homemade dessert with the people you love.