Need a show stopping dessert for your next family gathering? This easy coconut cream pie is a homemade favorite made with simple ingredients like shredded coconut and sweetened condensed milk. Save for later and make it your new family favorite tonight!
Easy Coconut Cream Pie (So Dreamy & No Fuss!)
Introduction
Indulge in the tropical paradise of flavors with our Easy Coconut Cream Pie, a dessert so divine it will transport you to a dreamy island getaway with every bite. What makes this pie truly special is its accessibility – using everyday ingredients, you can create a masterpiece that’s not only a feast for the taste buds but also a visual delight. The best part? It’s incredibly easy to make, requiring minimal fuss and effort, perfect for both novice bakers and seasoned chefs looking to impress without the hassle.
Why This Works
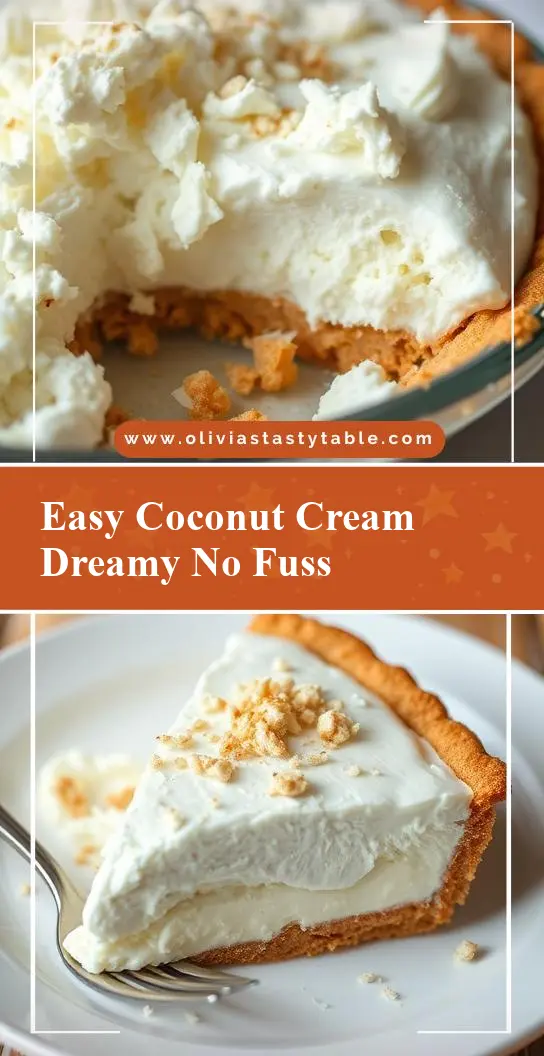
- The balance of flavors between the sweetness of the coconut, the richness of the cream, and the crunch of the toasted coconut flakes creates a harmonious taste experience that’s hard to resist.
- The ease of preparation is a significant advantage, as it simplifies the process of making a cream pie from scratch, reducing the time and stress associated with more complex desserts.
- Despite its simplicity, the pie yields impressive results, making it an ideal choice for gatherings, parties, or special occasions where you want to make a lasting impression without spending hours in the kitchen.
Key Ingredients
The main ingredients in this Easy Coconut Cream Pie include a pre-made or homemade pie crust for convenience, sweetened condensed milk, full-fat coconut milk, large eggs, unsweetened shredded coconut, and a touch of vanilla extract for depth. For practical substitutions, you can use low-fat coconut milk or almond milk for a dairy-free alternative, though this may slightly alter the richness and flavor of the pie. Additionally, toasted pecans or walnuts can be used in place of unsweetened shredded coconut for added texture and a different flavor profile.
Instructions
- Step 1: Begin by preheating your oven to 350°F (180°C). If using a homemade pie crust, roll it out and place it in a 9-inch pie dish. For a pre-made crust, simply follow the package instructions for thawing and baking. Bake the crust until it’s lightly golden, about 15 minutes, then set it aside to cool.
- Step 2: In a large mixing bowl, whisk together the sweetened condensed milk, full-fat coconut milk, large eggs, and vanilla extract until well combined. Pour this mixture into the cooled pie crust and smooth the top.
- Step 3: Bake the pie for about 40-45 minutes, or until the edges are set and the center is slightly jiggly. It’s crucial not to overbake, as this can cause the filling to become too firm and lose its creamy texture. Once done, let the pie cool to room temperature.
- Step 4: For the final touches, sprinkle toasted unsweetened shredded coconut over the top of the cooled pie. You can toast the coconut in a 350°F oven for about 5-7 minutes, or until lightly browned, stirring frequently to prevent burning. Chill the pie in the refrigerator for at least 2 hours before serving to allow the flavors to meld together and the filling to set properly.
Handy Tips
- Always use full-fat coconut milk for the richest flavor and creamiest texture. Low-fat versions can result in a less satisfying pie.
- Don’t overmix the filling, as this can introduce air and cause the pie to crack during baking.
- For an extra crunchy topping, consider adding a layer of caramelized sugar on top of the pie before sprinkling with toasted coconut.
Heat Control
Maintaining the right temperature is crucial when baking the pie crust and the filling. Ensure your oven is at a true 350°F (180°C) for even baking. The pie is done when the edges are set, and the center still slightly jiggles, indicating the filling is cooked through but still creamy. Avoid overbaking, as this can lead to a pie that’s too firm and dry.
Crunch Factor
The crunch factor in this pie comes from the toasted unsweetened shredded coconut sprinkled on top. To achieve the perfect crunch, toast the coconut in the oven until it’s lightly browned, stirring frequently. This step adds texture and flavor contrast to the smooth, creamy filling. For added crunch, you can also sprinkle toasted nuts like pecans or walnuts on top of the pie.
Pro Kitchen Tricks
- For a smoother filling, make sure all your ingredients are at room temperature before mixing. This ensures a more even incorporation of the eggs and prevents the coconut milk from separating.
- Use high-quality vanilla extract for the best flavor. A good vanilla can elevate the entire dessert and provide a deeper, more complex taste experience.
- Consider using a water bath for baking the pie to prevent the crust from becoming too brown and to ensure the filling cooks evenly. This is especially useful if you’re unsure about your oven’s temperature accuracy.
Storage Tips
- Store the pie in the refrigerator, covered with plastic wrap or aluminum foil, for up to 3 days. Allow the pie to come to room temperature before serving for the best flavor and texture.
- For longer storage, the pie can be frozen. Wrap it tightly in plastic wrap or aluminum foil and place it in a freezer-safe bag. Frozen pie can be stored for up to 2 months. Thaw overnight in the refrigerator before serving.
- When reheating, avoid using the microwave, as this can cause the filling to become too runny. Instead, let the pie come to room temperature naturally or warm it in a low-temperature oven (about 200°F or 90°C) for a short period.
Gift Packaging Ideas
This pie makes a wonderful gift for friends, family, or coworkers, especially during the holidays or for special occasions. Consider packaging the pie in a decorative pie box or a tin, wrapped with a ribbon and a gift card. For a more rustic look, you can wrap the pie in parchment paper, tie it with twine, and add a handwritten note. If you’re gifting the pie to someone who lives far away, consider freezing it and shipping it with ice packs to keep it fresh during transit.
Flavor Variations
- 🌟 Add a pinch of salt or a teaspoon of espresso powder to balance the sweetness and enhance the flavors.
- 🌟 Use different types of milk, such as almond or soy milk, for a non-dairy version, or try flavoring the filling with a teaspoon of liqueur like rum or coconut rum for an adult twist.
- 🌟 Top the pie with fresh fruits like strawberries, blueberries, or raspberries for added flavor and visual appeal. You can also use toasted nuts, chocolate shavings, or even candy pieces for a fun and playful touch.
Troubleshooting
- Texture problems, such as a too-runny or too-firm filling, can often be traced back to overmixing or incorrect baking times. Ensure you’re not overbaking, and mix your filling just until the ingredients are combined.
- Ingredient replacements can sometimes affect the final result. If substituting ingredients, do so with caution and in small quantities to ensure the pie still turns out as expected.
- Over/undercooking signs include a filling that’s too jiggly (undercooked) or too firm (overcooked). The perfect pie should have a slight jiggle in the center when moved.
FAQs
- Can I freeze it? Yes, the pie can be frozen for up to 2 months. Wrap it tightly and thaw overnight in the refrigerator when you’re ready to serve.
- Is it gluten-free? Depending on the pie crust used, this pie can be gluten-free. Ensure your crust is made with gluten-free flours, and be mindful of cross-contamination if baking in a shared kitchen space.
- Can I double the recipe? Yes, you can double the recipe to make two pies. Just ensure you have enough baking dishes and adjust the baking time slightly, as the pies may take a bit longer to cook through when made in larger quantities.
Conclusion
Making an Easy Coconut Cream Pie is a journey of discovery, not just a recipe to follow. It’s about exploring flavors, textures, and the joy of creating something truly special with minimal effort. Whether you’re a beginner in the kitchen or a seasoned pro, this pie is sure to become a favorite, offering a delicious escape into a world of creamy, dreamy goodness. So go ahead, give it a try, and don’t hesitate to experiment with your own twists and flavors. Happy baking, and remember, the most important ingredient in any recipe is love!