What makes the perfect dessert? This easy homemade cloud cake is a quick family favorite made with simple ingredients like whipped cream and sweet vanilla. Save for later and indulge in a light treat tonight.
Light & Fluffy Cloud Cake
Introduction
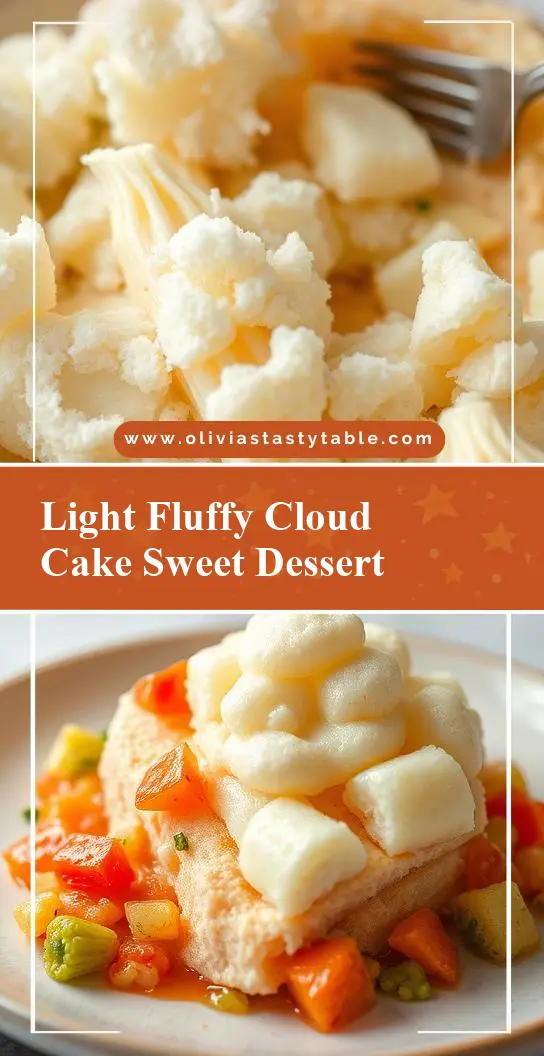
Imagine a dessert so divine, it feels like biting into a cloud. Welcome to the world of Light & Fluffy Cloud Cake, a masterpiece of texture and flavor that will elevate your baking skills and impress your friends and family. This cake is not just a dessert; it’s an experience. With its tender crumbs, airy texture, and delicate sweetness, it’s a treat that will leave everyone wanting more. The best part? It’s incredibly easy to make, requiring minimal effort for maximum impact. Using everyday ingredients, you can create a culinary masterpiece that’s as much a delight to the eyes as it is to the palate.
Why This Works
- Flavor balance and ingredient accessibility: The beauty of this cake lies in its simplicity. It doesn’t require exotic ingredients, making it accessible to anyone who wants to give it a try. The balance of flavors is also a key factor, ensuring that the cake is neither too sweet nor too bland.
- Ease of preparation: One of the most appealing aspects of this recipe is how easy it is to prepare. With straightforward steps and minimal complexity, it’s perfect for both beginners and seasoned bakers looking for a quick yet impressive dessert.
- Impressive results with minimal effort: Despite the simplicity of the recipe, the end result is nothing short of impressive. The cake’s light and fluffy texture, combined with its elegant presentation, makes it a perfect centerpiece for any gathering or special occasion.
Key Ingredients
To make this Light & Fluffy Cloud Cake, you’ll need a few key ingredients. These include 2 cups of all-purpose flour, 1 cup of granulated sugar, 2 teaspoons of baking powder, 1/2 teaspoon of salt, 1/2 cup of unsalted butter softened, 1 cup of whole milk at room temperature, 2 large eggs at room temperature, and 1 teaspoon of pure vanilla extract. For practical substitutions, you can use almond milk instead of whole milk for a dairy-free version, or replace the granulated sugar with caster sugar for a slightly different texture. The quality of your ingredients can affect the final result, so opt for the freshest eggs and real vanilla extract for the best flavor.
Instructions
- Step 1: Begin by preheating your oven to 350°F (175°C). Prepare two 8-inch round cake pans by greasing them and lining the bottoms with parchment paper. In a medium bowl, whisk together the flour, sugar, baking powder, and salt. Set this mixture aside.
- Step 2: In a large mixing bowl, using an electric mixer, beat the softened butter until it’s creamy. Add the dry ingredients mixture to the butter in three parts, alternating with the milk, beginning and ending with the dry ingredients. Beat just until combined after each addition. Beat in the eggs one at a time, allowing each egg to fully incorporate before adding the next. Finally, beat in the vanilla extract.
- Step 3: Divide the batter evenly between the prepared pans and smooth the tops. Bake for 25-30 minutes or until a toothpick inserted into the center comes out clean. Remove the cakes from the oven and let them cool in the pans for 5 minutes before transferring them to a wire rack to cool completely.
- Step 4: Once the cakes are completely cool, you can frost and decorate them as desired. A light dusting of powdered sugar or a simple glaze made from powdered sugar and milk can add a beautiful finish to your cake without overpowering its delicate flavor.
Handy Tips
- Ensure all your ingredients are at room temperature before starting. This helps in achieving a smooth and even batter, which is crucial for the cake’s texture.
- Don’t overmix the batter, as this can lead to a dense cake. Stop mixing as soon as the ingredients come together in a smooth batter.
- For an extra moist cake, you can add a simple syrup (equal parts water and granulated sugar, dissolved) to the cakes after they have cooled slightly. This step is optional but highly recommended for an added layer of flavor and moisture.
Heat Control
Heat control is crucial when baking this cake. The ideal temperature is 350°F (175°C), and it’s essential to not overbake. Check the cake after 25 minutes, and if it’s not done, continue to check in 2-minute increments until a toothpick inserted into the center comes out clean. Overbaking will result in a dry cake, so it’s better to err on the side of underbaking slightly, as the cake will continue to cook a bit after it’s removed from the oven.
Crunch Factor
This cake is all about texture, with its light and fluffy interior being the crowning glory. To achieve this, ensure you don’t overmix the batter, and don’t overbake the cake. A light hand when folding ingredients together and a watchful eye during the baking time will reward you with a cake that’s as tender as a cloud. If you wish to add a crunch factor, consider topping the cake with toasted nuts or a sprinkle of sea salt before serving.
Pro Kitchen Tricks
- Use cake strips around your pans to ensure even baking and to prevent the edges from cooking faster than the center.
- For a professional finish, once the cakes are completely cool, you can level them to ensure they’re perfectly even. This step is especially important if you’re planning to stack the cakes or cover them in frosting.
- Invest in a turntable for displaying your cake. It makes for a beautiful presentation and allows everyone to admire your handiwork from all angles.
Storage Tips
- The cake can be stored at room temperature for up to 2 days, wrapped tightly in plastic wrap or aluminum foil.
- For longer storage, the cake can be frozen. Wrap it tightly in plastic wrap or aluminum foil and place it in a freezer-safe bag. Frozen cake will keep for up to 2 months. Thaw at room temperature or refrigerate overnight before serving.
- Refrain from refrigerating the cake unless it’s frosted with a perishable frosting. Refrigeration can dry out the cake.
Gift Packaging Ideas
If you’re considering gifting this cake, presentation is key. Wrap the cake in a beautiful piece of parchment paper or a decorative cake box. Add a ribbon around the middle for a charming touch. You could also package slices individually in cute containers or jars, perfect for a dessert buffet or as a sweet treat for coworkers or friends. Don’t forget to include a personalized note or card to make the gift even more special.
Flavor Variations
- 🌟 Different spices: Consider adding a pinch of cinnamon, nutmeg, or cardamom to the batter for a unique twist on the classic flavor.
- 🌟 Creative toppings: Instead of the traditional powdered sugar dusting, try topping your cake with fresh fruits, a drizzle of chocolate glaze, or a sprinkle of shredded coconut for added texture and flavor.
- 🌟 Ingredient swaps: Experiment with different types of milk or flavor extracts, like almond extract or lemon zest, to create distinct flavor profiles.
Troubleshooting
- Texture problems: If your cake turns out too dense, it might be due to overmixing the batter. If it’s too dry, it could be overbaked. Adjust your technique and baking time accordingly for the next attempt.
- Ingredient replacements: Always try to use the ingredients called for in the recipe for the best results. However, if you need to make substitutions, do so thoughtfully, considering how the replacement might affect the final product’s texture and flavor.
- Over/undercooking signs: An undercooked cake will be wet and possibly sink in the center. An overcooked cake will be dry and possibly crack on the surface. Adjust your baking time based on these signs.
FAQs
- Can I freeze it? Yes, the cake can be frozen for up to 2 months. Wrap it tightly and place it in a freezer-safe bag.
- Is it gluten-free? No, the recipe as written includes wheat flour and is not gluten-free. However, you can experiment with gluten-free flour blends for a gluten-free version.
- Can I double the recipe? Yes, you can double the recipe to make a larger cake. Just ensure you have enough pans and adjust the baking time accordingly.
Conclusion
Making a Light & Fluffy Cloud Cake is a journey of discovery and joy, offering a chance to explore the world of baking in a fun and creative way. With its simple yet impactful recipe, it’s the perfect project for anyone looking to impress without stressing. Whether you’re a seasoned baker or just starting out, this cake is sure to become a favorite. So go ahead, get baking, and watch as your kitchen fills with the sweet aroma of success. Share your creations, experiment with new flavors, and most importantly, enjoy the process and the delightful outcome of your culinary endeavors.