Craving something sweet and decadent? This easy homemade caramel coffee buttercream cake is a family favorite, made with rich coffee and smooth caramel, perfect for weeknight dinner desserts, save for later
Irresistible Caramel Coffee Buttercream Cake Recipe for Dessert Lovers
Introduction
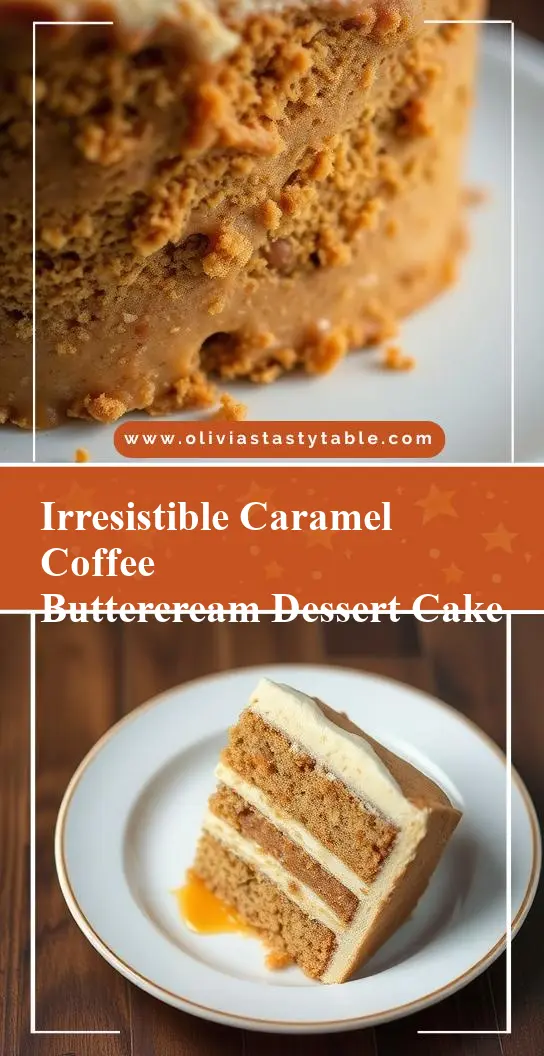
This irresistible caramel coffee buttercream cake is a symphony of flavors and textures that will delight any dessert lover. Made with everyday ingredients, this recipe is surprisingly easy to follow and requires minimal effort for such an impressive outcome. The combination of moist coffee-infused cake layers, rich caramel filling, and creamy buttercream frosting creates a dessert experience that is both decadent and refined. Whether you’re a seasoned baker or just starting out, this recipe is perfect for special occasions or as a treat to brighten up any day.
Why This Works
- Flavor balance and ingredient accessibility: The recipe strikes a perfect balance between the bitterness of coffee, the sweetness of caramel, and the richness of buttercream, all using ingredients that are easily found in most supermarkets.
- Ease of preparation: Despite its impressive appearance and complex flavors, the cake is relatively straightforward to prepare, with each component building upon the last in a logical and manageable way.
- Impressive results with minimal effort: The end result is a stunning and delicious cake that belies the simplicity of its preparation, making it an ideal choice for those looking to impress without spending hours in the kitchen.
Key Ingredients
The main ingredients for this recipe include all-purpose flour, granulated sugar, unsalted butter, eggs, instant coffee powder, whole milk, caramel sauce, and heavy cream for the buttercream. Practical substitutions can be made for some ingredients, such as using espresso instead of instant coffee for a deeper flavor or replacing heavy cream with half-and-half in the buttercream for a slightly lighter texture. However, for the best results, it’s recommended to stick as closely as possible to the listed ingredients.
Instructions
- Step 1: Begin by preheating your oven to 350°F (175°C). Prepare three 8-inch round cake pans by greasing them and lining the bottoms with parchment paper. In a medium bowl, whisk together flour, sugar, and coffee powder. In a large bowl, whisk together butter, eggs, and milk until well combined. Gradually add the dry ingredients to the wet ingredients, mixing until just combined.
- Step 2: Divide the batter evenly among the prepared pans and smooth the tops. Bake for 20-25 minutes or until a toothpick inserted into the center of each cake comes out clean. Allow the cakes to cool in the pans for 5 minutes before transferring them to a wire rack to cool completely.
- Step 3: To make the caramel filling, heat caramel sauce over low heat until warm and runny. To assemble the cake, place one cake layer on a serving plate and drizzle with some of the warm caramel. Repeat with the remaining two cake layers, creating a stacked effect.
- Step 4: For the buttercream frosting, beat the butter until creamy, then gradually add powdered sugar, beating until smooth and creamy. Add heavy cream as needed to achieve the desired consistency. Frost the outside of the cake, making sure to cover any caramel that might be exposed. Decorate as desired, perhaps with additional caramel drizzle or chopped nuts.
Handy Tips
- When making the cake batter, ensure all ingredients are at room temperature for the best emulsion and texture. Also, don’t overmix the batter, as this can lead to a dense cake.
- For the caramel filling, be cautious when heating the caramel, as it can easily burn. Stir constantly and remove from heat as soon as it starts to simmer.
- When frosting the cake, it’s helpful to have a turntable to easily access all sides of the cake. If not, simply rotate the cake as you frost to ensure even coverage.
Heat Control
Heat control is crucial in this recipe, particularly when baking the cake layers and heating the caramel. For the cakes, ensure your oven is at the correct temperature, as this will affect the texture and doneness of the cakes. Use an oven thermometer if necessary. When heating the caramel, use low heat and stir constantly to prevent burning.
Crunch Factor
The crunch factor in this dessert comes from any optional toppings you might choose, such as chopped nuts or caramelized sugar. To achieve a nice crunch, sprinkle chopped nuts over the top of the frosted cake before the buttercream sets, or drizzle with caramel and sprinkle with sea salt for a sweet and salty contrast.
Pro Kitchen Tricks
- To ensure the cake layers are even, bake them for the same amount of time and check for doneness by inserting a toothpick into the center of each cake.
- For a smoother buttercream, make sure the butter is at room temperature and beat it for a longer time to incorporate more air.
- Clean up as you go to prevent clutter and make the process more enjoyable. This is especially important when dealing with sticky ingredients like caramel.
Storage Tips
- The cake can be stored at room temperature for up to 2 days, covered with plastic wrap or aluminum foil to prevent drying out.
- For longer storage, the cake can be refrigerated for up to 5 days. Allow it to come to room temperature before serving.
- It’s not recommended to freeze the assembled cake, but you can freeze the cake layers individually for up to 2 months. Thaw at room temperature or refrigerate overnight before assembling and frosting.
Gift Packaging Ideas
This cake makes a wonderful gift for any occasion, especially when beautifully packaged. Consider placing a slice or the whole cake in a decorative box or tin, wrapped in ribbon or twine. For a more rustic look, use a wooden crate or a vintage suitcase. Don’t forget to include a personal note or card to make the gift even more special.
Flavor Variations
- 🌟 Different spices: Add a pinch of cinnamon, nutmeg, or cardamom to the cake batter for unique and intriguing flavor profiles.
- 🌟 Creative toppings: Experiment with various toppings such as caramelized bananas, chocolate shavings, or toasted coconut flakes to add texture and visual appeal.
- 🌟 Ingredient swaps: Replace some of the granulated sugar with brown sugar for a deeper flavor, or use almond milk instead of whole milk for a non-dairy version.
Troubleshooting
- Texture problems: If the cake turns out too dense, it might be due to overmixing the batter. If it’s too dry, it could be overbaked.
- Ingredient replacements: If you’re out of a particular ingredient, look for substitutions that offer similar properties. For example, you can use baking powder as a substitute for baking soda in some recipes, but be aware that this will affect the flavor and texture.
- Over/undercooking signs: Keep an eye on your cakes while they’re baking. They’re done when a toothpick inserted into the center comes out clean. If the toothpick is covered in wet batter, they need more time. If it comes out with a few moist crumbs, they’re perfectly cooked.
FAQs
- Can I freeze it? Yes, you can freeze the cake layers individually for up to 2 months. It’s best to freeze them without frosting.
- Is it gluten-free? No, this recipe uses all-purpose flour and therefore contains gluten. However, you can experiment with gluten-free flours, keeping in mind that the texture and flavor might be slightly different.
- Can I double the recipe? Yes, you can double the recipe to make a larger cake. Just ensure you have enough pans and adjust the baking time as needed.
Conclusion
This irresistible caramel coffee buttercream cake is a masterpiece of flavors and textures that will satisfy any sweet tooth. With its moist coffee-infused cake, rich caramel filling, and creamy buttercream frosting, it’s a dessert that’s sure to impress. Don’t be afraid to experiment with the recipe, trying out different spices, toppings, or ingredient swaps to make it your own. Whether you’re a seasoned baker or a beginner, this cake is a great project to undertake, and with these tips and instructions, you’ll be well on your way to creating a truly unforgettable dessert experience.