Want a decadent dessert like grandma used to make? This easy homemade Black Forest cake is a family favorite, loaded with extra cherries and creamy goodness – Save for later and indulge in a classic treat tonight!
Black Forest Cake Like Grandma Made 🍒✨ (With Extra Cherries & Cream!)
Introduction
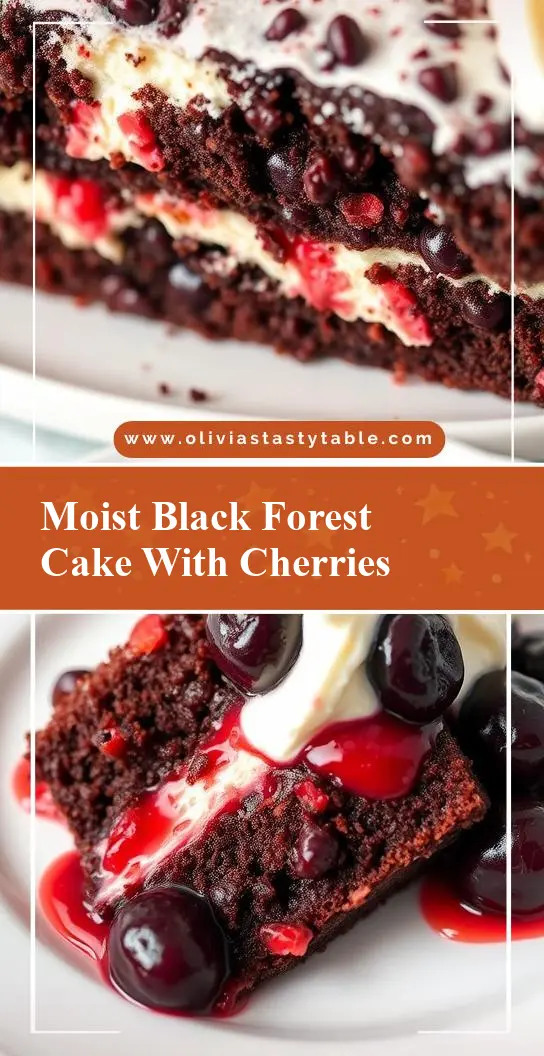
Imagine indulging in a rich, velvety chocolate cake, layered with the sweetness of cherries and the creaminess of whipped cream, just like grandma used to make. This Black Forest Cake recipe is a classic German dessert that combines the deep flavors of chocolate, the tartness of cherries, and the lightness of whipped cream, all in one decadent treat. The best part? It’s incredibly easy to make and requires only a few everyday ingredients. Whether you’re a seasoned baker or a beginner, this recipe is sure to impress your family and friends with its simplicity and sheer deliciousness. So, let’s dive into the world of Black Forest Cake and uncover the secrets to making this heavenly dessert.
Why This Works
- Flavor balance and ingredient accessibility: This recipe strikes the perfect balance between the richness of chocolate, the tartness of cherries, and the sweetness of whipped cream, making it a delight for the taste buds. Moreover, all the ingredients are easily accessible in most supermarkets, making it a practical choice for any occasion.
- Ease of preparation: Despite its impressive appearance, this Black Forest Cake is surprisingly easy to prepare. The steps are straightforward, and the ingredients are simple to mix and assemble, making it a great option for those short on time or new to baking.
- Impressive results with minimal effort: The combination of moist chocolate cake, sweet cherries, and fluffy whipped cream creates an impressive dessert that’s sure to wow your guests. And the best part? It requires minimal effort and fuss, making it perfect for special occasions or everyday treats.
Key Ingredients
The key to a great Black Forest Cake lies in its ingredients. You’ll need:
For the cake: all-purpose flour, granulated sugar, unsweetened cocoa powder, baking powder, salt, whole milk, large eggs, and vegetable oil. For the cherry filling: canned cherries in syrup, cornstarch, and lemon juice. For the whipped cream: heavy cream, granulated sugar, and vanilla extract. You can also use fresh cherries if they’re in season, and substitute the heavy cream with half-and-half or a non-dairy alternative for a lighter version.
Instructions
- Step 1: Preheat your oven to 320°F (160°C) and grease two 8-inch round cake pans. In a medium bowl, whisk together flour, sugar, cocoa powder, baking powder, and salt. In a large bowl, whisk together milk, eggs, and oil. Gradually add the dry ingredients to the wet ingredients and mix until smooth.
- Step 2: Divide the batter evenly between the prepared pans and bake for 25-30 minutes or until a toothpick inserted in the center comes out clean. Allow the cakes to cool in the pans for 5 minutes before transferring them to a wire rack to cool completely.
- Step 3: To make the cherry filling, combine the canned cherries, cornstarch, and lemon juice in a small saucepan. Cook over medium heat, stirring constantly, until the mixture thickens. Allow the filling to cool to room temperature. To assemble the cake, place one of the cooled cakes on a serving plate and spread a layer of cherry filling on top. Repeat with the second cake and another layer of cherry filling.
- Step 4: To make the whipped cream, beat the heavy cream, granulated sugar, and vanilla extract in a large bowl until stiff peaks form. Spread the whipped cream over the top and sides of the cake, making sure to cover any exposed cake or filling. Decorate with additional cherries and chocolate shavings, if desired.
Handy Tips
- Make sure to not overmix the cake batter, as this can result in a dense cake. Stop mixing as soon as the ingredients are combined.
- Use high-quality cocoa powder for the best flavor. Dutch-processed cocoa powder gives a deeper, richer flavor than natural cocoa powder.
- Don’t overbake the cakes. They should be moist and tender, with a slight spring to the touch.
- If using fresh cherries, be sure to pit them before using. You can also use a cherry pitter to make the process easier.
Heat Control
When baking the cakes, it’s essential to control the heat to ensure they cook evenly and don’t overcook. Keep an eye on the cakes after 20 minutes of baking, and check them every 5 minutes until they’re done. The cakes are ready when a toothpick inserted in the center comes out clean, and they feel springy to the touch. If you’re unsure, it’s always better to err on the side of caution and underbake slightly, as the cakes will continue to cook a bit after they’re removed from the oven.
Crunch Factor
The texture of the cake is crucial to its overall appeal. The cakes should be moist and tender, with a slight crunch from the chocolate shavings on top. To achieve this, make sure to not overmix the batter, and don’t overbake the cakes. You can also add some chopped nuts or chocolate chips to the batter for added texture and flavor.
Pro Kitchen Tricks
- Use a turntable to display your cake, making it easier to serve and adding a touch of professionalism to your presentation.
- Invest in a good-quality cake stand or serving plate, as this will make a big difference in the overall appearance of your cake.
- Experiment with different types of chocolate and flavor combinations to create unique and exciting variations of the Black Forest Cake.
Storage Tips
- Store the cake in an airtight container in the refrigerator for up to 3 days. Allow the cake to come to room temperature before serving.
- Freeze the cake for up to 2 months, wrapped tightly in plastic wrap or aluminum foil. Thaw the cake overnight in the refrigerator before serving.
- Use a cake keeper or a large container with a tight-fitting lid to store the cake, keeping it fresh and protected from dust and other contaminants.
Gift Packaging Ideas
If you want to give your Black Forest Cake as a gift, consider packaging it in a beautiful cake box or a decorative tin. You can also wrap! the cake in plastic wrap or aluminum foil and tie it with a ribbon or a gift tag. Add some fresh flowers or a sprig of rosemary to the top of the cake for a touch of elegance and a personal touch.
Flavor Variations
- 🌟 Add a teaspoon of instant coffee powder to the cake batter for a mocha-flavored Black Forest Cake.
- 🌟 Use different types of cherries, such as sour cherries or cherry jam, for a unique flavor twist.
- 🌟 Substitute the heavy cream with coconut cream or a non-dairy alternative for a dairy-free version of the cake.
Troubleshooting
- Texture problems: If the cake is too dense, try reducing the amount of flour or adding more liquid to the batter. If the cake is too dry, try adding more oil or eggs to the batter.
- Ingredient replacements: If you don’t have unsweetened cocoa powder, you can use sweetened cocoa powder or melted chocolate as a substitute.
- Over/undercooking signs: If the cake is overcooked, it will be dry and crumbly. If the cake is undercooked, it will be raw and soggy. Check the cake frequently during the baking time to avoid these issues.
FAQs
- Can I freeze it? Yes, you can freeze the cake for up to 2 months, wrapped tightly in plastic wrap or aluminum foil. Thaw the cake overnight in the refrigerator before serving.
- Is it gluten-free? No, this recipe contains gluten due to the all-purpose flour. However, you can substitute the flour with a gluten-free alternative to make the cake gluten-free.
- Can I double the recipe? Yes, you can double the recipe to make a larger cake. Just keep in mind that you’ll need to adjust the baking time accordingly, and the cake may take longer to cook through.
Conclusion
And there you have it – a classic Black Forest Cake recipe that’s sure to impress your family and friends. With its rich, velvety chocolate cake, sweet cherry filling, and fluffy whipped cream, this cake is a true showstopper. Whether you’re a seasoned baker or a beginner, this recipe is easy to follow and requires only a few everyday ingredients. So go ahead, give it a try, and enjoy the ooohs and ahhhs as you present your beautiful Black Forest Cake. Happy baking!